HOME | DD
 CasualSnickers — Fur Texture /Coloring Tutorial

#digital #digitalart #fur #ibis #texture #ibispaint #tutorial
Published: 2022-04-17 20:04:14 +0000 UTC; Views: 6729; Favourites: 34; Downloads: 0
Redirect to original
Description
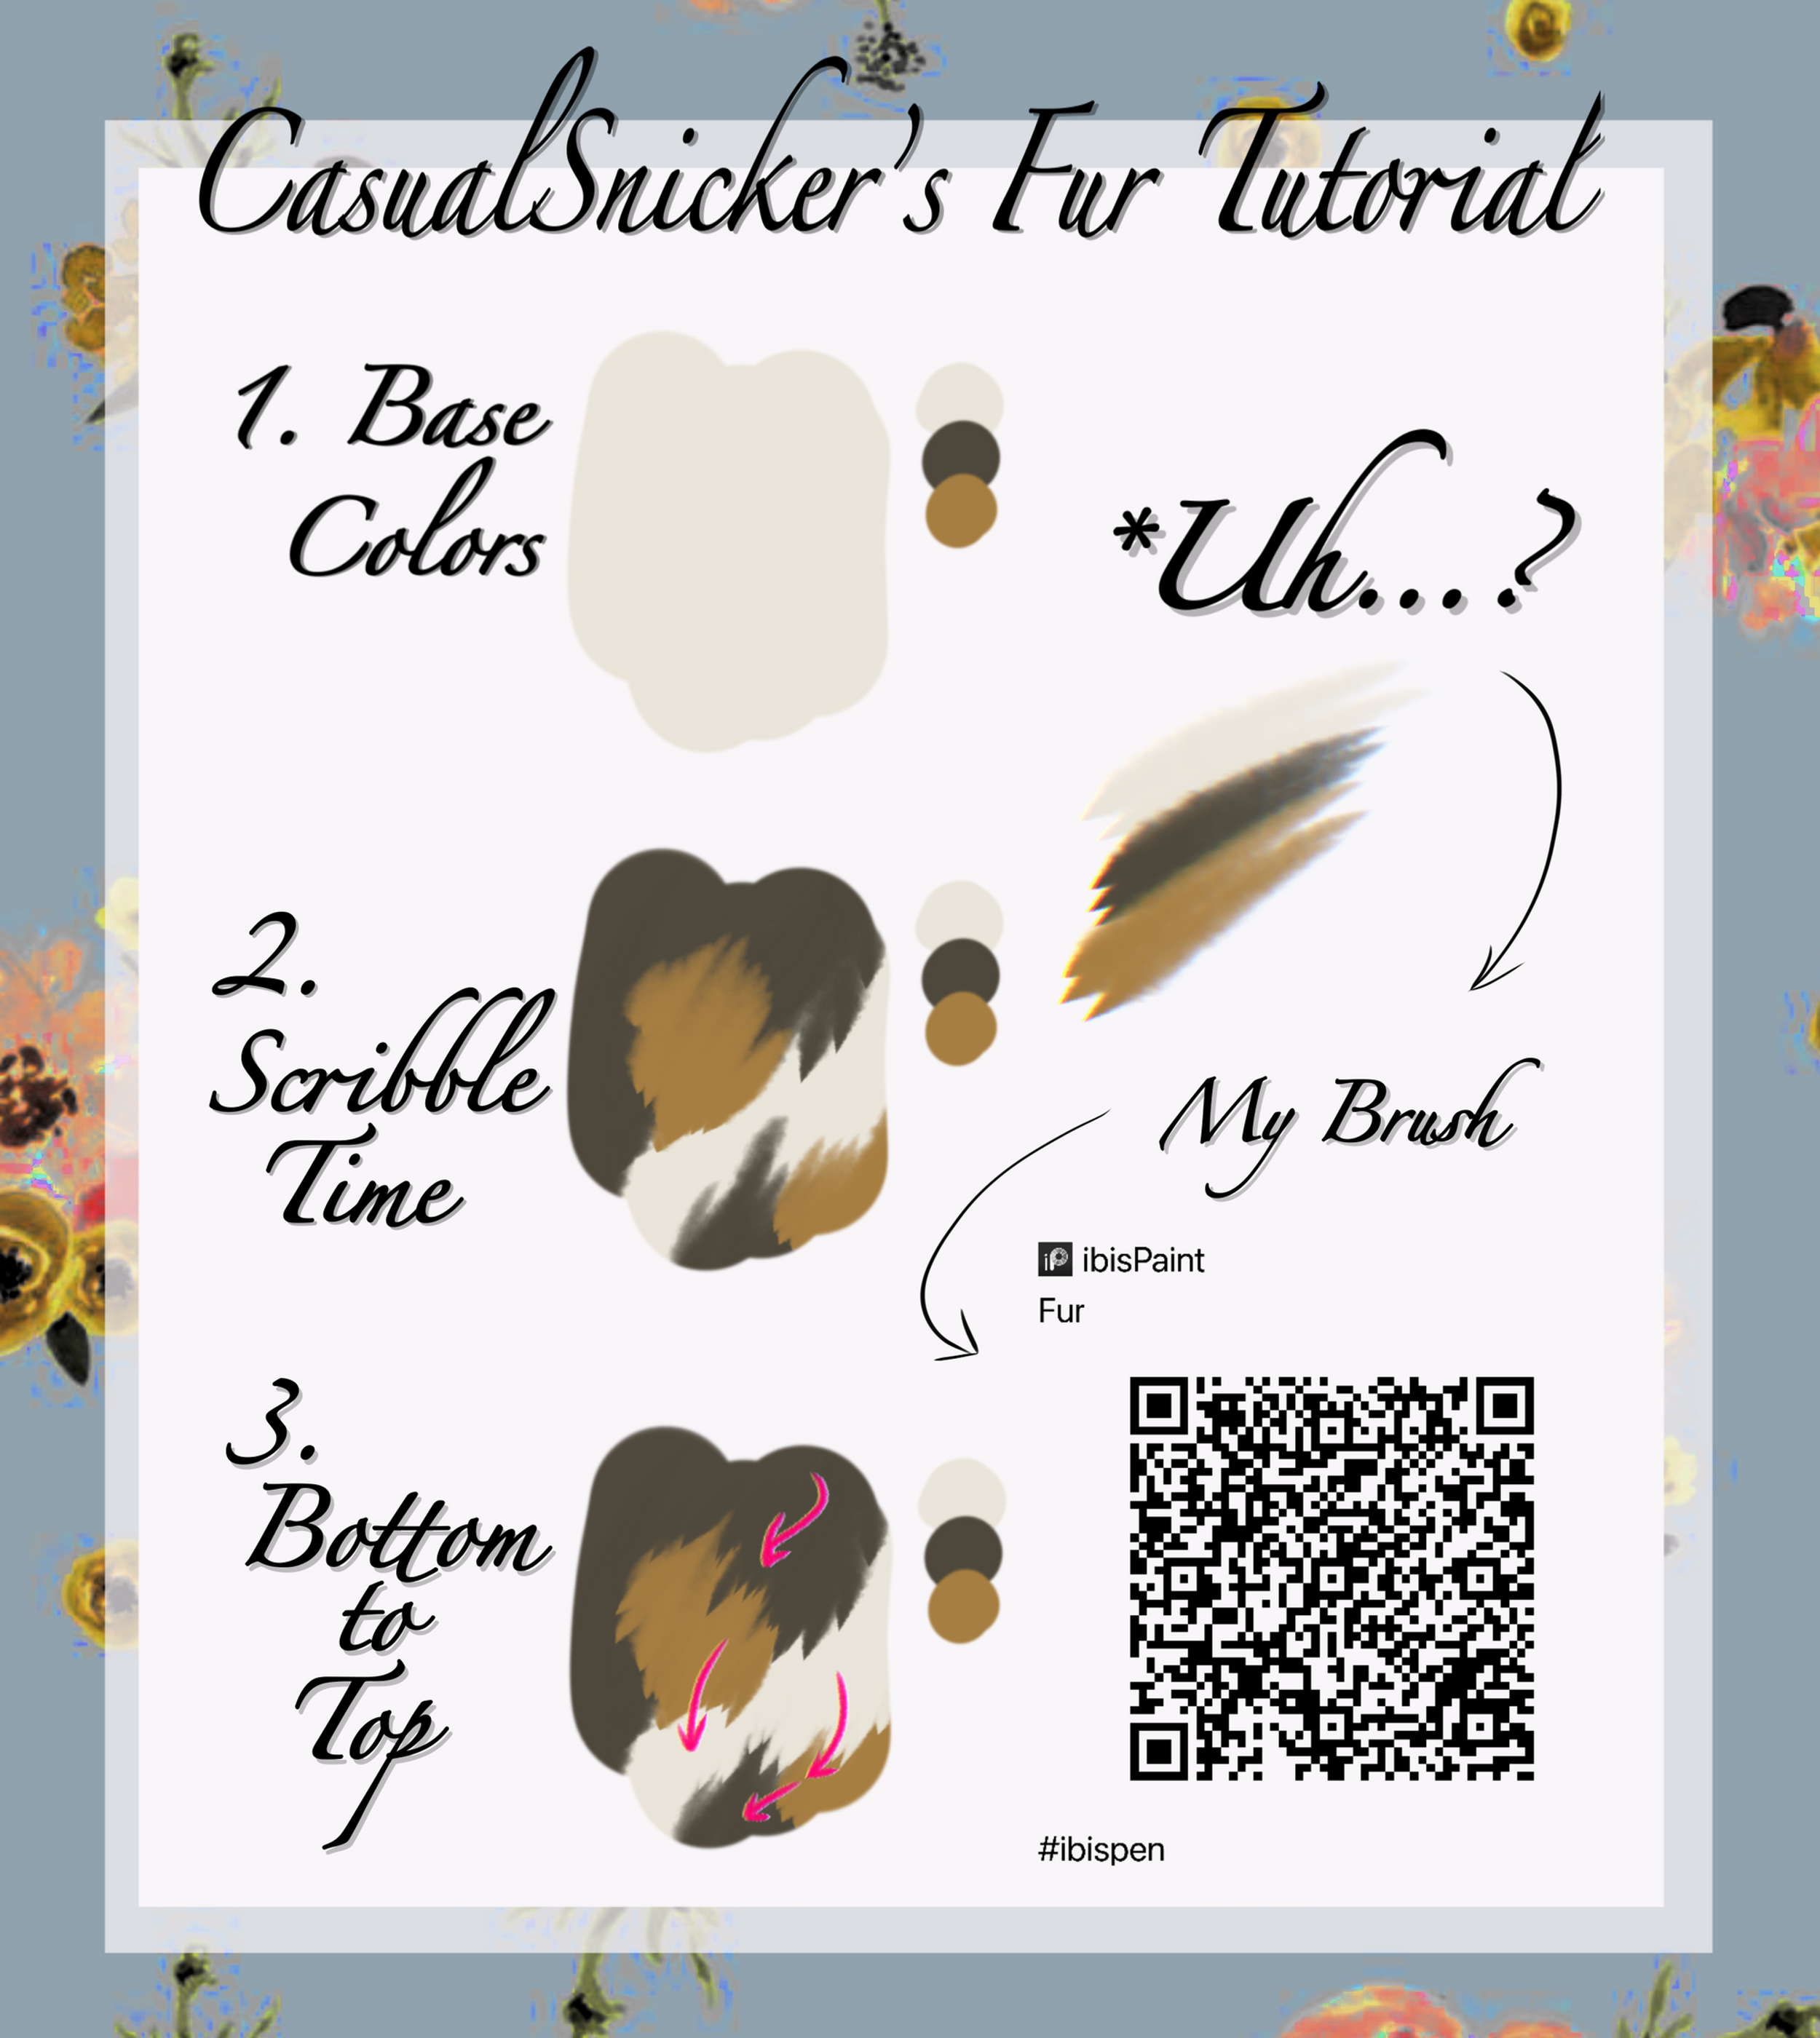
Saw that I have 420 followers at the time of posting (nice). Figured why not do this since I get a lot of notes mentioning how I do fur. Here's my simplified version of the process.***I use a customized brush for fur in IbisPaint. It works like a fountain pen and the opacity increases at the end of each stroke. It goes from faint to opaque and it tapers at the end giving it that sharpened look. There's too many settings included to give you a thorough explanation so experiment and see what looks good, or if you use Ibis, just steal- I mean use- this handy QR code.
1. Start with the base color. Enough said.
2. Scribble Time. Apply your colors. I usually go in the order of base, overcoat, undercoat, rosettes (stripes, spots, etc). For the love of god, do each color on a separate layer. That way if one of the colors looks off, you can just change it. I cannot tell you how many times not changing layers has screwed me over. When you're done, combine all.
3. Bottom-to-Top. This is the fun part. Since I like layering fur top to bottom, I start fixing my texture by going bottom to top. Take a look at the arrow directions and how they overlap one another; that's what I go for. I start from the bottom and work my way up, paws to back. The trickiest bit for me are texturing the shoulders, ugh.
That's it! That's... that's literally it.


