HOME | DD
 deuxia-devonair — Craptastic Hair Tutorial

Published: 2006-07-10 03:02:01 +0000 UTC; Views: 22199; Favourites: 289; Downloads: 313
Redirect to original
Description
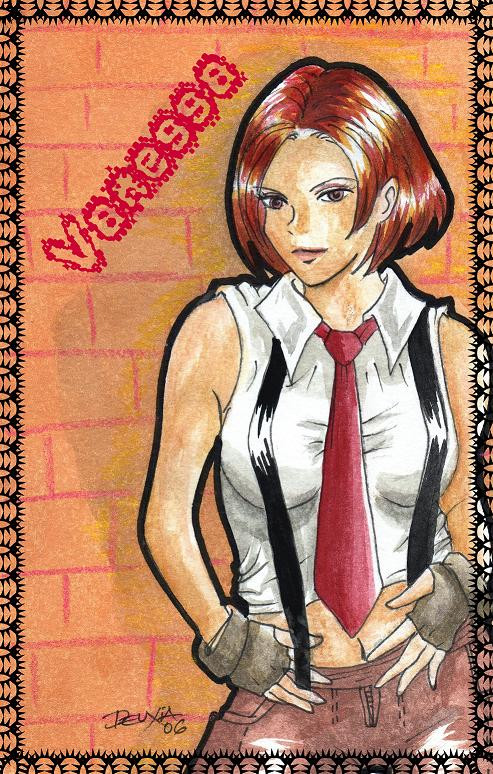
As you can see, I finally decided to make a quick hair tutorial for color pencils.The finished picture is here -> [link]
EDIT as of 12/07/2012:
And the FAVS keep coming! Thank you all for your stars and comments!

EDIT as of 06/13/2012:
I still can't believe this is STILL getting fav'd. Thanks a bunch! Please send me your results if this tutorial worked for you!
 (Smile)")
EDIT as of 03/17/2011:
Whoa! it's been quite a while and this deviation keeps on getting Favorites! Thanks so much to each one who fav'd!
EDIT as of 05/22/2010:
My, oh my! Even now, this tutorial gets fav'd and commented! Thanks to everyone who comments and keeps on faving or just passing by! I appreciate that bit of your time.. a lot! Thanks again, I'm overwhelmed!
EDIT as of 11/30/2007:
YAY! This Tutorial has been featured at an article for DA News among the best Tutorials in DeviantArt! I'm so excited! Go see for yourself: [link]
Here is the description:
 Palette: This is the range of colors I used for the hair. As you can see, I used soft strokes and combined the different tones to achieve a smoother look. The more tones you use, the more realistic it will look. Hint: For wider areas, the pencil should not be too sharpened. The oposite goes for smaller areas, use a sharp pen and very thin strokes. Area 0: That is your rough, white, un-colored area. This is where you start. Area 1: This is the base. Here, you will use very light and broad strokes. The lighter tone is used here. See the notes for "Palette". Also, use the "color" of the paper. The white spaces will add shine to your picture. Area 2: Here, I have used 3 layers. You can now tell the difference between this and the rest of the areas, the hair starts to look like hair! Area 3: This is how it looks at the end. All the left-half of her face is shaded with all the colors included in the palette. Note how the hair seems to pop right out of the paper, almost as you could touch it. The final touch is actually given by a few strokes of black, individual strands of hair. Additional notes:
- If you want to have a shinier look, add more black, thin strands of hair where the hair is deeper and further from the viewer. The rest will look silkier by contrast.
- You can also use a thin eraser later to add more shine where you need it. Remember that the shine is more noticeable when the surface is closer to the viewer.
- For blonde hair, you can combine the following colors: light yellow + yellow + light brown + tan + black + olive green
- For black hair, I can recommend you this palette: gray + light purple + blue + black
Remember that these are just tips, you can use them to improve your current skills or add variations of your own to create a unique style.
Have fun!

Related content


Comments: 57


Hahahah! I love her hair. I have spent more than two hours just on that. This was a great practice.

👍: 0 ⏩: 0

o= aun con esto no podria hacer algo asi @-@
Pero esta muy bueno, me dio una idea de como es la cosa
👍: 0 ⏩: 1
Gracias! Lo importante para empezar, es tener una idea clara de como son las cosas, como decis.
")
👍: 0 ⏩: 0

Nya~~~ Gracias por el tutorial! O.O
Vere si puedo probar con mis lapices x]
👍: 0 ⏩: 1
Acabo de darle un edit. ^^ Muchas gracias por visitar!
👍: 0 ⏩: 0
<= Prev |