HOME | DD
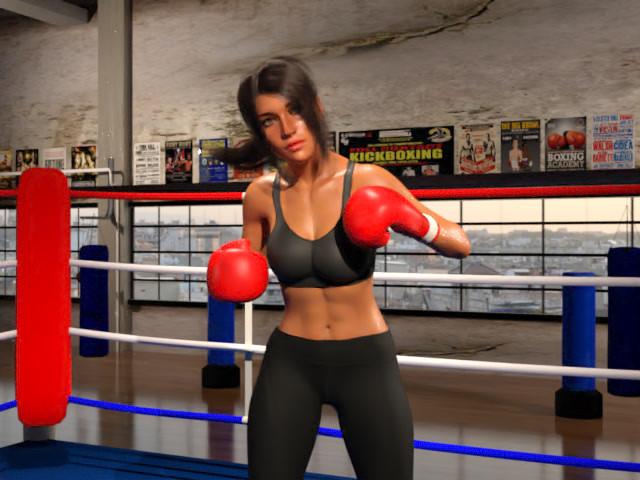
 ffists7 — Animation Test 02 - Optimized
#boxing #animation #video #boxingwomen
Published: 2020-01-02 07:56:28 +0000 UTC; Views: 38233; Favourites: 157; Downloads: 0
Redirect to original
Description
Wait...this looks like Animation Test 02 ! What's the deal?This is really more of a technical post than it is a new piece of work. A recent comment from DixieRamone brought Animation Test 02 back to my mind and I started thinking about some of the tricks I've learned since making it to see if I could drop the animation time.
For reference, my hardware has not changed since the original animation. It is still:
CPU: Ryzen 5 1500x
RAM: 16GB RAM
HDD: SSD (EVO 970 M.2)
GPU: GTX 1060 (6GB)
It took 12 hours to complete rendering Animation Test 02 in iRay in Daz Studio (12 hours for 1-2 seconds of animation!). I remember that I had already predicted it would take a very long time to render so I chose to render Animation Test 02 as a series of images than rendering straight to video so that if the render was interrupted for some reason I could pick up and render from whichever Daz stopped at last. This also meant that I would have to stitch the images together again using video editing software. I forget which software I selected but remember that it had a strange limitation where still images could not be displayed for a duration shorter than 1/3 of a second, resulting in a slower animation than I'd hoped.
I redid the animation using some new techniques and tools I picked up over the last year and dropped the animation time to a mere 45 minutes....and thanks to the lower render time I felt more comfortable rendering directly to video. 6% of the original render time!
Unfortunately, I didn't have a rigorous way to measure the effectiveness of each step I took the following is a list of things I did to drop the render time in approximate order of what I tried:
1. LIMIT IRAY RENDER TIME/FRAME.
Ok, I'll admit that limiting iRay render time does zilch for directly improving render time. But it was helpful to set some limits at the beginning so I had a vague idea if what I was doing had a chance of working or not. I knew 12 hours for 75 frames (roughly 10 min/frame) was too much. So I started my experiments by limiting max render time to 1 minute (resulting in a worse case render time of 1.25 hours, much better than 12). In the Editor Tab under Render Settings, I went to Progressive Rendering and chose to limit Max Time to 60s (I was later able to drop this to 15s). Once I had my Max Render time set, I would making some changes, re-render up to 60s and see if the image had gotten any clearer. The goal was the keep making changes to get the clearest possible image in 60s or less. If I could do that, rendering animations on my PC would become much more feasible.
2.CHANGE LIGHTING TECHNIQUE.
Unfortunately, one of the first steps I took was to change lighting, meaning the scene wouldn't look quite the same as the original. In the original animation, I relied on emmissive surfaces to provide a lot of the background lighting. In other words, I had configured the surfaces of the lightbulbs in the scene to emit a light. A year ago, I leaned very heavily on this technique (as well as attaching IES profiles) to lighting fixtures that came with indoor scenes. My thought was lighting in this manner would make the lighting look more realistic and be easier to work with - I could move the camera around and not see any weird lights in the scene. If you've ever placed a light in a Daz within a camera's filed of view and rendered using a physically based, you will know the light will show up as a white or black square depending on which way light is facing - not good! I ended up redoing the lighting using only spotlights and no emmissive surfaces. A little less flexible in terms of where I can place the camera but considering the camera would not move, this was OK. I saw some improvement in the renders. The images were less grainy after 60 seconds, but still not satisfactory.
3. REDUCE POLYS.
I reduced the poly count of nearly everything I could in the scene (I was able to cut poly count by about 50%). Reducing geometry complexity can help with improving render times for Physically-Based Renderers since there are fewer surfaces the GPU needs to calculate light bounces for. If you're working with most assets sold in the Daz Store, they probably come with high resolution and base resolution options. You can access this option by selecting an asset in the Scene panel, then going to the Parameter Panel, looking for the Mesh Resolution section (it may not exist for every asset) and dropping the Resolution Level to Base. Genesis 8 figures are usually loaded into the scene at High Resolution (about 35k polys). Dropping the mesh Resolution Level to Base cuts it down to about 17k polys. I've informally noticed that the largest gains usually come from hair. If they offer high and low resolution levels, the high resolution level can get up to 100ks of polys (multiple times more complex than even the base G8 figure). For assets that don't have multiple mesh resolutions, I used the Decimator tool: www.daz3d.com/decimator-for-da…. Thankfully, dropping the mesh resolution improved the render quality at 60s a good deal and Decimator wasn't required. But I had picked the tool up during a sale and was able to squeeze out a little more image quality with it.
4. ENABLE POST DENOISER.
By this stage, the renders were looking respectable after 60s of rendering per frame. I could clearly make out the boxer, ring, etc. but there was still a little grain and some fireflies, not yet at the quality of the original render. I ran into POST DENOISER by accident and it's apparently a new feature in 4.11 and beyond. Post Denoiser is what it sounds like - it reduces the noise (grain) in the image. This URL has a pretty good intro to what it is and how it works: www.versluis.com/2019/02/about…
As I understand it, it's a little like if you tried to apply a blur filter on your image in some photo-editing software after rendering to even out the grain. But unlike the blur filter, the post-denoiser has some smarts going into it determine which parts to reduce noise and which parts to ignore.
The Post Denoiser can be activated from Render Settings>Editor>Filtering. At minimum you should toggle on "Post Denoiser Available" and "Post Denoiser Enable." You may also want to adjust the "Post Denoiser Start Iteration" as well. What this does is change the number of iterations iRay will render before it attempts to apply the denoiser. I've read that you will typically want to apply the post-denoiser as late in the render as possible for the crispest image. If you have a still image that finishes after 100 iterations, you will probably want to st the denoiser start iteration around iteration 90-99. This part takes some tuning. For the animation, I had to fiddle around. If I started too early, the video could be too blurry. But start too late and the changes in the scene could result in frames cannot complete as many iterations in the same amount of time, causing the the post denoiser not to be applied at all.
This step helped improve the animation quality a bit more but the result was not consistent; some frames were still too grainy.
5. REDUCE TEXTURE SIZE.
I think this final step had a huge impact on render quality/speed. If I remember right, by taking this step alone I doubled the iteration count in 60s from about 50 iterations to 90-100/min. Unfortunately, this step absolutely required the help of an external tool. Specifically, I used Scene Optimizer www.daz3d.com/scene-optimizer to reduce texture size. I didn't fiddle too much with it, just let the tool reduce texture size however it saw fit.
Related content


Comments: 9


Wow! From 12 hours to 45 minutes! That's outstanding work! As others have already commented, thank you for sharing all your information!
As you correctly say, I, too, am finding that the hair in any render is going to cause the most problems. There is one other cheat that might help you reduce your render times, if you are going to keep your model generally in one place - capture the background, then create a new scene using the 2d pix as your background. That way, your computer doesn't have to try & render all your additional assets. Oh, and one more - drop your fps to the filmic frame rate of 24 fps. I don't know that the latter one will help achieve your ultimate goal in your creation, but it might save up to 20% in your render time. Or, you could just ignore everything I wrote & keep doing what you're doing - you're doing great.
 (Smile)")
There is a tool used in the film industry called Alembic which is now open source & may be worth a look. I don't know if it would help in your instance, but it might be worth a look.
Good luck going forward & have fun creating more good stuff!
")
👍: 0 ⏩: 0

👍: 0 ⏩: 0


Alex Ffists Films Presents it's first film!!!
Cool!
👍: 0 ⏩: 0