HOME | DD
 Hazel-rah — Tutorial - How To Draw Horses

Published: 2005-04-28 02:18:23 +0000 UTC; Views: 99220; Favourites: 1930; Downloads: 10832
Redirect to original
Description
EDIT: Ok people, I'm very sorry you have to endure me re-submitting this huge chunk of tutorial. -_-; I had to fix a few things. And, excuse the spelling mistakes/incoherences in the image. This is dinosaur-age old, and I was brainless at the time. (Smile)")
Again, fond excuses,
Hazel
Oh, yay. A tutorial!
") Yeah, my first one, too. :3 I'm a horrible explainer, so bare with me.
Yeah, my first one, too. :3 I'm a horrible explainer, so bare with me.This will sadly be long, but hopefully helpful.
Keep in mind that art is done using a great amount of grueling patience. For one artwork, it can take from minutes, to hours, weeks, years, etc. Depending on the artist and what she/he is drawing, using what medium. For some artists to get very good, it usually takes some many years to master a certain style, or for them to be proud of their work (note: usually, no artist is very proud with what they accomplish, lol.)
The worst critique you can get is from yourself! Be a perfectionist and be focused on what you're doing. But also, keep in mind that you shouldn't be too hard on yourself, or overwork yourself.
") Don't try to sit through a whole drawing session. Most likely, you'll get frustrated and fuming after a few hours. Take breaks; eat, drink, take a long walk, watch TV... Just clear your mind and rest your eyes before continuing. This also usually helps to make you see your image through a different perspective. When you'll return from your break, you'll be more likely to see mistakes you hadn't seen, earlier on when you were hunched over your paper. When you're working too hard like that, it's quite common for you to look at your drawing, and see nothing wrong, just because you've been working so much on it. That's the cue to take a breather. xD
Don't try to sit through a whole drawing session. Most likely, you'll get frustrated and fuming after a few hours. Take breaks; eat, drink, take a long walk, watch TV... Just clear your mind and rest your eyes before continuing. This also usually helps to make you see your image through a different perspective. When you'll return from your break, you'll be more likely to see mistakes you hadn't seen, earlier on when you were hunched over your paper. When you're working too hard like that, it's quite common for you to look at your drawing, and see nothing wrong, just because you've been working so much on it. That's the cue to take a breather. xDAnyway, these are just mere tips I use. You don't have to follow them, but I personally think they help a lot. Oh, and one more thing before we start. This tutorial will be done in pencil (a 'How To Draw Horses/Equines; and not a coloring or other type of tutorial) and will be performed in my style, I guess.
Bah, enough babbling. ^_^ Here's the damn thing.
- - - - - - - - - -
1: Head
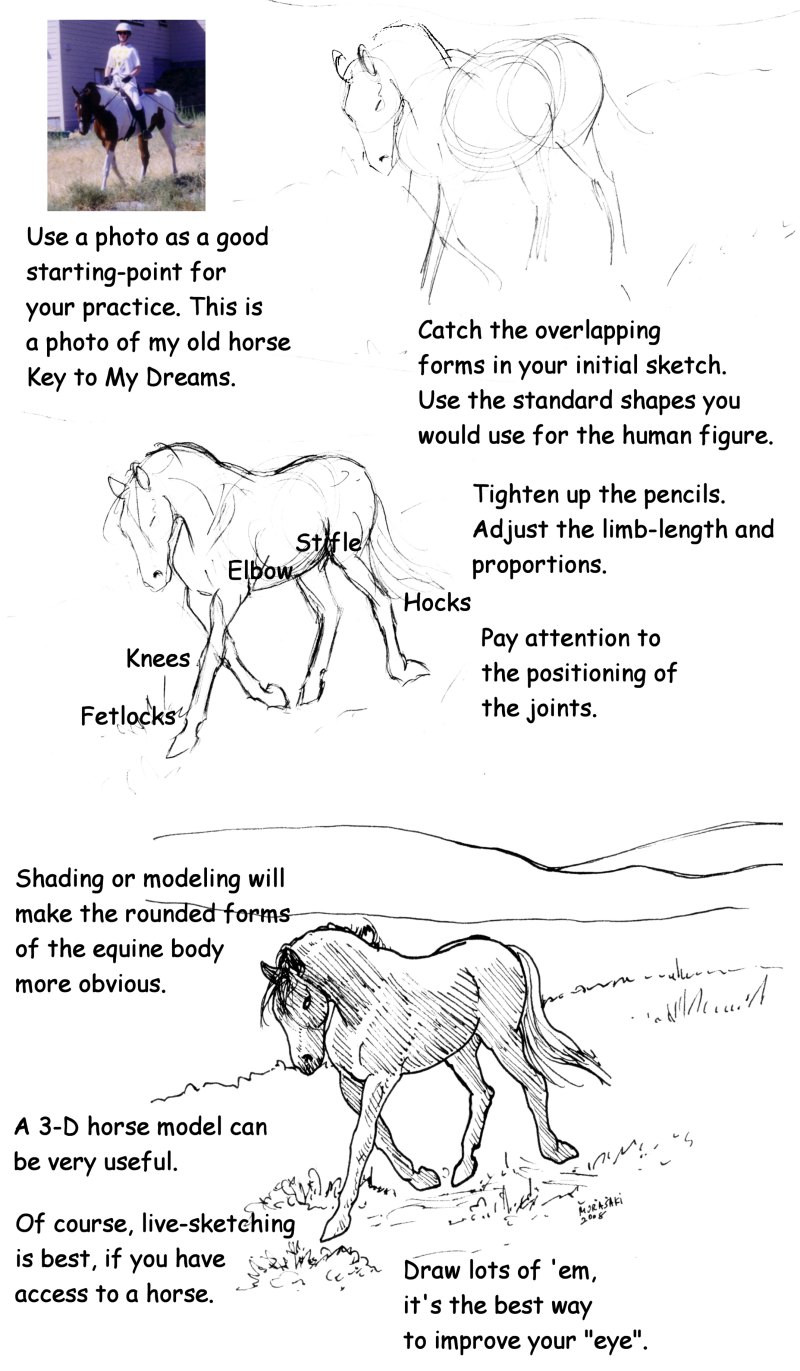
I usually start with the forehead, when I draw most animals. You can start wherever, though. I've heard that a large majority of people begin with the eyes, which is the norm.
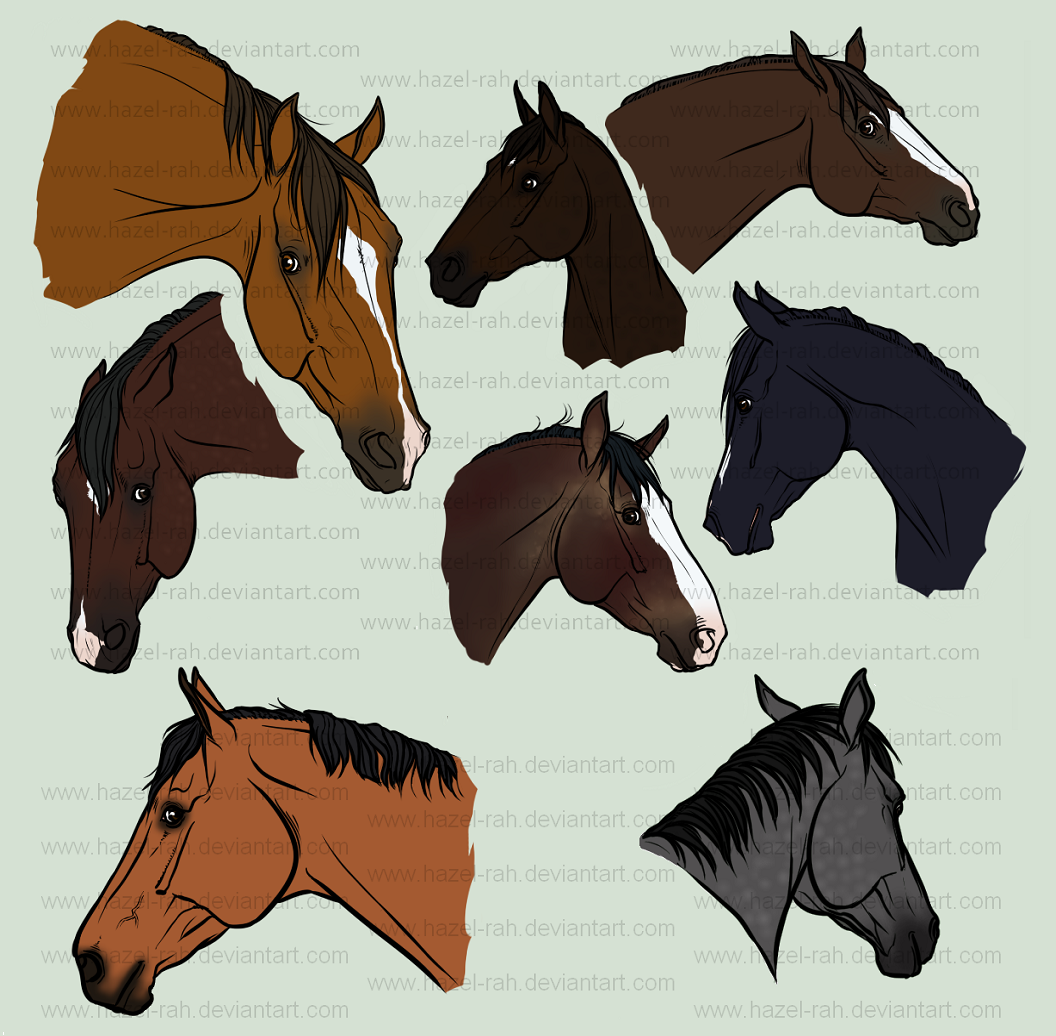
I begin my heads with an oval-ish circle. This will later on form the cheek and forehead. Then, I lengthen the forehead and draw a medium-sized line, which will turn out to be the front of the face. Next is the muzzle. Draw a square-type form in the area where you want the maw to be. Then, sketch out the form of the jaw and lips. I suggest looking at real horse reference images to do this. It takes quite a while of practice to get right (for me, anyway!) After this, we'll do the ears. Well, it's just a question of time before you master their form and structure. I drew a little diagram for the ears. A good trick to get that little annoying swerving curve at the tip of the ears is to draw a circle/oval in between the ears.
Lets leave the eyes and detail out for now, and continue.
2: Neck
Make a long, spinal, vague "s" shape going from the back of the skull (under the ears) and continuing down to a curve into the shoulder area (note: the spine does not run down the crest of the neck, it's a bit lower than that.) You can continue this line straight out through the back and out the tail, as the whole structural base of the body.
Next, you do the jowl/throat. It's a sort of curl under the jaw, where the base of the neck begins. Now draw a curvy line to complete the neck. Above the neck, where the poll continues, you can just follow out that spinal shape we did, earlier. Follow it and then end it in a soft bump (this will be the withers.)
3: Torso
Draw a diagonal line going from the withers, and ending just about where we stopped the neck. This is the shoulder blade. Continue it in a triangle-ish shape. And you can even start a bit of the forearm (see image.) Try to use a reference picture to understand how the elbow works. Then try and make a box-type (though more rounded) shape for the protruding chest, if needed (you may not necessarily want to draw this for dainty, feminine mares.) It's the continuation of the lower neck and the girth's meeting point, if you will.
4: Body
There are mainly two large lines to this shape. They'll sort of flesh out the majority of your horse and put everything into proportion. If you want to be anatomical correct and more careful, you can make a box around your horse, to see where everything will fit (I sometimes do this.)
The first line is the back. Long and slightly dished. After that slight curve, there's the croup/rump. Make a small yet elongated/slanted bump to identify this.
For the belly, begin the line as a stretched skin chunk (where the girth strap would go) and then just add a slightly rounded gut. ^^
NOTE: The stomach/girth is always flowing with the chest. Look if both are at equal lengths (pretend there is no foreleg, and only one block, instead of it getting separated in two.
5: Rump
It has a 'sharp' bony edge under the tail.
Um, in the image, I just decided to add a bit of bone structure, in order to situate ourselves just a tad more. :]
Try using real life horse references from pictures (or, if you have the luck, from living horses that you can go visit.)
Is your horse shaping up yet? I hope so! Because if you find anything wrong, any errors, or other nit-picks that are bothering you, then you better get to them now before we continue. Fix things you don't like, as soon as you can, before continuing further. If you don't, you most likely won't be able to fix them, when you're doing the final touches.
6: Front Legs
Start with the forearm, in an almost arched shape, and just flow down. Remember the soft, barely noticeable 'bump' joint in the near-center of the leg. This is the knee. The back part of the knee is also often has a slightly more developed lump. After, just do a pair of fairly straight lines, parallel to one another. Then, the ball-shaped fetlock. Do two more (tiny, this time) parallel lines, coming out of the fetlock diagonally. They're going to form the pastern. Close it up with a small line linking both lines of the pastern, and voilà. The foreleg. You can just follow these steps again, to draw the other front leg.
7: Hind Legs
Start off with the thigh area and follow the many curves down (again, I strongly recommend using a real photo as reference.) Don't forget your stifle, the part of stretched skin near the belly, where the back 'knee' would be.The middle part of the leg is rather straight and parallel to it's back end. Then, there's the hock, protruding at the behind and soft and rounded in the front. Then, two more straight, parallel lines for the lower leg, and finally, the hind fetlock (from here, it's roughly the same thing as the front legs.)
8: Hair
Yay!
 Fun part!
The best trick I can give you is to just look at images of real horses. All locks are certainly not all the same length. Whatever you choose to make, your horse's hair should be varying and original. It gives the horse more definition to its unique personality, bet it a low-cut mohawk, a flowing, knee-length, wavering mane, an intricate running braid, or a neatly pulled mane. Hair begins in the center of the forhead (lower than the poll), usually in a lightly 'caved in' point of above the eyes, in the center of the face. It ends at the withers. The tail starts at the dock (extension of the spine) and then ends in the middle of the tail itself. The rest is just hair, which is what trails down sometimes down to the ground. In the tutorial, I just very lightly sketched out a few shapes for the mane and tail, because I didn't want to keep the viewer's eye straying too far from the anatomical point of view of the drawing.
9: Hooves
Draw a diagonal line straight out of the pastern. Make it follow in a continuation of that same line.
Then the back line. A shorter line that's located right at the back of the leg. Roughly parallel to the first line.
Finally, draw a flat line at the bottom of the hoof, to connect the first and second lines together. Front hooves are very similar to back ones. On the tutorial, I failed miserably with my hoof diagram, but it's just to get the point across. x)
10: Detail
Finally.
") The best part.
The best part.Draw the eye. These vary the most in artists.
Put in triangular shaped nostrils, with an oval curve.
Add the mouth. The lips tuck in together and form a slit in the lower middle of the muzzle, under the nostrils and often closer to the chin.
Fix the muscles, place extra lines... For example, a line tracing the crest of your horse. Or a cheek line, right under the eye. A facial streak. Or even a muscle ripple for the forearm or hind legs. A bone or joint bump, etc. Erase all the extra sketch lines or muscles/bones (I won't do that thought because I'm a lazy bum.)
Have fun.
- - - - - - - - - -
Thank you for being patient, and I'm hopeful that this at least helped SOMEONE. Lol, I'd love to see your horse drawings; be it your first, fifth or if your an expert, already. ^.^
NOTE: The Jack Hamm tips are extremely useful and always have been for me. I strongly suggest viewing them because they are very worth it. Study them carefully!
These two pages are far better than any tutorial I could ever muster up, lol. --> [link] and [link]
This tutorial was greatly influenced by the famous Ken Hultgren.
 *comments are very welcome*
Related content


Comments: 156


Yep, "The Art of Drawing Animals" But mine's in french, lol.
👍: 0 ⏩: 1

0.o French? Interesting..
You're welcome!
👍: 0 ⏩: 1
Lol, yes. I'm mother tongue french, but I speak both english and french very fluently. :B
👍: 0 ⏩: 1
Whoa, that's really cool! I wish I could speak two languages [fluently]....
👍: 0 ⏩: 0
<= Prev |