HOME | DD
 jllear — Cycle: Chi development
Published: 2010-11-20 01:11:01 +0000 UTC; Views: 157; Favourites: 1; Downloads: 0
Redirect to original
Description
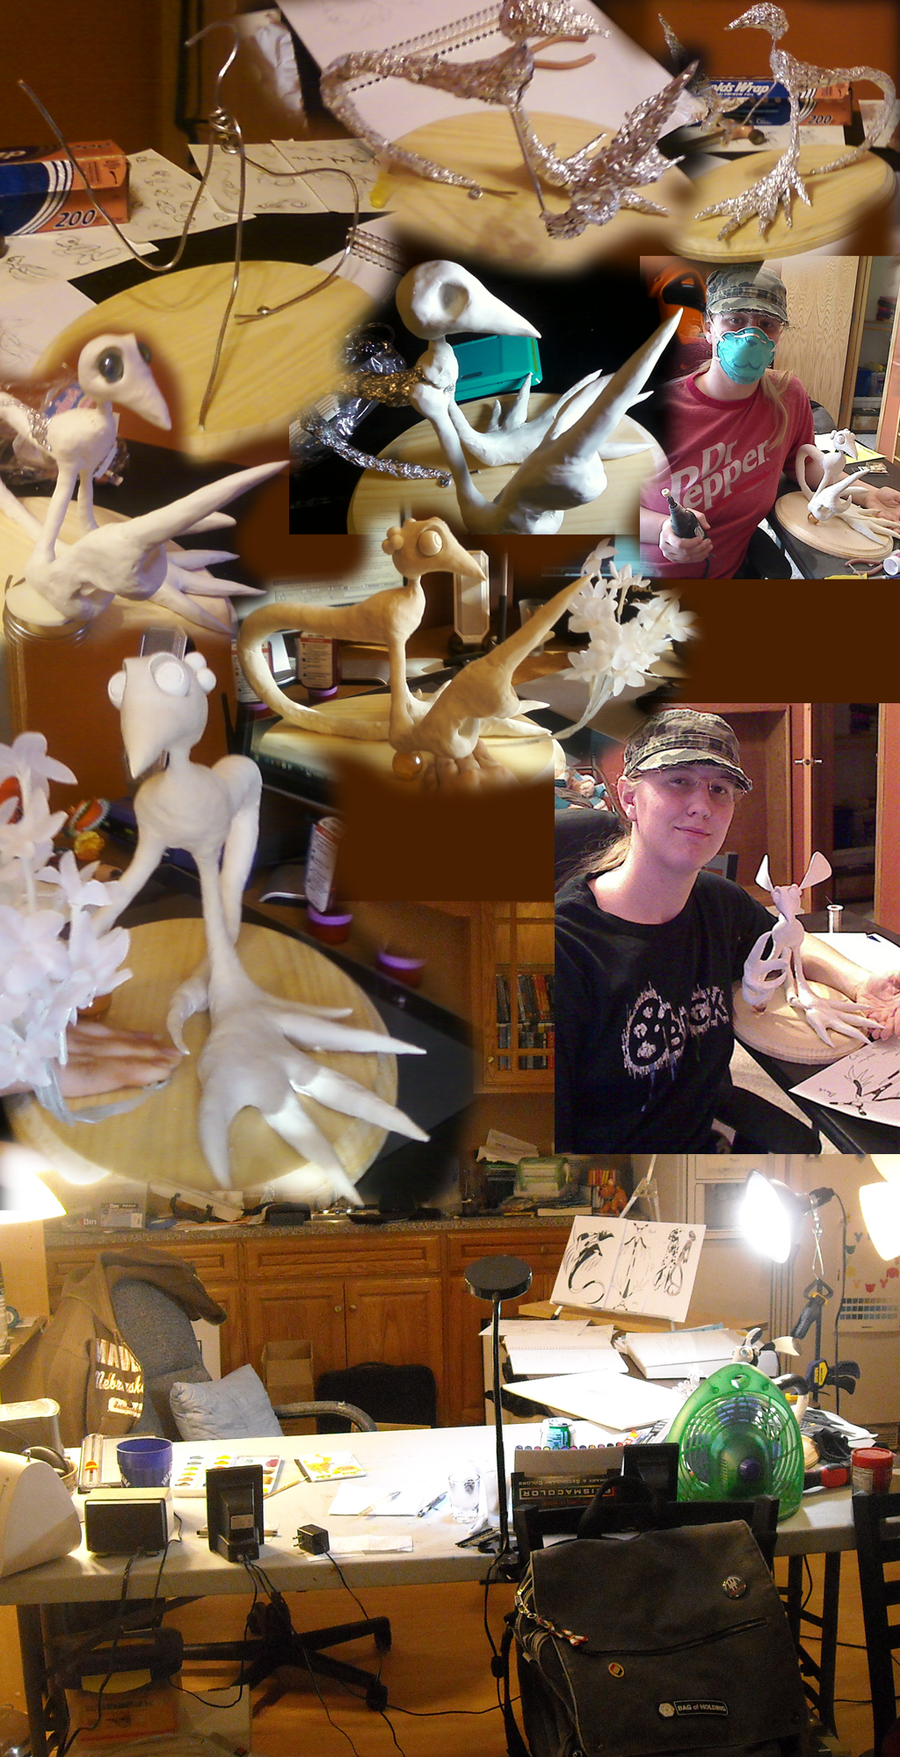
As promised, first half of the figurine/maquette detail shots. These were all in progress shots. Big file is big.Display | Model details | Model WIPs
The process:
(Drawings and sketches to create the character, then a couple for good maquette pose)
Armature wire bend for basic skeleton, held onto base with screw
Tinfoil to bulk out the form (Second anchor within hand on ground)
Super Sculpey for majority, with Sculpey III to finish up (Learning process there)
Baked in oven (No problems thankfully)
Quality time with sandpaper and a dremel to smooth out lots of places. (Turns out the thin sheets of Sculpey III laid on top like fondant ended up being the smoothest start to finish)
Painted entire figure with white acrylic and made 'ears'
(Ears are made from a foam, originally bought for cosplay armor. Scraps were cut into two identical shapes and then a second, thinner wire was glued onto the backs. They took to paint pretty well, which was great as they were a nice bright blue originally. Holes were drilled into the head to stick the ears in. They can be posed easily and removed/replaced just as easy.)
Painter's tape applied generously, cut with an Xacto for the markings
Painted with black acrylic, removed tape (Open with the aid of the Xacto to preserve the crisp edges)
Eyes painted with a few layers of nailpolish for the color (whites were left as the same white as body)
Flowers had markings put on (What a tedious process!) and then screwed into base with figure
I am very proud of Chi. Not the best figure ever, but for my first it is very good! I learned a lot.
The last shot at the bottom is where the rest of the storyboarding was done, as well as the characters sheets. That was actually the 'clean' state it was before Cycle exploded over both tables.