HOME | DD
 KurlyWurls — Tsum tsum body template.
#bodytemplate #plushies #tsumtsum
Published: 2018-03-12 19:36:16 +0000 UTC; Views: 2938; Favourites: 16; Downloads: 24
Redirect to original
Description
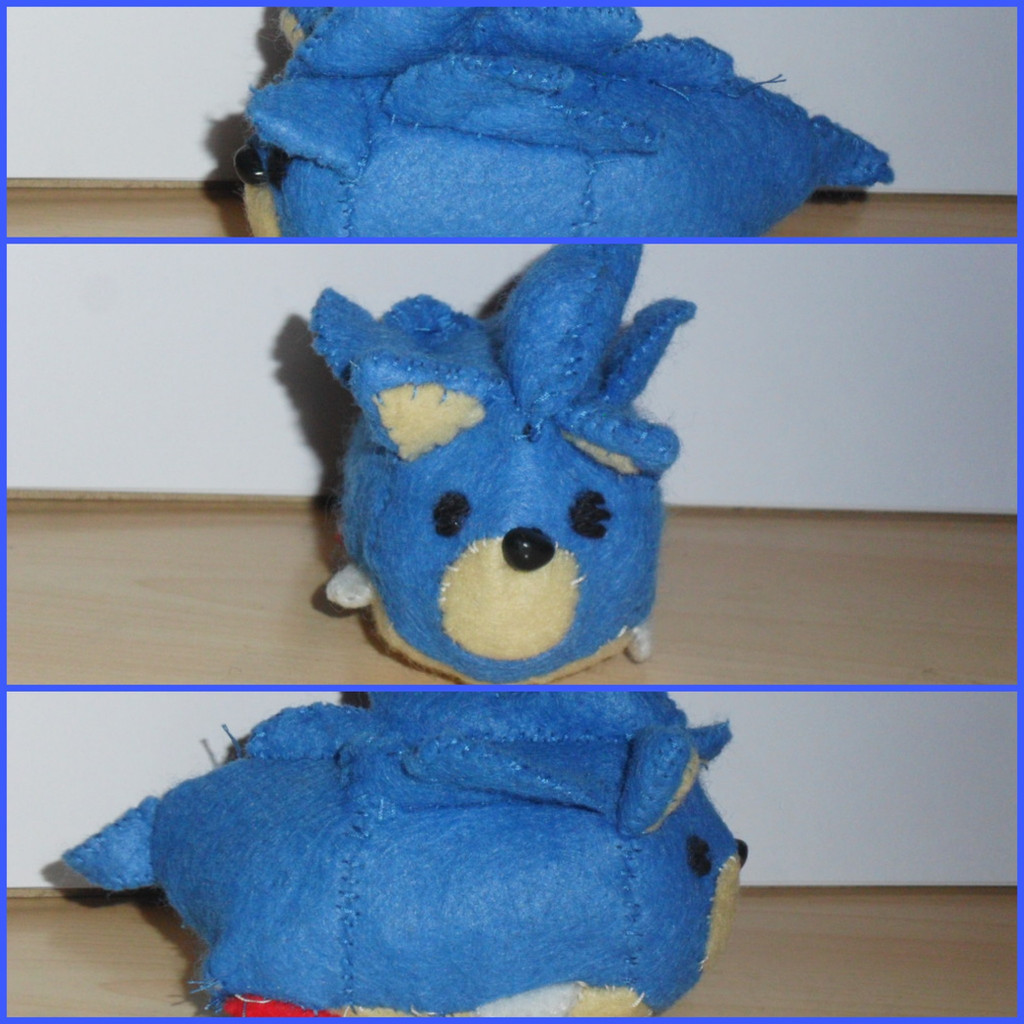
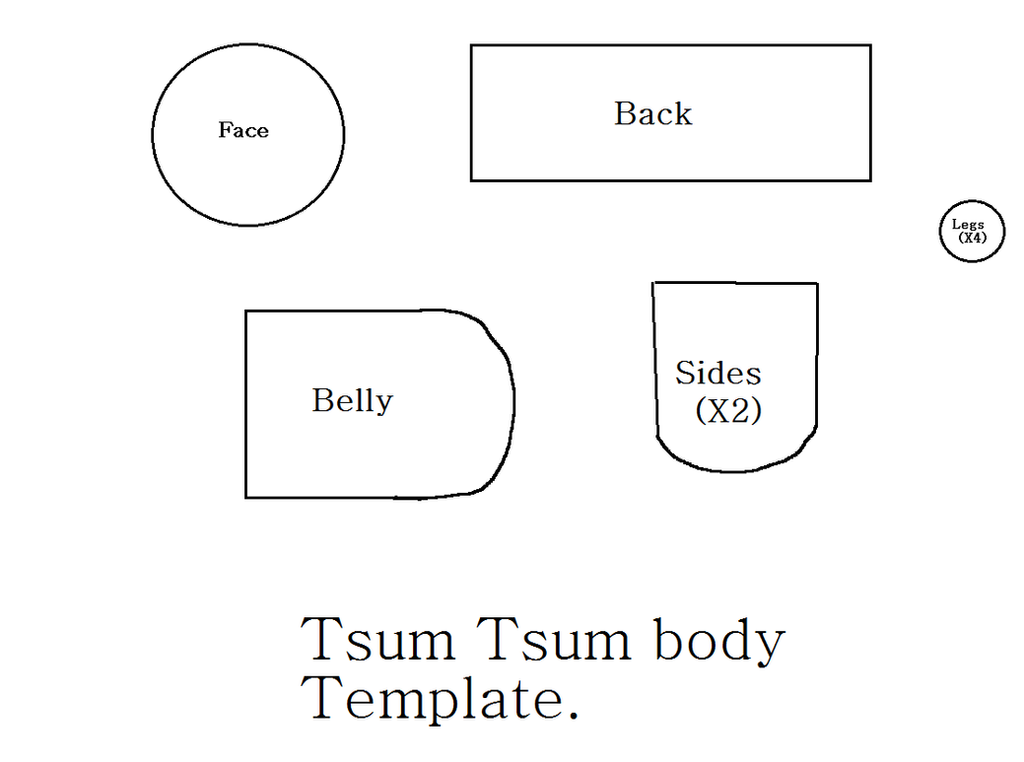
Ever since Some of you might or want any suggestions to how I made my very own tsum tsums. I looked at the original tsum tsums from disney and carefully looked at the stitching and the shape of the body that each plush has got. So there you've been hoping for to have ago yourselves. I've typed down to what each piece is used for.1. Face: if your deciding to make a face for a tsum tsum, I usually sketch out the size of facial features such as eyes, nose, eyebrows, lashes etc. (If your doing an animal. sketch out for the muzzle in the middle, fold the face in half and cut it very carefully. Using the muzzle template if you can design one. make it slightly bigger so it stands out better and pinching with fingers with the face with the hole cut and the template of the muzzle cut out on fabric and sew it carefully. (If your deciding to add hair too, make a template for the hair using the face template and draw a design of hair you want and sew it around the tsum you created.
2. Sides: What I usually do is start with one first and do the second sketch on the chosen material used by flipping it over to the other side and write down a number e.g. first piece write 1 and second 2 and sew them together stopping near the end.
3. Legs: Once it comes to legs, I usually fold the pieces in half and sew them so there just like the right size as the original.
4. Back: If your happy with the design of the tsums face. starting from the middle or the end. (I usually start from the end, add pins if needed so it doesn't go wrong.) Turn it on the wrong side so you don't start from the good side.
5. Attatching the sides to the back: This is like the same from attaching the face sort of thing. but attaching the sides started from the beginning. use pins to keep the back and sides in place as your sewing them together. If your happy with it, turn it inside out. You can make some adjustments if necessary.
6. Belly: As your happy with the shape so far, Turn it to the wrong side and start to use the belly piece to attach to the face, use pins to keep it in place while sewing.
7. Sewing on the legs: Were almost there already. After attaching the belly to the face, It's time to place in the legs and sew along the way from near the end. Pinch the middle between the back and belly if needed while sewing.
8. The end: After you sewn all the legs in place, Turn it inside out for a better design to show how the tsum is made. Finally add stuffing, sew the back side up and your done.
These are all the steps I used to make my very own tsum tsums and I'm hoping to see one of your homemade tsum tsums. You can add some special details such as : Wings, tail, horns, ears, spikes and other details you can think of. Hope this all helps and wishing all the best to have a go. Good luck
 (Smile)")