HOME | DD
 PePPerDoG — Icon Tutorial feat. RDJ No.2
Published: 2008-07-31 04:57:15 +0000 UTC; Views: 1631; Favourites: 19; Downloads: 129
Redirect to original
Description
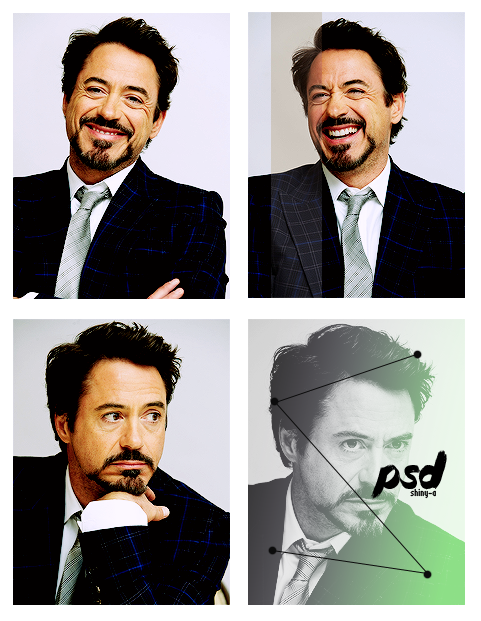
Made in Photoshop CS2. Not translatable.--------------------------------
1. Crop, resize, do whatever you need to do with your layer. I don't recommend sharpening just yet.
2. Duplicate your base and set this to SCREEN at 100%. This obviously varies but with this image I needed a screen layer. Play with the fill.
3. Make a new Selective Color layer (Layer > New Adjust. Layer > Selective Color) and put in these settings at 100% opacity:
REDS: -36, -4, 49, 0
YELLOWS: 61, 0, -45, 0
NEUTRALS: 8, 0, -8, 0
4. Make another Selective Color layer and use these settings at 100% opacity:
REDS: -100, 0, 74, 0
YELLOWS: 100, 0, 53, 0
GREENS: 100, 0, 0, 0
CYANS: 100, 100, -100, 100
NEUTRALS: 30, 8, -13, -12
5. Now create a Hue/Saturation (Layer > New Adjust. Layer > Hue/Saturation) and put in these settings at 100% opacity ONLY CHANGE THE SATURATION!:
MASTER: +20
REDS: +9
CYANS: -27
6. Duplicate the base, drag it to the top and set it to SOFT LIGHT at 100%. Once again play with the opacity/fill here. This particular image needed the full 100%.
7. Go to your base image and sharpen it using the UNSHARP MASK feature:
AMOUNT: 50%
RADIUS: 1.0 pixels
THRESHOLD: 0 levels
8. There really is no step here, 'cause your done! Add some text or whatever you want and that's it.