HOME | DD
 Rancidire — Step by Step Tutorial

Published: 2017-05-03 12:23:21 +0000 UTC; Views: 1073; Favourites: 54; Downloads: 11
Redirect to original
Description
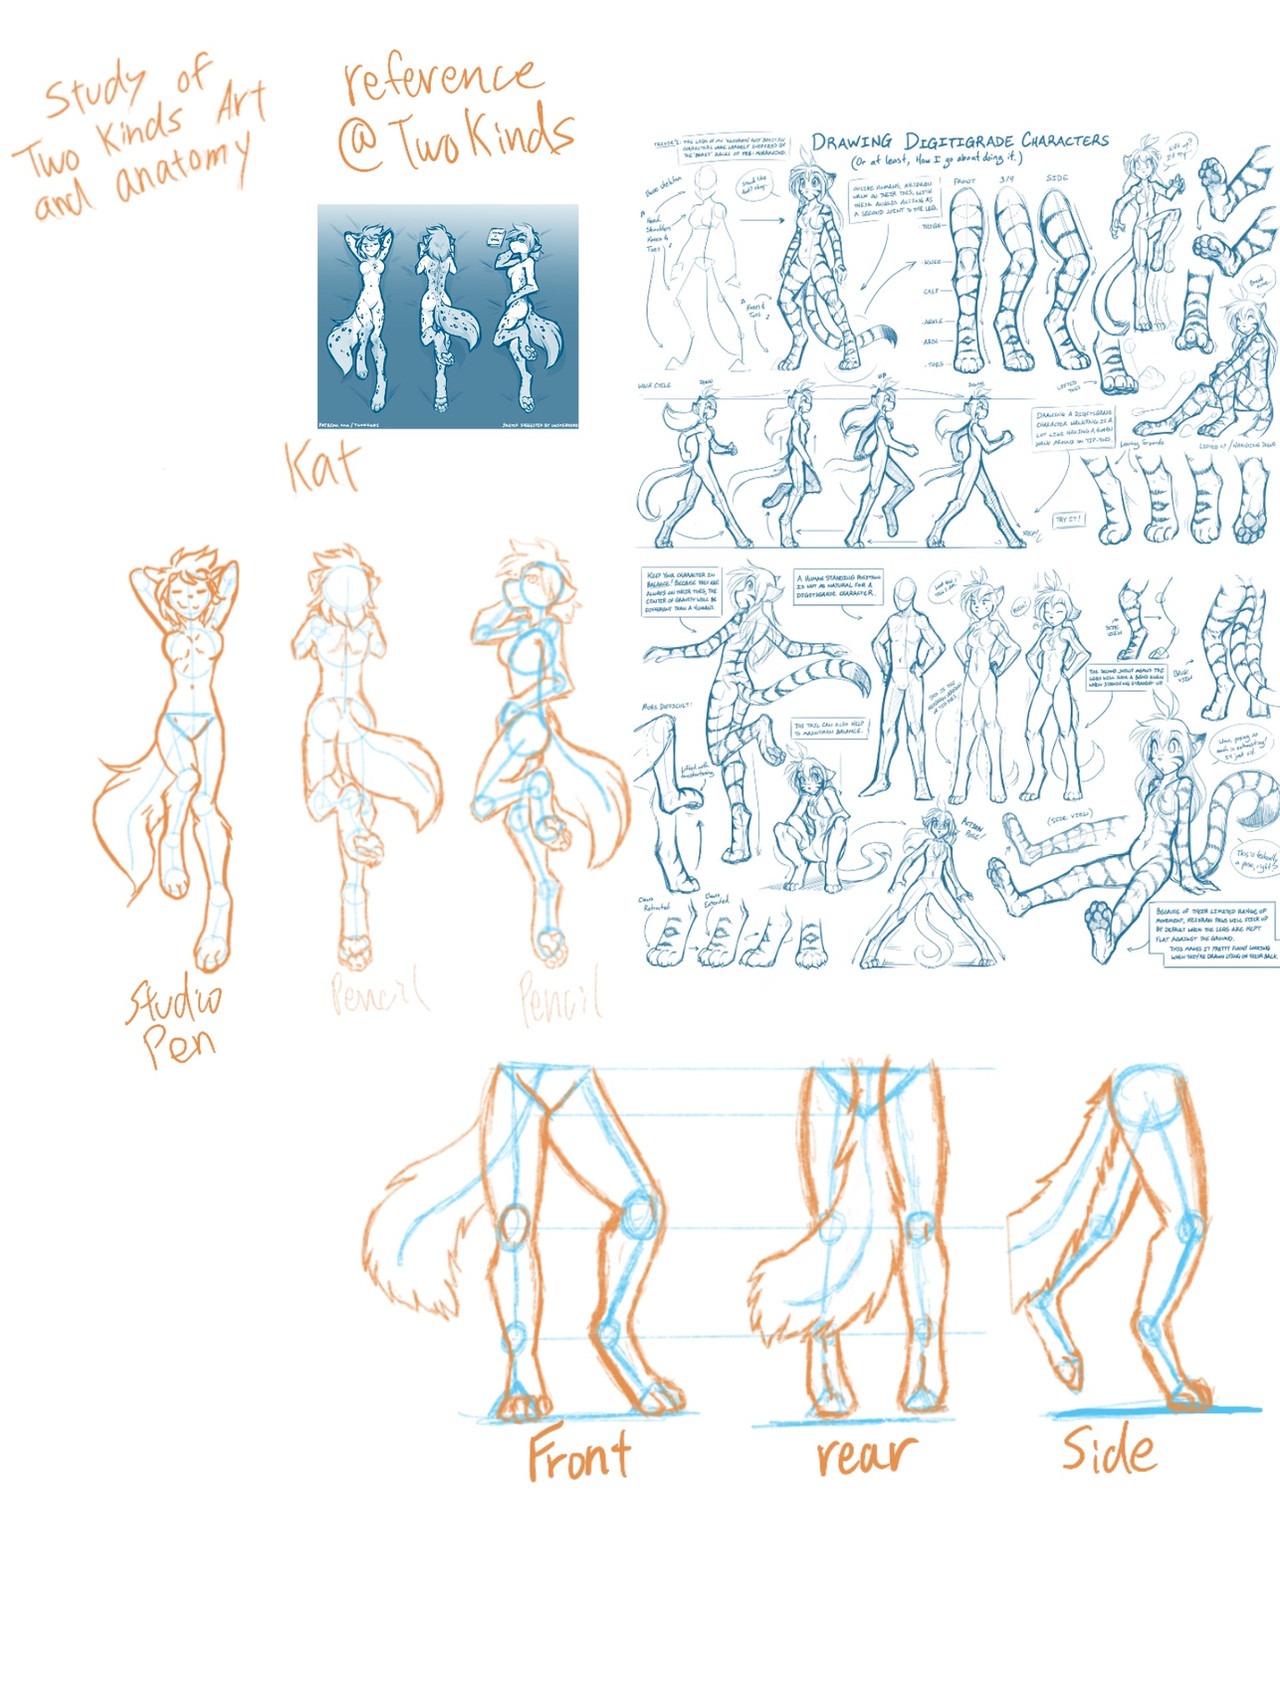
Step 1. Rough Sketch - This was done on paper but is usually done digitally. Very rough using guidelines and simple shapes, just to get an initial idea of who or what I'm going to draw. If you are more comfortable with traditional, you can totally start with pencil and paper. Here I just used a simple No.2 pencil I found laying around. You can scan it to your computer or do what I do and take a photo with your phone and upload it to your computer.Step 2. Shaping Anatomy - On a new layer, I line the anatomy, shaping and editing proportions, angles and the pose. Pretty much just draw them naked before getting in to the details. Understand the anatomy always before adding clothes and accessories. This layer will act as a guideline for the proceeding steps.
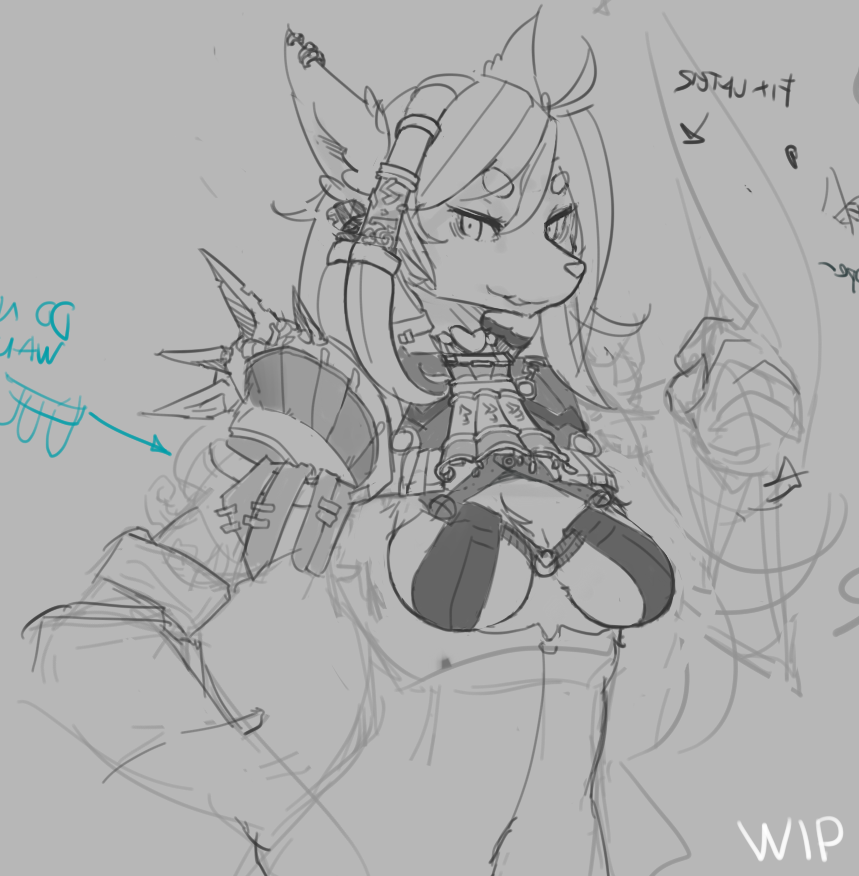
Step 3. Clean Sketch - The most refined sketch I'm willing to draw. Simply on another layer on top of the anatomy layer, I draw the clothes and aim for a more final idea of the character's design as well as to make any detail changes. What's cool about this is, you can keep making new layers on top the nude sketch if you want to try out different outfit ideas.
Step 4. Color Theory - Totally optional and can be saved for later. I color the sketch with the color pallet I initially plan to use. Here I can make any changes to colors however I seem fit or what I personally think looks the best. All my characters use about 8 colors in total. I personally think it's better to have a limited color pallet than to use as many colors as possible. I also like using muted colors because of how I shade. The shading I use will colorize the pallet even more. With bright solid colors, the shading will make everything over saturated.
Step 5. Line work and Flat Color - Lining using a vector tool followed by the pressure tool, I add weight and variations to the line work. Here I make any final details to the character's design as this will be a part of the final product. Coloring is as simple as filling it in. Lining is a very difficult and time consuming process, so prepare for pain. Unless you like lining, then whatever, I hate it. For those who do not have a pen tablet, this can totally be done with a mouse (That's what I used to do).
Step 6. Shading - Using a multiply layer, usually with purple (I prefer purple), use a soft edge brush being aware of a source of light. Use a blur tool to soften shaded areas when appropriate. Leaving shaded areas with hard edges makes the picture more angular so keep mind of that (It can also look really good when you want to cast shadows, e.i. her hair.)
Step 7. Lighting - Using a luminosity layer, using the same purple as before (Optional, you can use any color you want for lighting and shading. You can also use warmer colors for lighting and colder colors for shading. I for one just keep it simple and use one shade of purple for both). Lighten the appropriate areas. I also add back lighting, just a simple line along the outline. Note that back lighting only really works when overlaying shaded areas, because how light works as it "wraps" around objects.
Step 8. Finishing - Want to add any additional effects? I usually wait towards the end for stuff like this. For me, I just make the source of light more intense with another luminosity layer, giving the appearance of a bright light up and behind the character. In turn I make the shading more intense (Note that the harder and brighter the light, the deeper and darker the shading must be). Oppose the lighting with the shade by putting it low against the light.
I hope this simple tutorial helped you guys out. Take a few pointers, mess around and try to find your own new style!
Related content


Comments: 5

👍: 0 ⏩: 0

Nice tutorial! I may take some pointers from it for some future pictures.
👍: 1 ⏩: 0

im impressed with this step by step this is something im trying to create for my drawings.
 (Smile)")
👍: 1 ⏩: 0

Woooaaaa! I'm defently going to try to use you painting way and lets see what happend XD
👍: 1 ⏩: 0