HOME | DD
 red-shepherds — Opal tutorial (read description)

#digitalart #gems #opals #tutorial
Published: 2015-11-17 03:57:24 +0000 UTC; Views: 1050; Favourites: 5; Downloads: 0
Redirect to original
Description
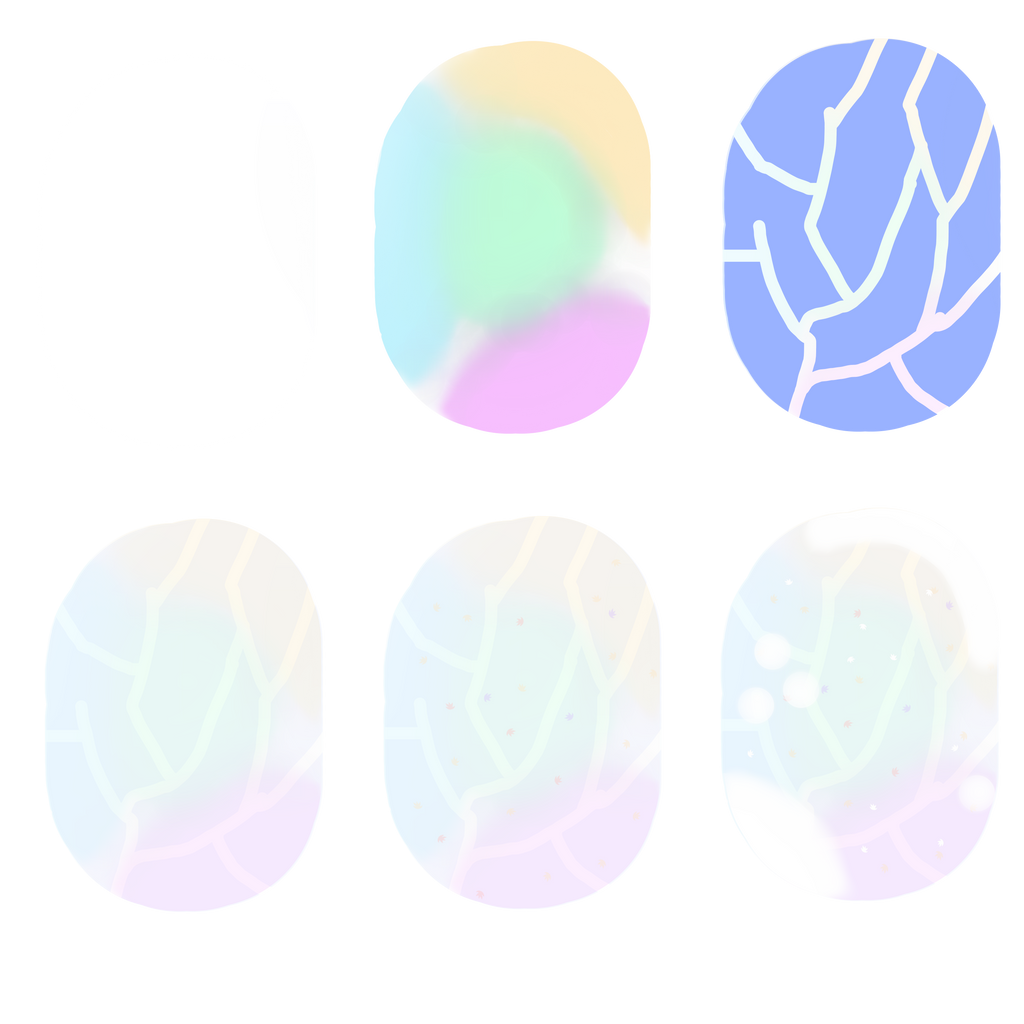
Aaah sorry the png is pretty low quality. Happens when I upload. Anyways, here goes nothing.Step 1: Select your base. Simple, effective. I chose pure white, you can choose any color, depending on what you want your final product to look like.
Step 2: Filters, otherwise known as tamagotchi hell. I...yeah. This step looks pretty ugly at full opacity. The gist is you decide on your lighting direction, pick four or five colors, splat bang blur, etc. The truth is--pick whatever makes you happy. I usually stick with four COMPLETELY different colors here--a purple, a green, a red, and a blue--that's my standard. If I want to go super complex, I toss orange in. Next, you blur it. Blur it all to hell. When it looks like a really bad acid trip, you have arrived. Drop the opacity--somewhere around thirty.
Step 3&4: Filter #2. Okay. This is the easy step. Pick a color--blue, here, and cover the entire shape (selecting it first eliminates a LOT of erasing.) Now, erase little channels in it, like a lightning strike. Drop the opacity to near 20, and this step is through.
Step 5: Flakes. These go under both of your filters, by the way--but this step made little difference because I dropped the opacity VERY low. Basically you're adding very light flakes of color to give the opal its 'fire'. I didn't want to be overbearing so I dropped the opacity low enough that it could hardly be seen.


 . NOTE, pastels work best here. Three things you definitely don't use are dark purples, reds, or oranges. You may be able to slip in a dark blue or two, though.
 Step 6: Highlighting. Remember when I said to thing about your lighting in step 2? Here's where it comes into play. Put a crest of light up near the top of your gem, one near the bottom, and three little dots. Drop the opacity to 18. Make a new layer at full opacity and draw highlights ON your highlights.
And you're done! This is a horrible tutorial and I am so sorry. There are tons of great tutorials out there and I recommend searching them.
So, feedback and comments appreciated! Tell me what sort of tutorial you'd like to see next and I'll see what I can do!
Related content
Comments: 1

I had to look at it twice to see the pattern on the second row.
👍: 0 ⏩: 0


