HOME | DD
 Sgeia — How I edit step 17
Published: 2008-01-29 22:14:48 +0000 UTC; Views: 132; Favourites: 0; Downloads: 0
Redirect to original
Description
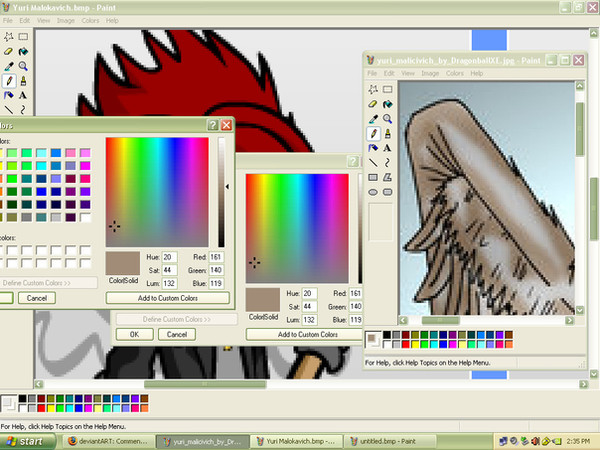
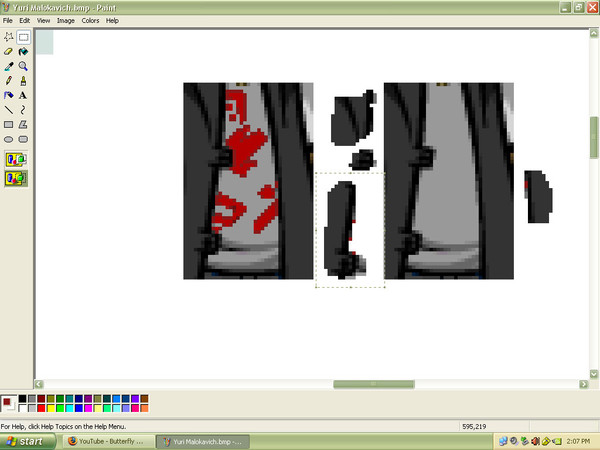
now Here I've made the nessary editations and shown you now I had to take my samples from the clean image and overlapped them onto the altered one.as you can see from the snippets around the right hand square my samples were not perfect and in fact few had straight lines at all. some even had to be edited before being dropped perminately into the altered image!
But there it is! once you get the copied cutout you want, and a few unique details that will help you place the thing into it's new home on the altered image, and align it to the square you want. carefully align it with the mouse and keep an eye on the pixels on the edge and then drop.
You may need to fix a few things but the effect will be the same. your glyphs are on the shirt and under the coat like they should be!
Now Highlight the whole altered piece once it's finished, copy that, and get to where you origionally want the symbol or whatever to go. you're almost done~!
and me too.
In the end this will hopefully be Yuri Malokavich Sonicifyed.
Furry doll maker editing tutorial
Step one: [link]
Step two: [link]
Step Three: [link]
Step four: [link]
Step five: [link]
step six: [link]
1-6 overview: [link]
Step Seven: [link]
Step Eight: [link]
Step Nine: [link]
Step ten: [link]
Step: Eleven: [link]
Step Twelve: [link]
Step thirteen: [link]
step fourteen: [link]
Step fifteen: [link]
Step Sixteen: [link]
Step Seventeen: Here
Final step: [link]