HOME | DD
 shadowsnips — Feathers Tutorial
#feathers #tutorial
Published: 2021-08-22 18:43:54 +0000 UTC; Views: 16538; Favourites: 138; Downloads: 19
Redirect to original
Description
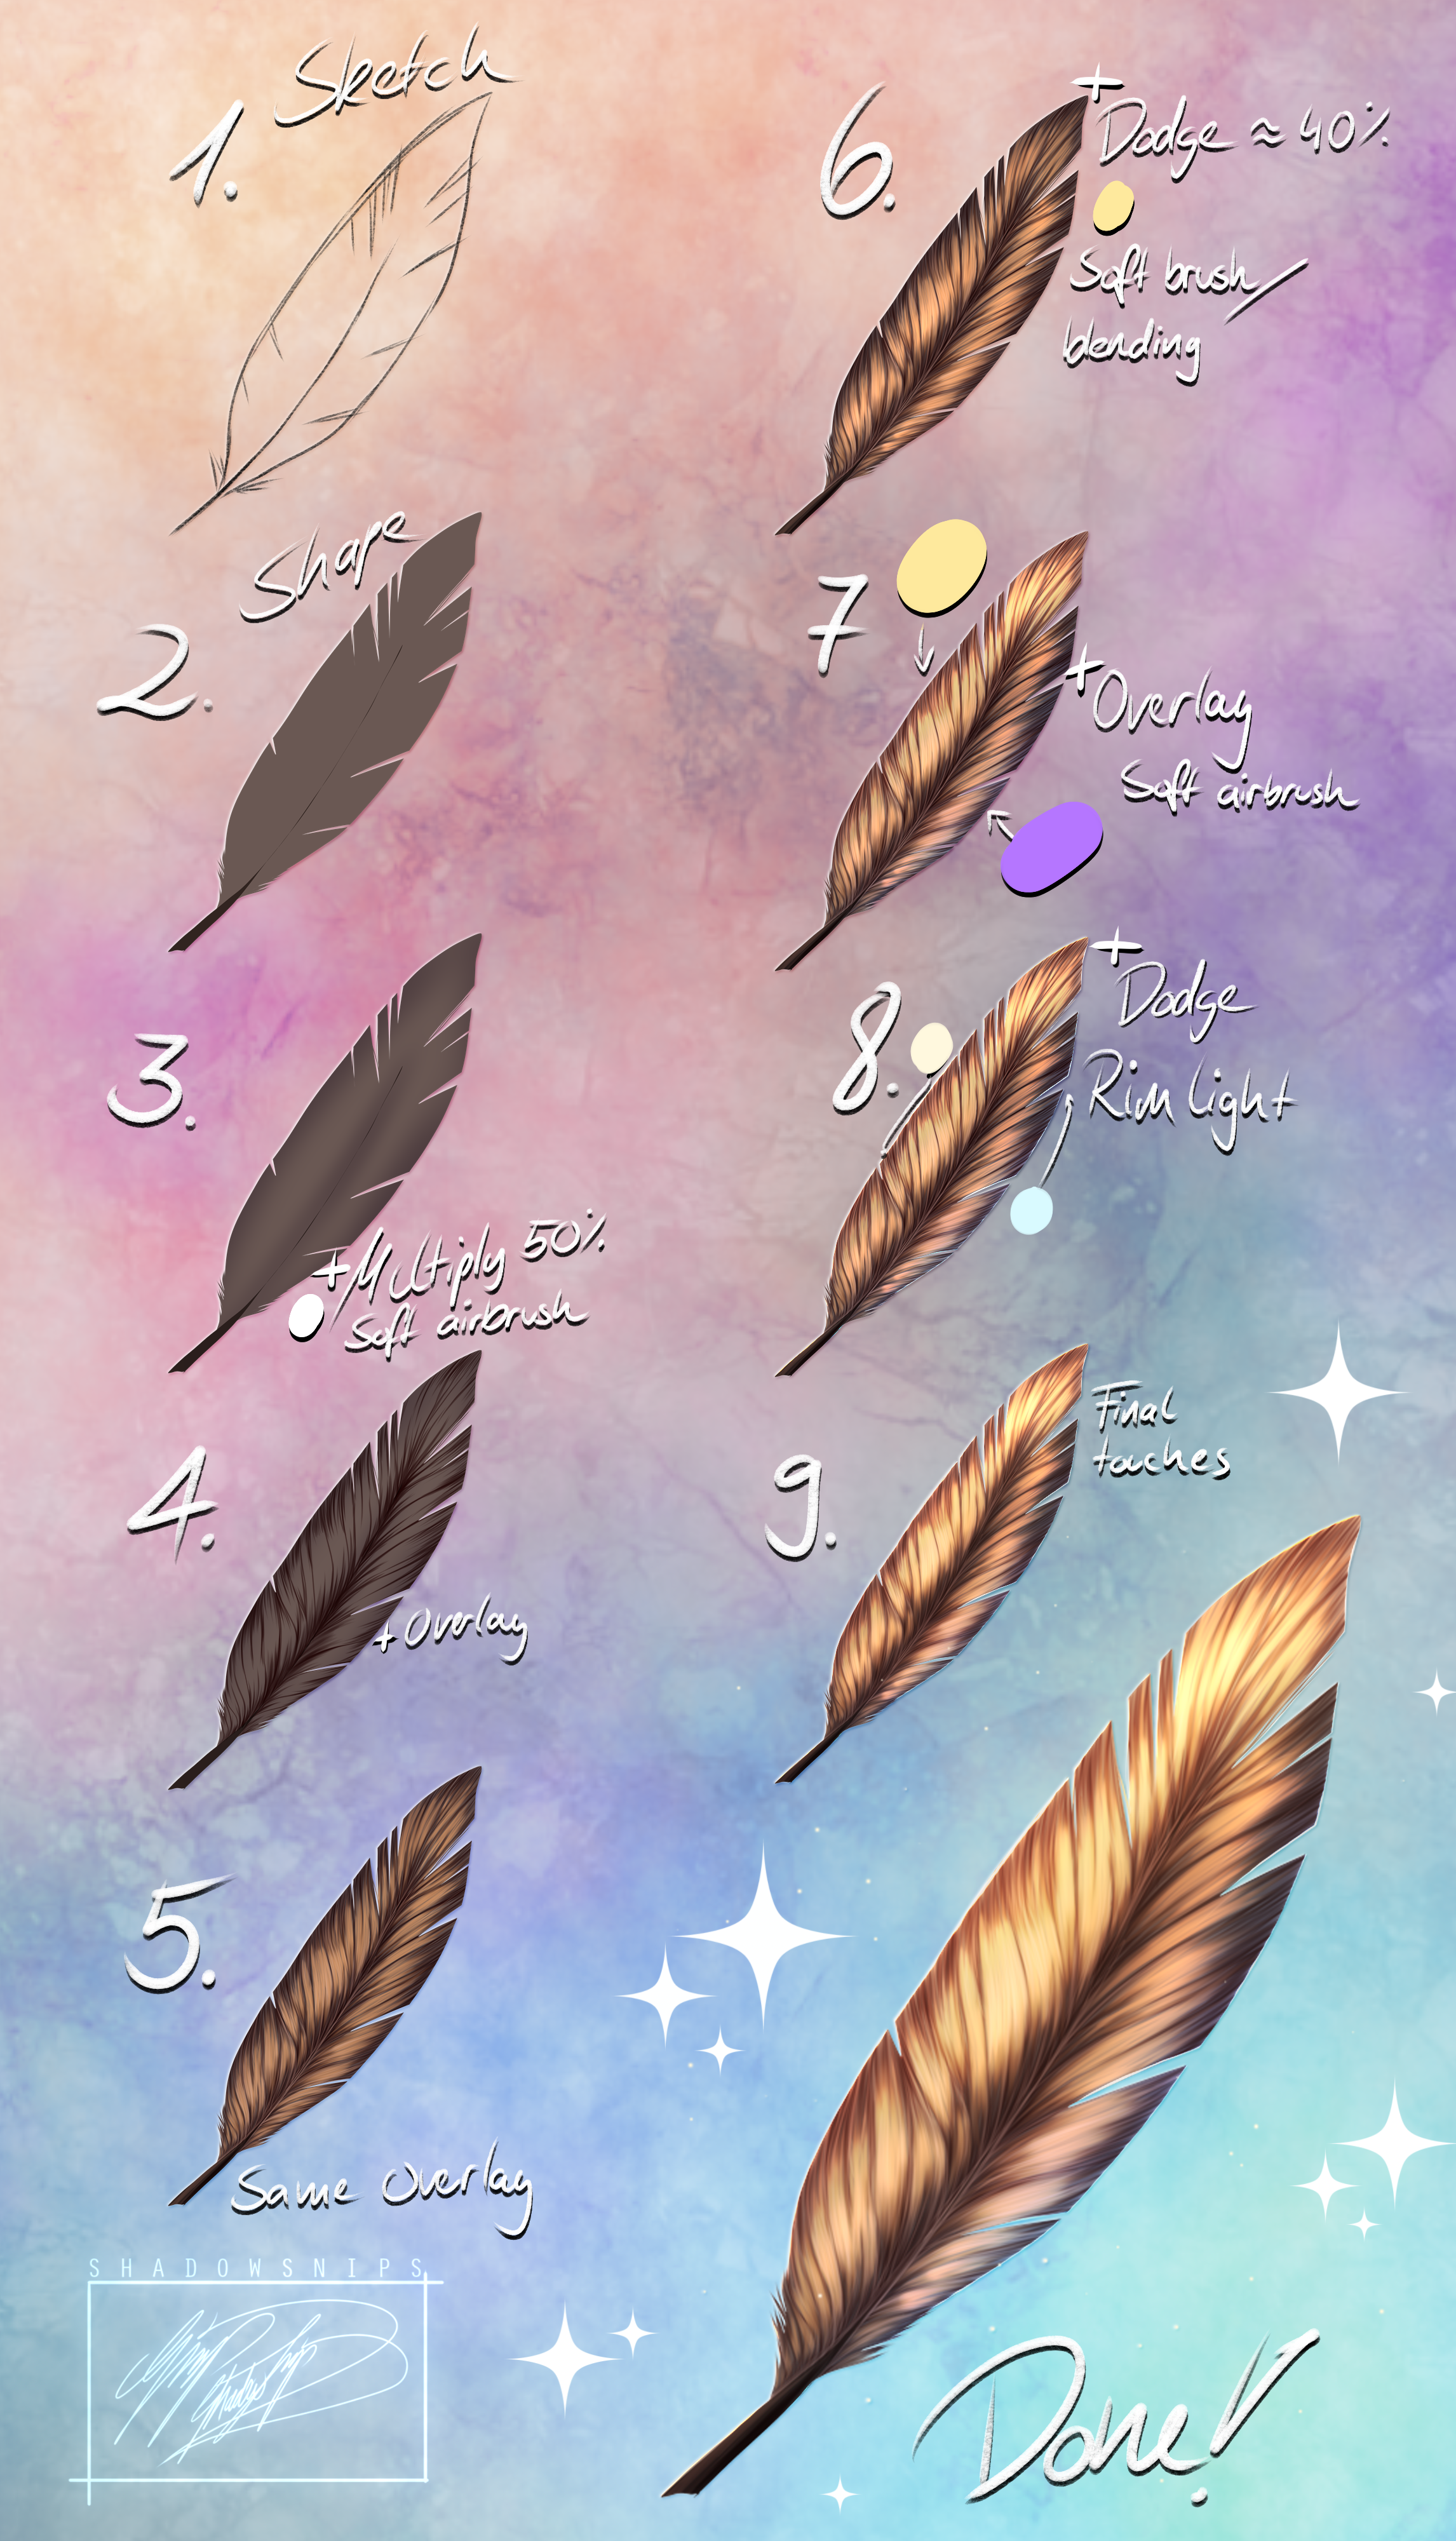
1.: Sketch
Sketch out the flow of your feather and the basic shape.
2.: Shape
Fill the shape with your desired colour. Make the shaft of the feather either a bit lighter or darker than the rest. You can either create the basic shape with the lasso tool or draw it freehand and fill it in. Then erase some lines into the feather to split up the strands a bit and make it look less blocky.
3.: First Shadow
On a new clipping multiply layer set on 50% opacity, use a soft, big airbrush and add some shading to the edges and the middle. Don’t use just black or gray for that, I like to use a more purpleish colour but a dark red or blue might do the job as well. The more reddish the colour is, the warmer the shading gets; the more blue you use, the cooler it gets.
4.: Overlay
Add a clipping overlay layer and start adding the detailed shading with a darker colour. I use a customized brush, but a hard edge airbrush on 30-40% opacity might do the same job. Split up the strands of the feather, go with the flow. Again, more shading on the outer edges and around the shaft of the feather.
5.: Lighting
Use a lighter colour (in my case a yellowish tone) on the same overlay layer and add some lights between the dark parts. Dont be afraid to draw over your dark shadow, this will create more colour variations and you don’t have to blend the colours manually. If you like to, you can also use a very light yellow, almost white, and a very thin brush to already add some details like loose strands or some shading on the shaft.
6.: Dodge
Create a new clipping layer on dodge mode and 40% opacity. Use a soft brush and add some more light to the middle with a warm yellow. If you want the colour to be more cold, then you can use a light blue.
7.: Overlay 2
Create another clipping overlay layer and use a soft airbrush to add some backlighting with purle and to lighten up the tip of the feather with a light yellow.
8.: Rimlight
On a new clipping dodge layer, add some rimlight in corresponding colours. In my case I used a light yellow from above to fit in with the warm light and a light blue for the light that got reflected from the environment. If i had used a cooler lighting and a warm environment, I would have used the blue for the upper rimlight and the yellow for the reflected light.
9.: Final touches
Put all your layers in a folder, duplicate that folder and merge it into one layer. Then clip that layer to the folder with the original feather. Now apply a a gaussian blur to that layer. I set the width of the blur around 15 for a 2000x3000 canvas. Now set that blurred layer to 30-40% opacity. Duplicate the layer again and set it to overlay.
If wanted, you can add some sparkles.
And you’re done!
This tutorial can be used for detailed feathers, but in small scale also for simple feathers.