HOME | DD
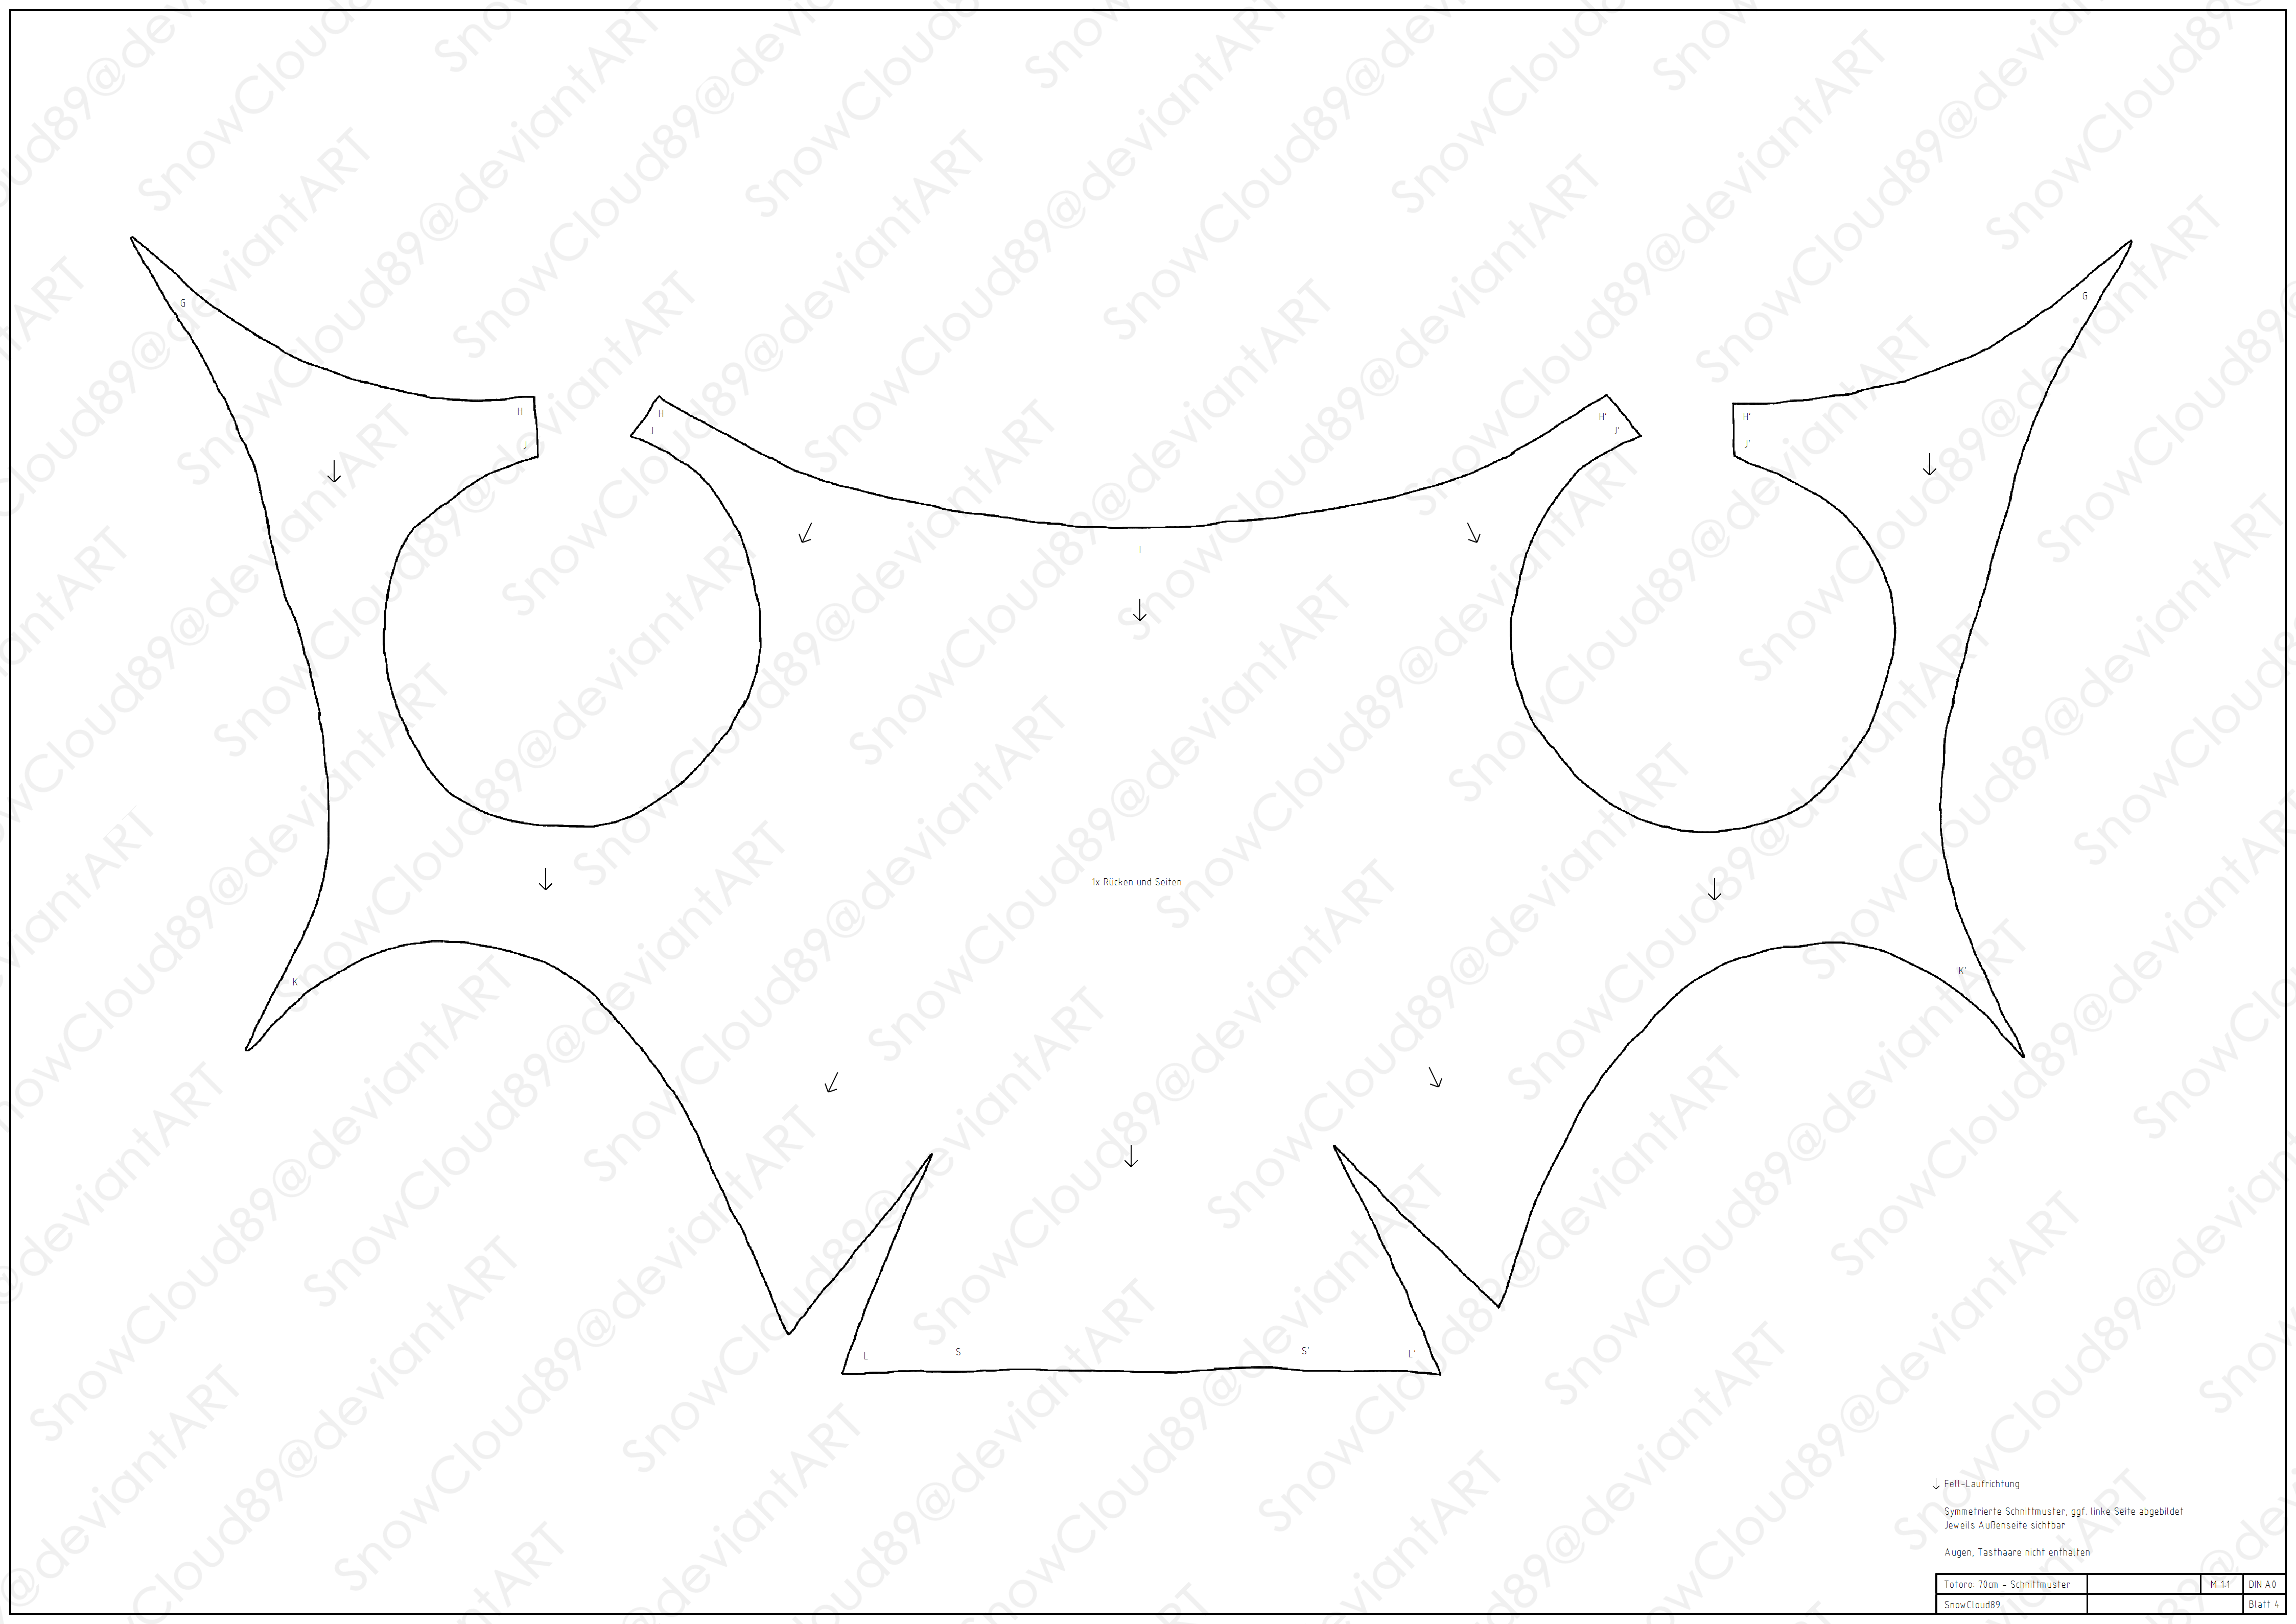
 SnowCloud89 — My TOTORO-Pattern Sheet 4/5 - DIN A0
#friend #ghibli #hayao #miyazaki #pattern #patterns #sew #sewing #studio #totoro
Published: 2015-10-22 22:54:57 +0000 UTC; Views: 311; Favourites: 3; Downloads: 9
Redirect to original
Description
2014, Pattern/DrawingHere are my original Totoro-pattern for sewing!
You don't know him? Here is he and all other pattern sheets, too: www.deviantart.com/snowcloud89…
At first: They are not perfect!
Unfortunately I don't have pattern for the eyes and the Whiskers. Moreover they don't fit perfectly, because I've made them with a small model.
It works anyway I've used these pattern for my Totoro, without any changes. ^____^
I've made the pattern on my own with a clayfigure and duct-tape. This is my first plushie, nothing professional.
The sheet DIN A0 is a german norm-sheet, but its really really big. Maybe someone can plot it at work for you, at the bureau maybe. When you plot it in original size your Totoro will be 70cm tall, without the ears and the tail, like mine.
If that's to big you can downsize the sheets in a fixed scale.
Attention!- Sheet 5 is format DIN A4 (small).
--------------------------------------------------------How to work with this drafts -----------------------------------------------------------------------------------------------
The size of all peaces of all sheets are made for each other and they all fits together - nearly. You should put the peaces together and check the edge-lengths. You should sew them by hand, so you can correct the differences by sewing (long stitch on the long side, short stitch on the short side).
Don't cut peaces away.
To the peaces: This are pieces without any addition for sewing. You have to ad about 1cm to every side, to every edge, all around.
Don't cut broken lines. They are just support
 (Wink)")
I always show only the left part, when there are two mirror-inverted peaces, like parts of the arms and legs for exmaple.
And it's always the outside, the fur-side.
Then there are letters on the corners and at some edges. Every letter is one point, so same letters belongs together.
When points are symmetric (at both sides) they have the same letter, but the left ist called X, und the right X', for example.
I'm going to share a picture that shows the locations of the points on Totoro.
The arrows shows the direction of the fur. Fur should always flow from the nose to the tail.
The paw-pads and the spots on his chest are fixed with glue. In preparation you have to cut the fur under this places, very accurately.
That's it! I hope you enjoy making your own Totoro!
I should have said in the end, it's difficult and I can't guarantee for good results.
But I'm going to share some photos like a making-of, of the difficult parts.
I'm looking forward to see some nice Totoros!