HOME | DD
 SugarPhlox — 218 - Tutorial
#digitalart #process #salamander #tutorial #howidraw
Published: 2022-08-01 06:24:27 +0000 UTC; Views: 1044; Favourites: 17; Downloads: 2
Redirect to original
Description
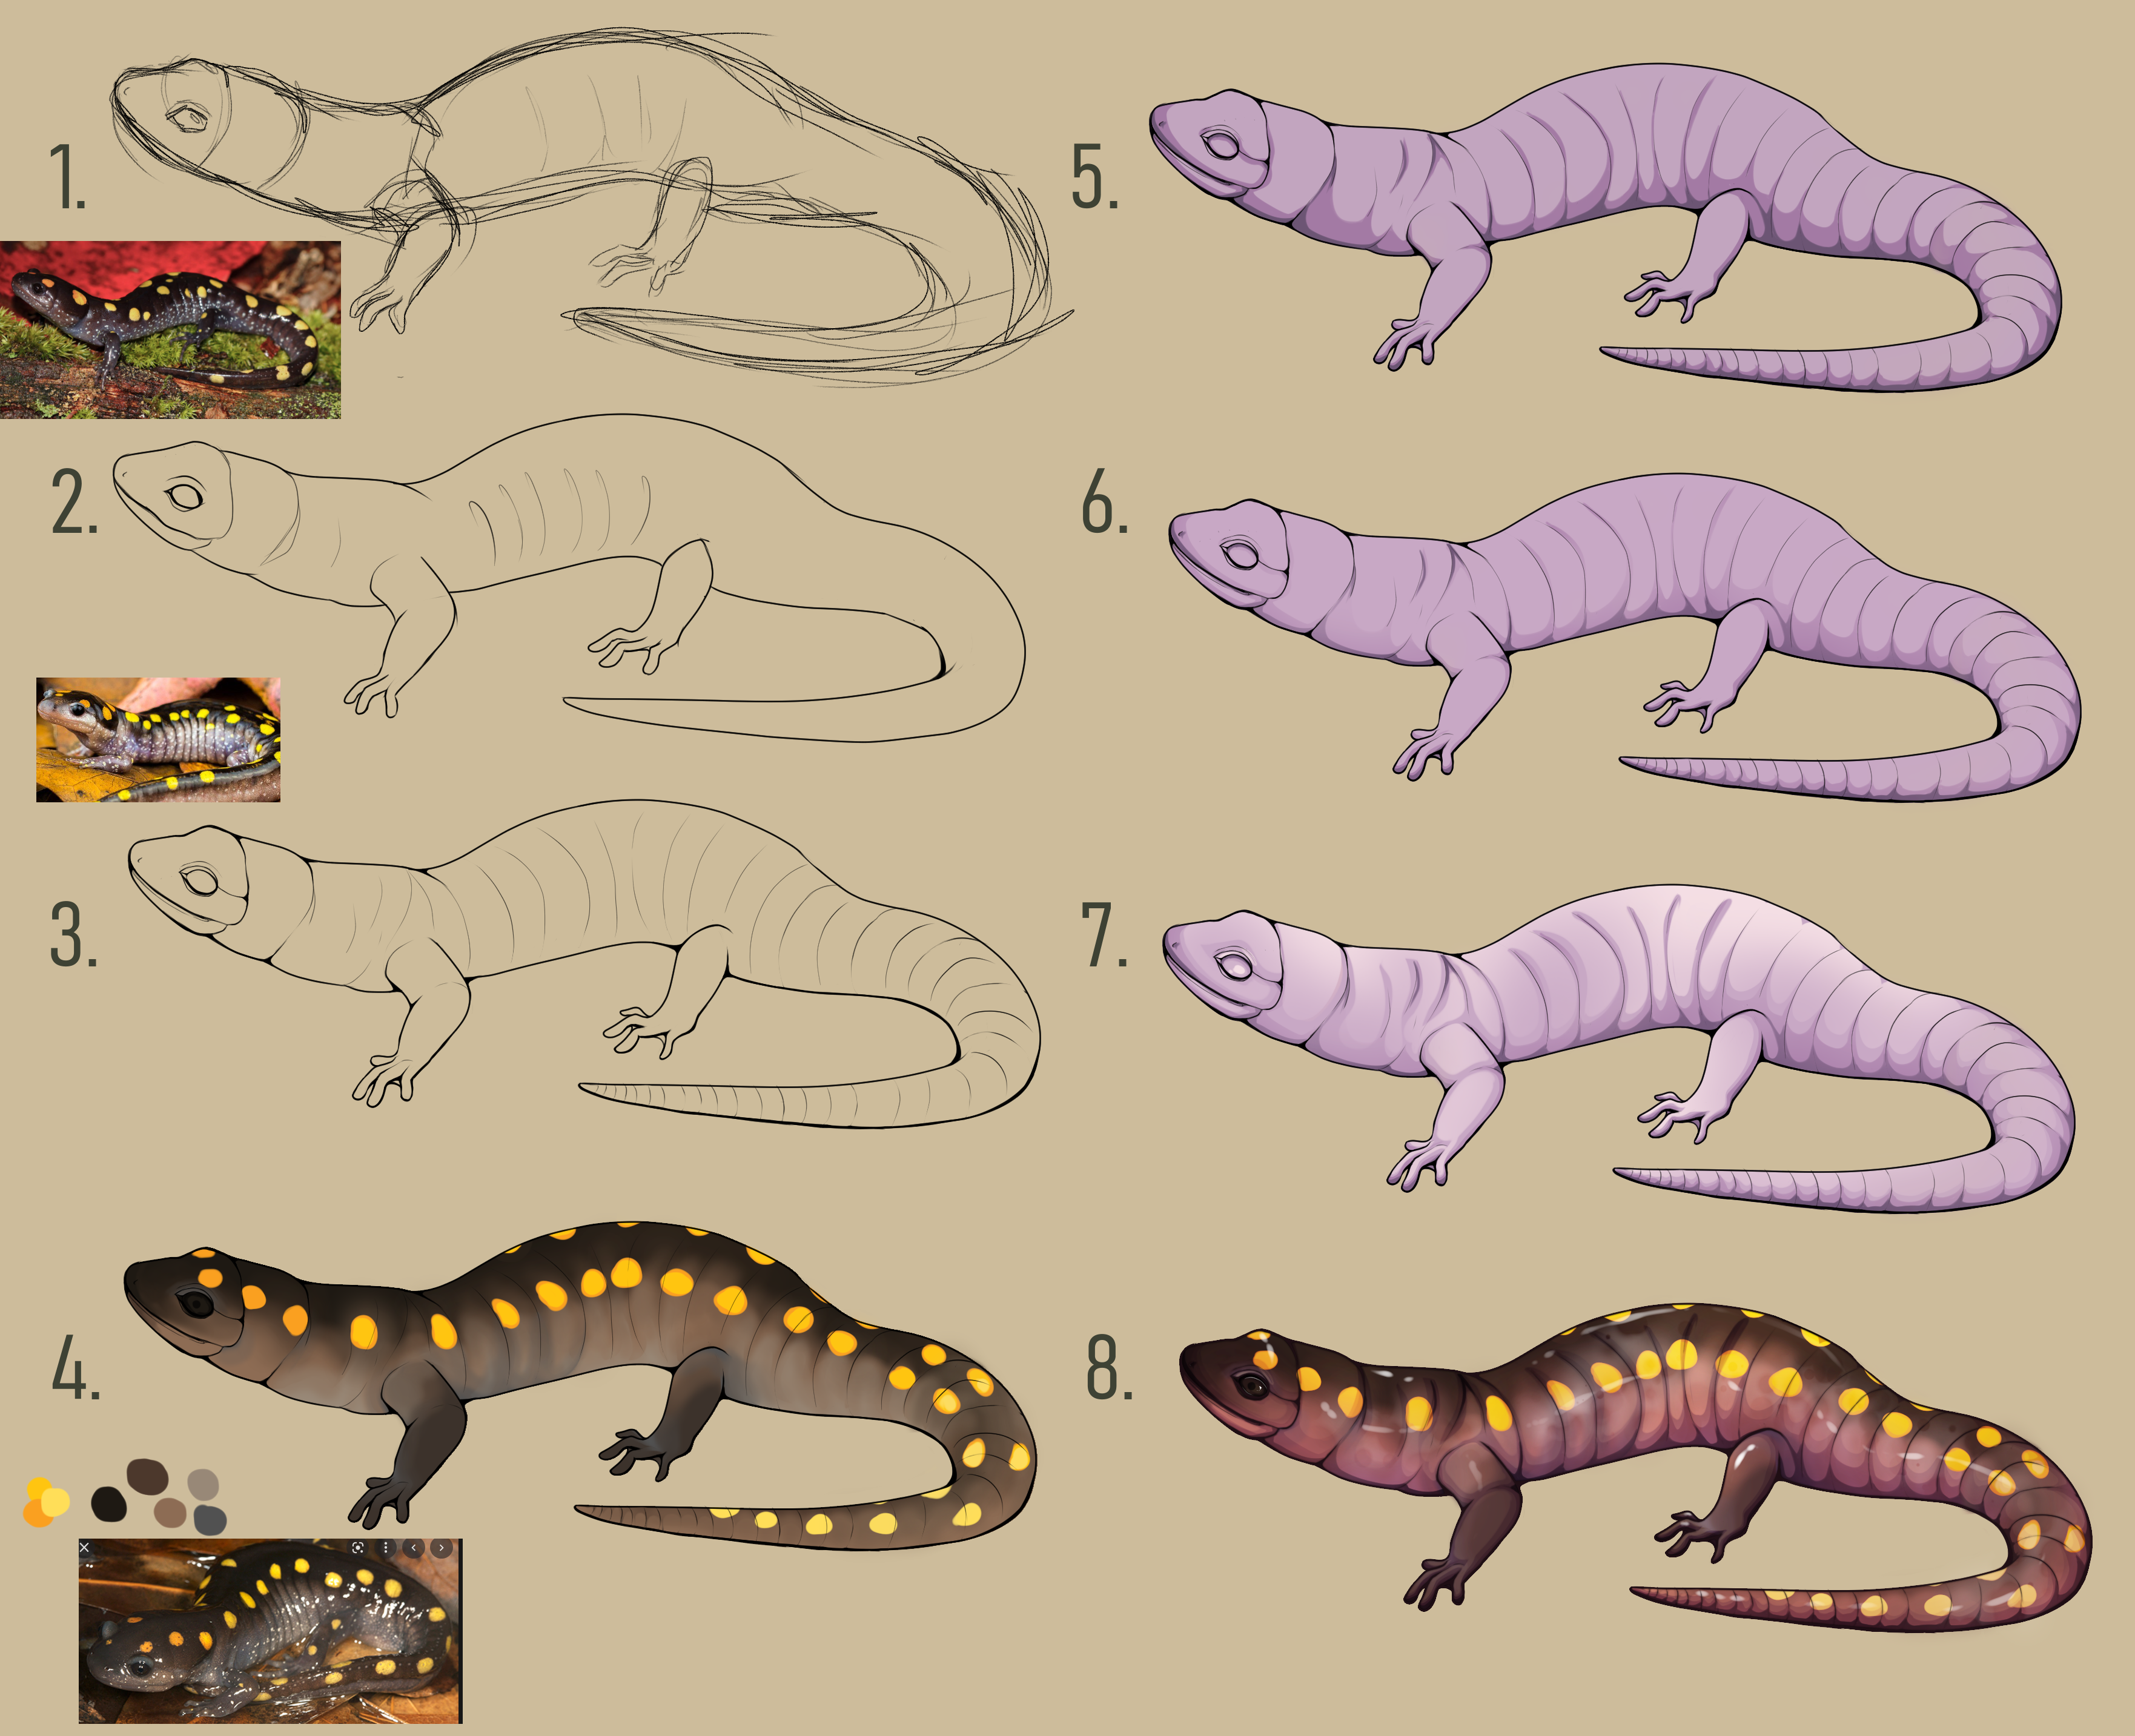
Here's a quick breakdown of my process when I draw anything!This is a very poorly worded explanation of my process, but I tried to get the gist of what I do.
Step 1
Rough sketch of whatever it is I'm drawing, in this case it's a spotted salamander. I typically start with drawing the big shapes then work on the smaller things, I tend to keep my sketches pretty rough.
Step 2
First draft of the lineart, this is usually just the outline and main shapes
Step 3
Here I'll usually pull up more reference images if needed and go into detail work, as well as add line weight- I basically make the darkest areas thicker, usually the bottom of the animal I'm drawing to help give the illusion of more weight there being closer to the ground, as well as show where the least light hits- it's hard to explain for me, but that's the gist of it.. Lines on the top of the animal will generally be thinner, lines on the bottom will be thicker. My lineart is my foundation of all of my art, and I spend the most time making sure it looks the way it should.
Step 4
I make a second layer underneath the lineart to do the colors. This is the flatcoloring stage- in this case I colorpicked from a random image of a spotted salamander, just a few of the major colors, then went through and plopped them down and blended them in. If this were my own or someone else's character I would use the colors from the character's reference's color palette. Since I was drawing a salamander, I chose to blend to help give the illusion of smoothness, but other animals don't necessarily need that sort of blending.
Step 5
Shading- I make a second layer, on top of the color layer and beneath the lineart layer, and choose a midtone color. I used purple in this case because it is the complimentary color of yellow, but blue or beige probably could've worked just as well- I just felt a nice purpley tone would bring out the colors the best. I create a second layer right above the midtone and block in the darker spots with a slightly darker and cooler tone of purple, then make a second layer and essentially do the same thing with an even darker tone. When I shade, I stick close to the lines I've drawn to decide where to put darker colors.
Step 6
Here I use an airbrush and softly erase along the hard lines where I feel it's needed, this is why I keep both of my darker colors on separate layers above the midtone, then I merge all 3 layers.
Step 7
Doing the same thing I did with the shadows, I'll make a new layer and choose a lighter, warmer tone than the midtone and go over anywhere the light would touch, again using my lineart as a guide for where to place the lighter colors. And then, just like with the shadows, I softly airbrush erase to help blend it a little, being careful not to over-erase- I want it to be clear where the light is hitting, and not just a flat gradient. I then merge the highlight layer to the same layer as the shadow layer.
Step 8
My final step is to duplicate my shading, one layer set to multiply mode, and the layer above set to overlay move- I'll adjust the colors and opacity until I get something I like, then merge all. I then find my darkest color in my image, colorpick it and color the lineart layer to that same shade- I think it helps the lineart look less harsh. Then I like to duplicate my lineart layer, blur the duplicate and set its mode to multiply underneath the real lineart layer, clip it, and merge it down. I add highlights, go over with a texture brush in a lighter color to help give the image some interest, then merge it all together again.
Finished image: