HOME | DD
 ZekSora — The Southern Campaign
#alternatehistory #australia #campaign #independence #inkscape #map #uk #us #war #alternatehistorymap #alternatehistorycom
Published: 2015-12-06 03:15:56 +0000 UTC; Views: 1308; Favourites: 10; Downloads: 7
Redirect to original
Description
The first part of my entry to MotF 128 over on alternatehistory.com.Full text:
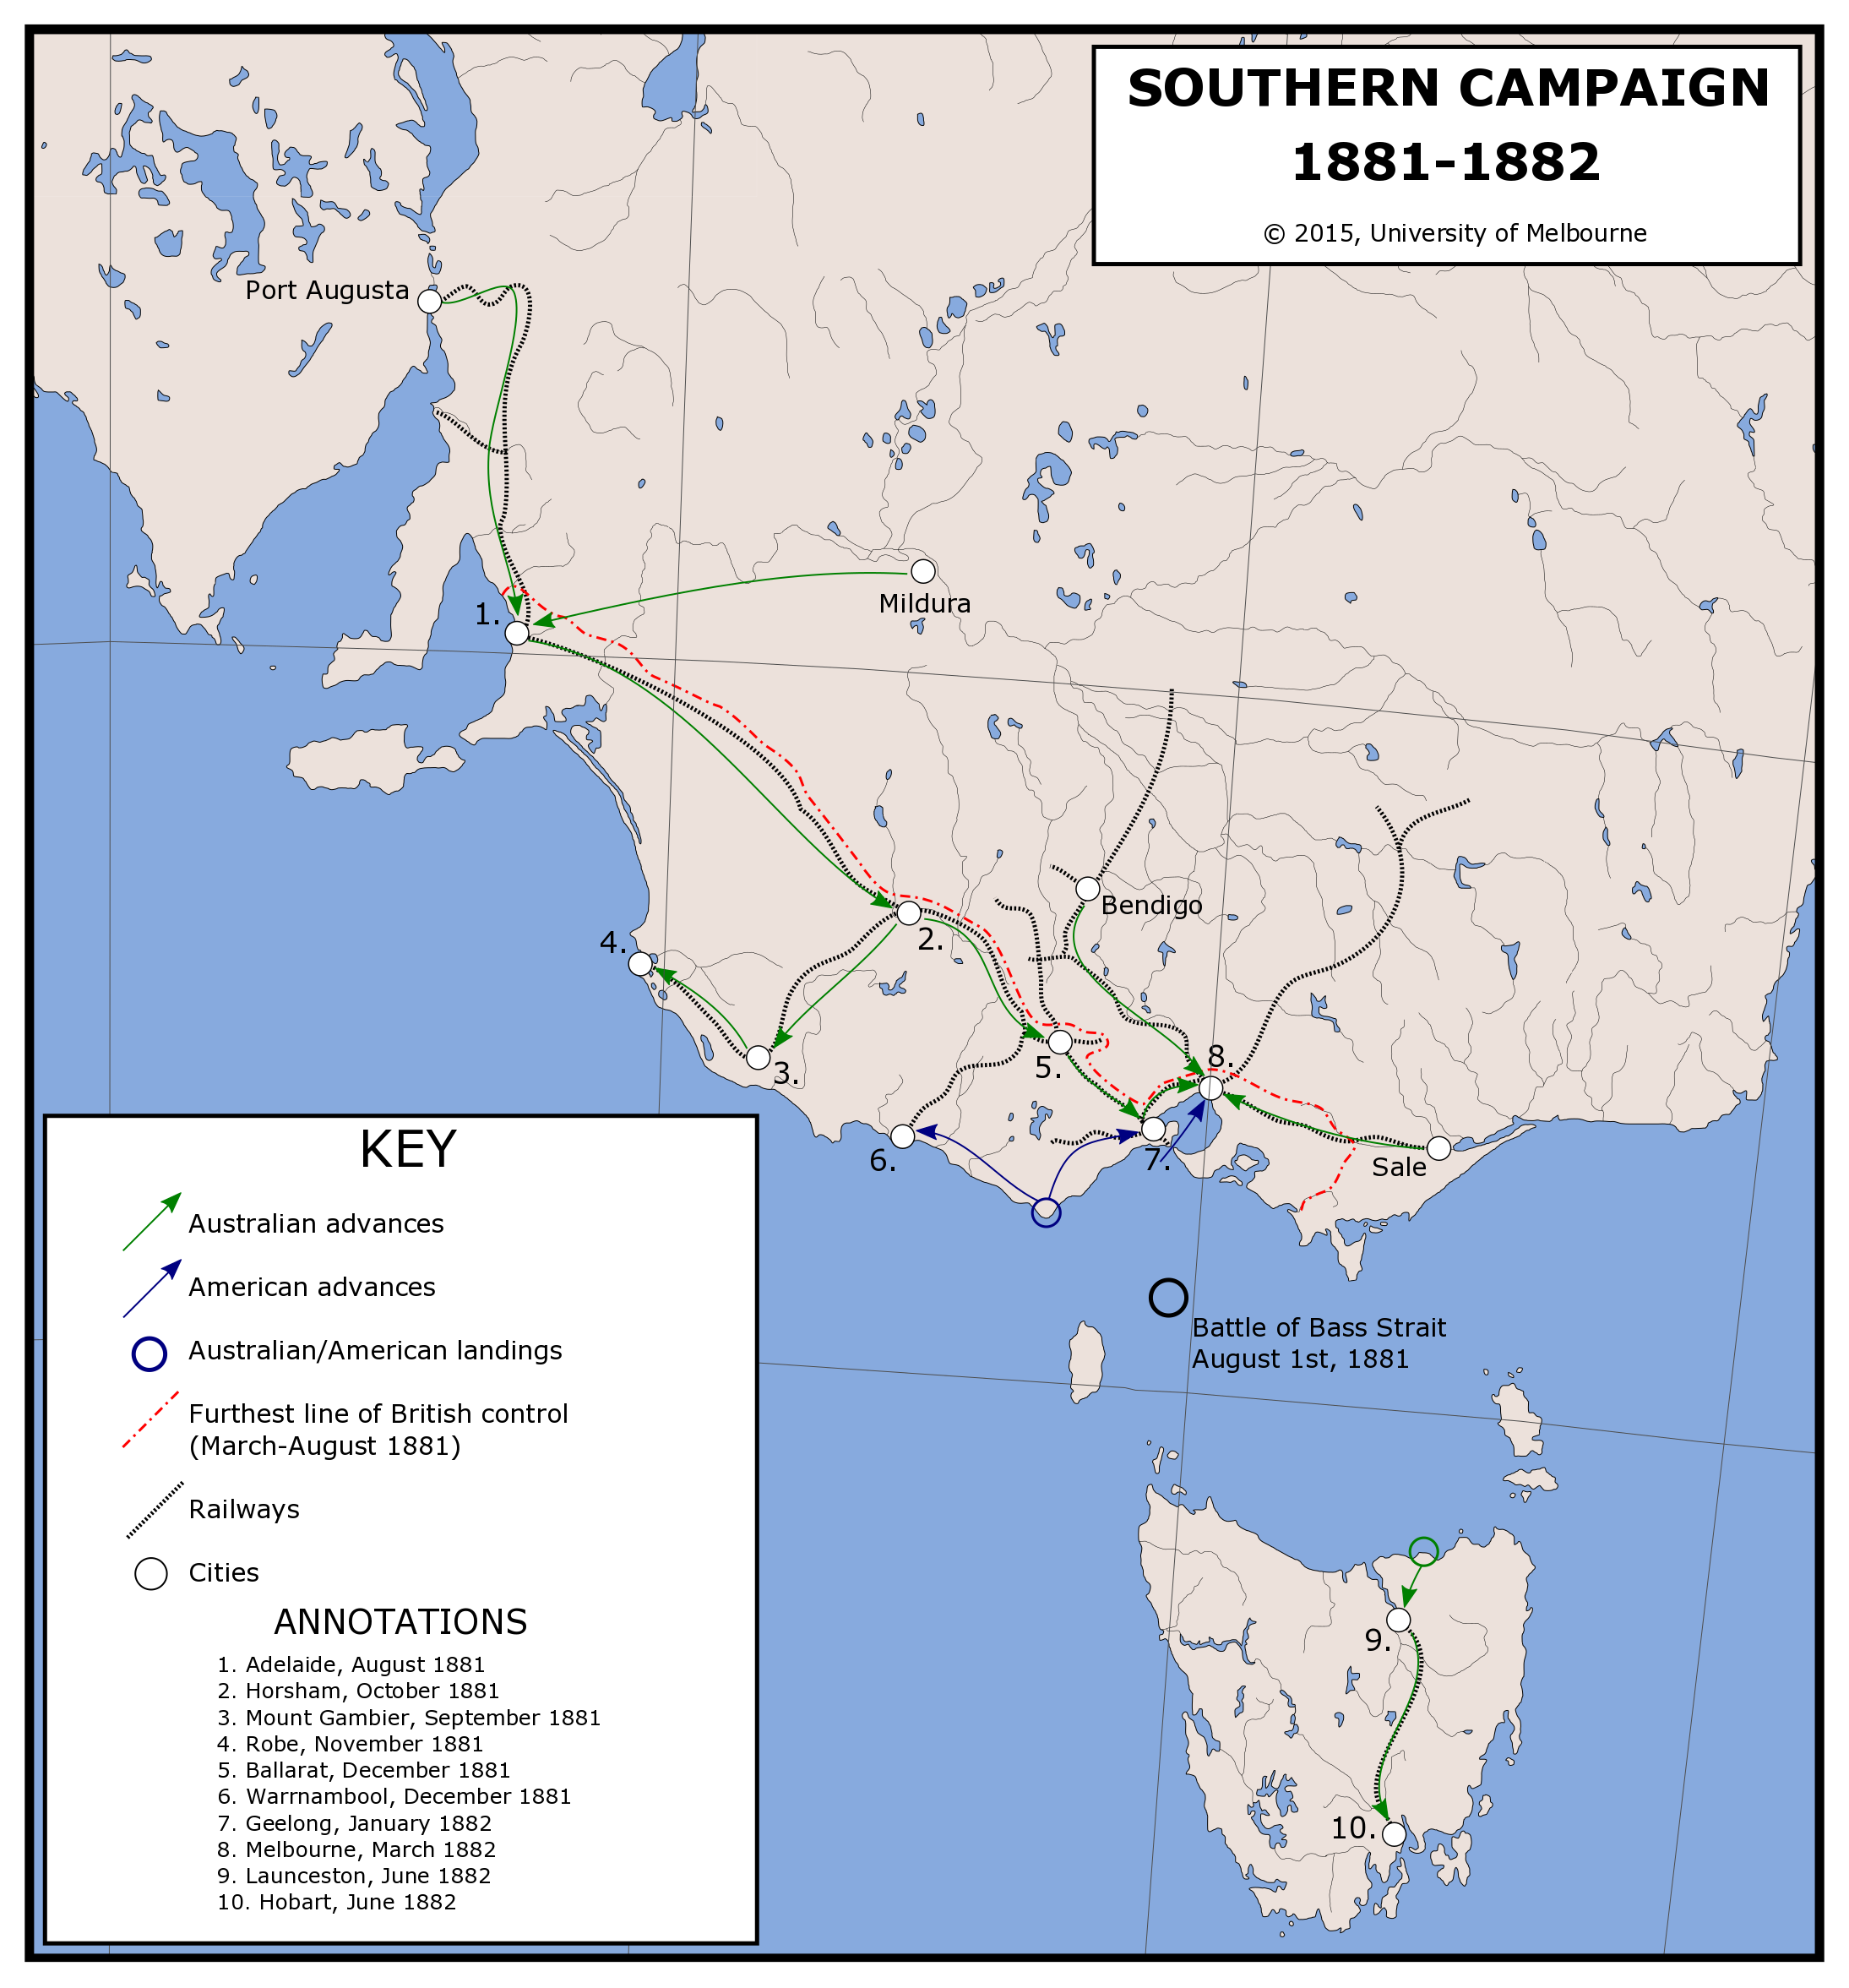
“The Battle of Bass Strait is generally considered the decisive moment of the Southern Campaign, which is itself generally considered the decisive campaign of the Australian War of Independence. The battle itself was joined on the first day of August, 1881, when a formidable British contingent of 3 battleships, 2 armored cruisers, 3 light cruisers, and 2 destroyers encountered an even more formidable American contingent of 5 battleships, 3 armored cruisers, and 4 destroyers while sailing out of Melbourne. The American fleet, flush off its recent victory in a brief encounter in the South Pacific, was joined by a small Australian rebel contingent of 2 gunboats and 3 armed yachts. Despite the allied numerical superiority, the British felt confident that victory was inevitable, partly thanks to their assumption that British ships and sailors were simply superior. and partly thanks to evident damage on many of the American ships (which was, in fact, mostly cosmetic.) And so, both fleets threw themselves into the engagement with abandon, which turned out to be a poor decision for the British. By the end, they had sustained severe casualties throughout their fleet, and lost two of their three capital ships (one sunk and one so badly damaged its repairs were still not complete enough for it to sail as Melbourne fell to allied forces almost a year later.)
Emboldened by this great victory, Australian forces captured Adelaide from its demoralized British garrison and began what came to be known as the March to Melbourne. The occupying British forces, cut off from supplies even from nearby Tasmania, demoralized by seemingly constant American and Australian victories elsewhere on the continent and facing an increasingly hostile Australian population thanks to constant requisitions, crumbled in the face of even the admittedly quite scruffy Australian rebels. It took less than a year for allied forces to push the British not only out of the southern part of the continent, but out of ostensibly loyal Tasmania as well.
This map shows the direction and timing of allied advances in the final phase of the Southern Campaign. It also may seem from the map that American forces played only an incidental role in the land war. However, this is completely untrue. American forces played a crucial role in the taking of Melbourne, and indeed many historians outright credit its fall to them entirely. Melbourne was by far the most heavily-defended city in southern Australia, and the Australian forces who would have had to attempt its taking were overstretched and utterly exhausted. Without the American Expeditionary Force taking on the brunt of the fighting, it is likely that Melbourne would not have fallen when it did. The timing of Melbourne’s fall was extremely important to the course of the war—without the lightning March to Melbourne, it is unlikely that the British population would have begun to see the war as hopeless until much later, delaying the war’s end indefinitely or perhaps even allowing the British a chance to win it. Unfortunately, in the end there is no possible way of knowing what would have happened had the Americans not been present, or indeed if Bass Strait had turned out a different way, so it’s better to focus on what did happen instead of what might have.”
Excerpt from a lecture on the Australian War of Independence, given by Professor Brian Johnson, University of Melbourne, June 15th, 2015


