HOME | DD
 ayamexx — Light Beam slash Ray
Published: 2009-09-19 03:38:00 +0000 UTC; Views: 3205; Favourites: 87; Downloads: 136
Redirect to original
Description
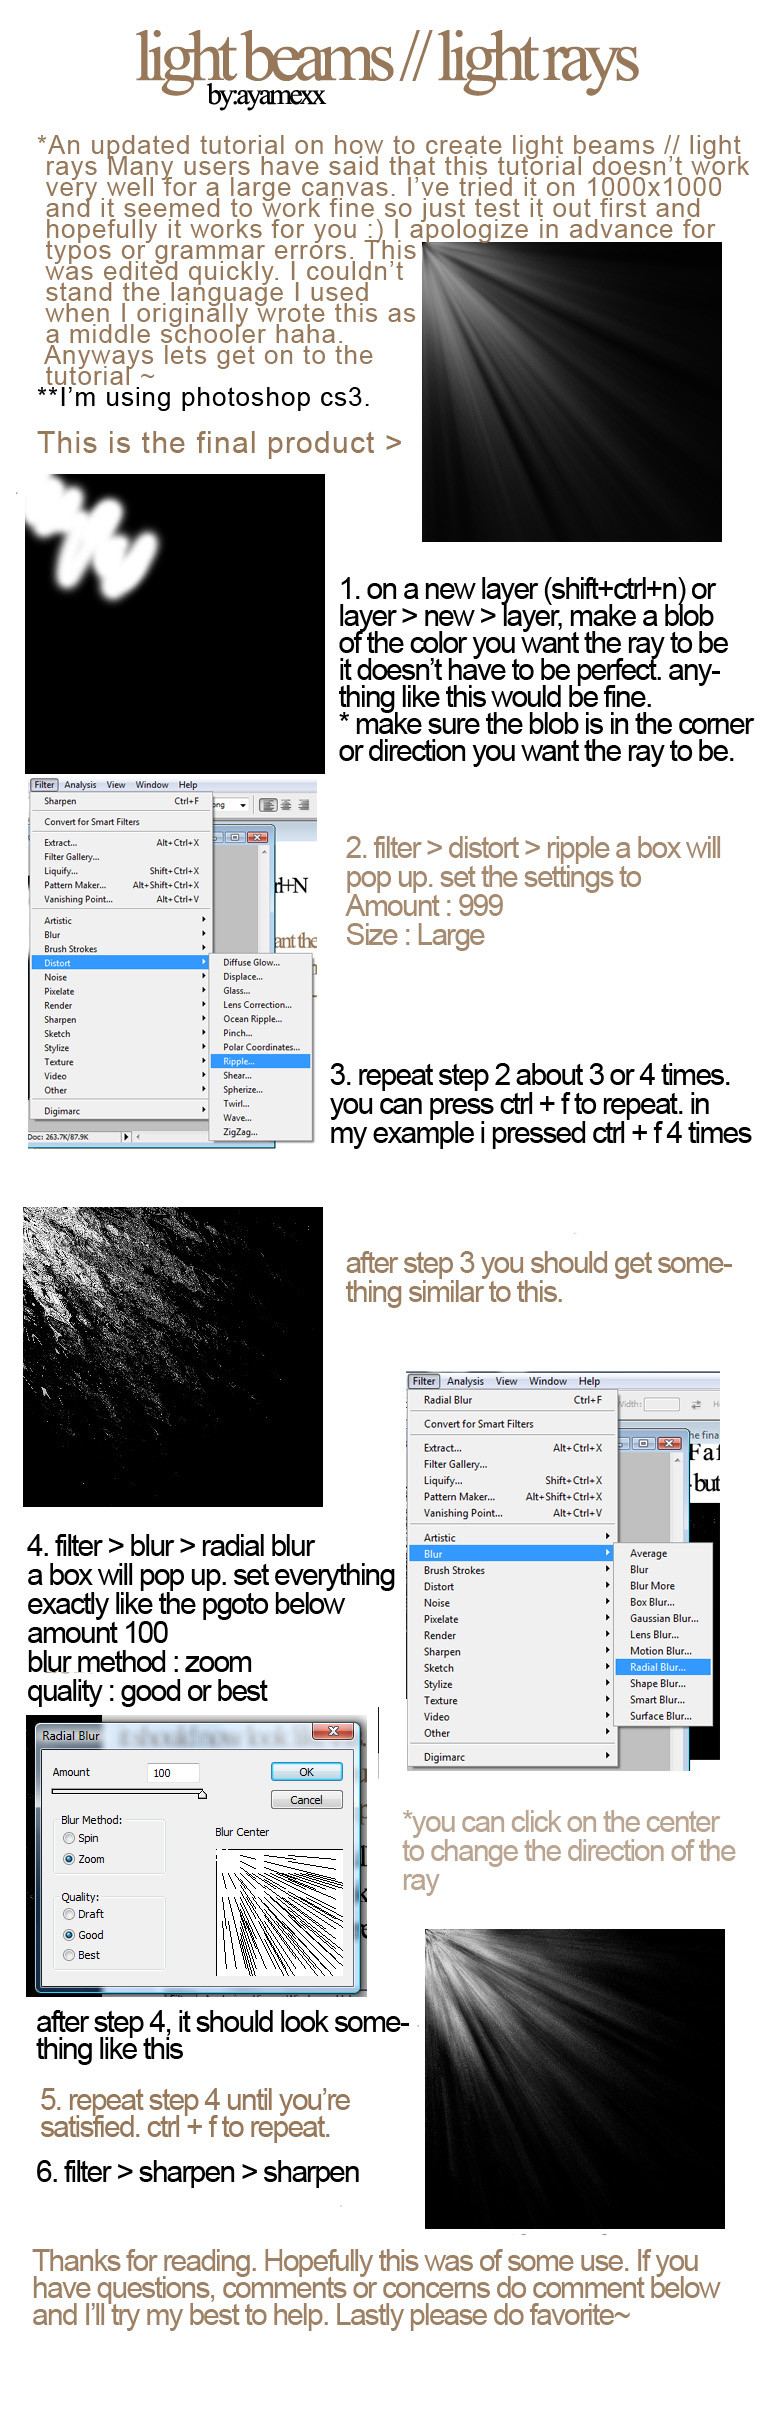
*updated tutorial.This is a light beam / light ray tutorial.
The last photo is the result of step 4. If you complete steps 5-6 you will arrive at the first image or final product that's pictured in the beginning of the tutorial ^^
Hopefully this was useful.
(C)~ayamexx
Related content


Comments: 17

Thanks for this! On a big picture, it's not as effective, but I used it on mine kind of like a small light ray up in the corner. :3 Works very nicely.
👍: 0 ⏩: 0


Sorry for that. I made these when I was around 13...
👍: 0 ⏩: 0

I love the results, bu there are a couple problems. My canvas is 3600 by 3000, and this doesn't work at all on something so big xD. Also, the ripple effect will only give you the right directional strokes if you have your ray coming from the top left corner. From anywhere else in the image, it doesn't work. Next time I have a small image that needs rays though I'll be sure to use this technique! Thanks for sharing
")
👍: 0 ⏩: 1
I'm sorry that it doesn't work on such a big canvas >.<
It doesn't matter much which direction the ripple effect goes, I believe. In step 7 radial blur, in the blur center box, you can move the center around so it should work from any corner as well as the center. I hope this helped ^^
👍: 0 ⏩: 1
It seems to be more smooth if the ripple is going in the direction of the blur (I tried both ways), but both look fine. If anyone else has this problem, I used a noise type radial gradient as a staring point and used a few blur filters. If you're curious, I can link the results when I'm done
")
👍: 0 ⏩: 0

 (Smile)")

Thanks for the tutorial, it's really helpful~
[link]
👍: 0 ⏩: 1
no problem. i'm glad it helped ^^
👍: 0 ⏩: 0

Thank you! :3 I used it here: [link] , but you can't see that much of it...
👍: 0 ⏩: 0

this one helped me a lot in here [link] Thank you so much!! 
👍: 0 ⏩: 1

O____O
Wow this is so easy!
Thank you SO MUCH
I never knew how and I really needed to know for the pic I'm working on!!!
Thank you!!!!
It looks so good!
Btw here's a link to my finished pic:
[link]
👍: 0 ⏩: 1
lol No problem.XD I'm glad it helped.
the finish product looks great
 - :O")
👍: 0 ⏩: 1