HOME | DD
 BLACK-Tango — Anthro head tutorial 1
Published: 2015-11-10 16:37:19 +0000 UTC; Views: 1819; Favourites: 24; Downloads: 5
Redirect to original
Description
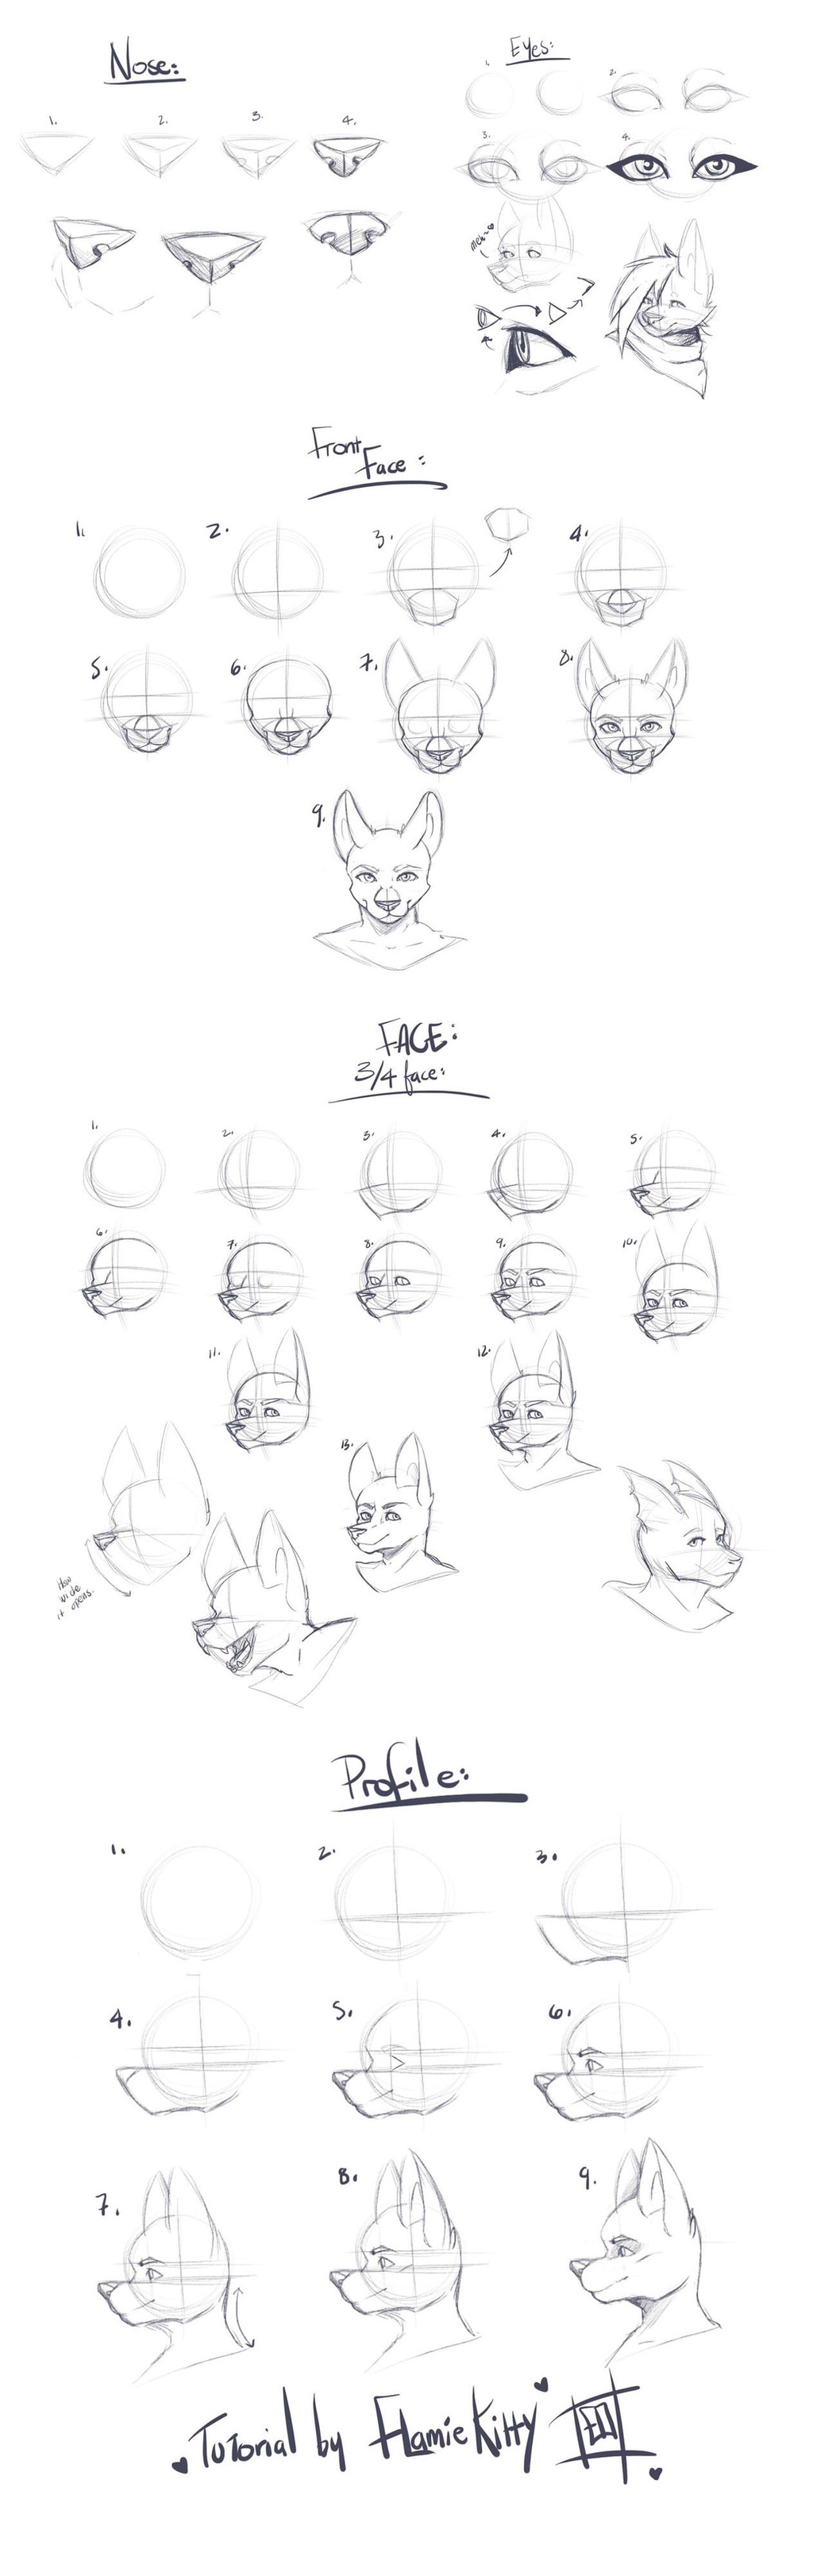
Used in GIMPstage 1 :
Open Gimp and Add new layer, (transparant or white is fine )
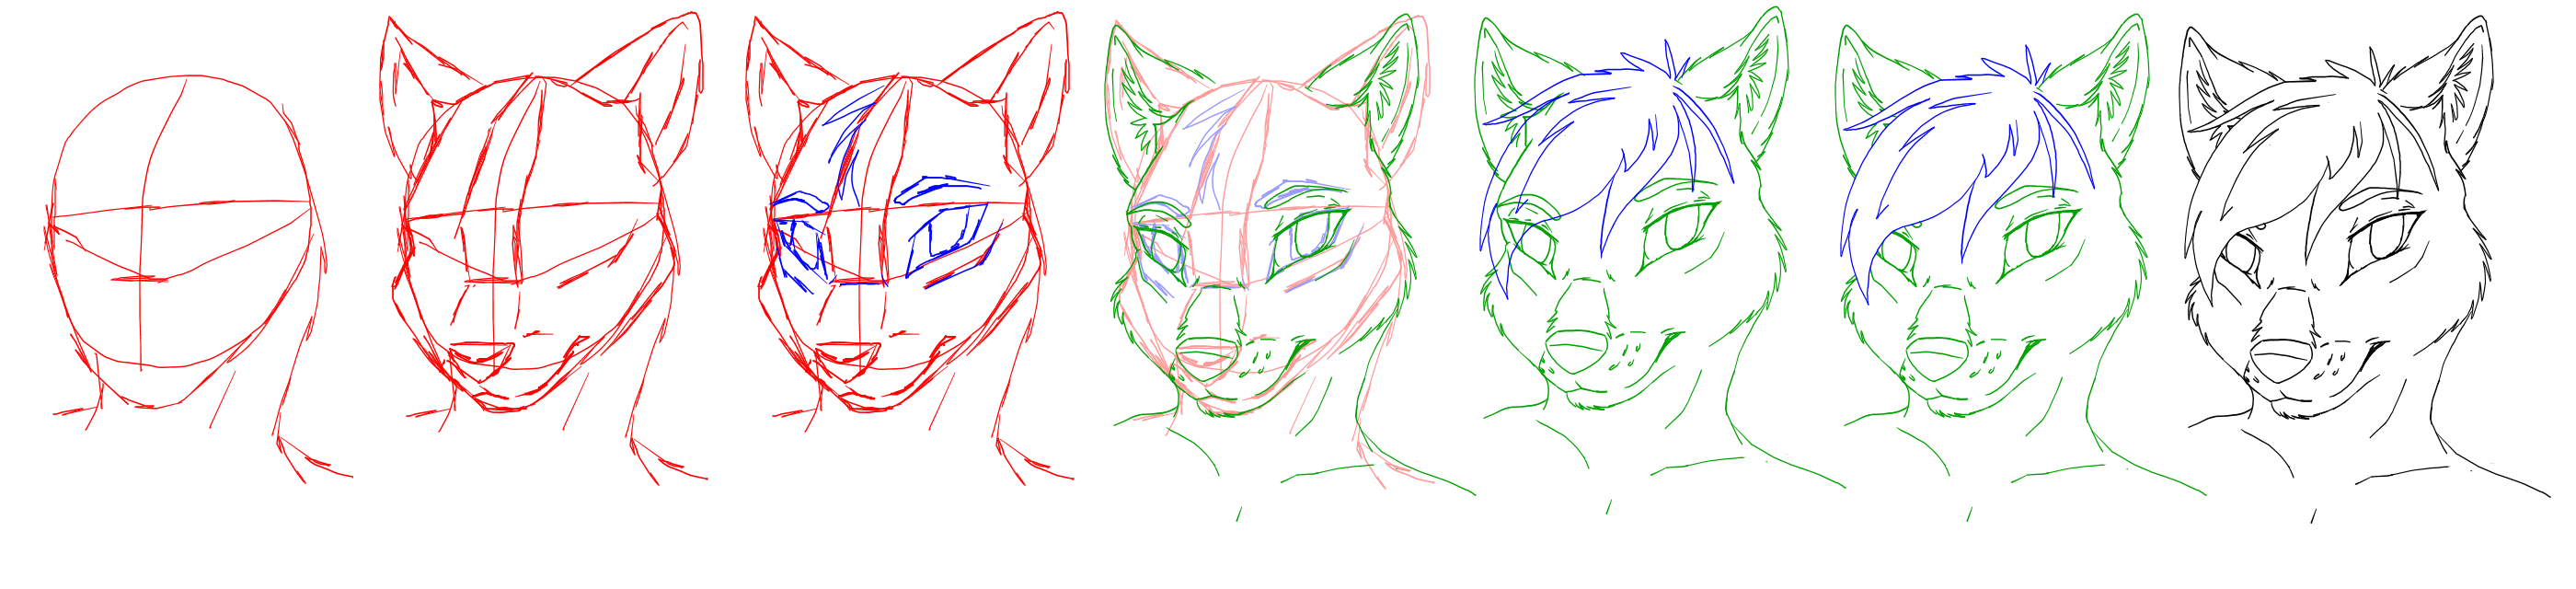
with any colour draw the base circle of the size of your head as seen above.
make sure you got your x and y points, doesnt have to be perfects its just a grid line to go by.
stage 2:
with a new Transparant layer; draw roughly the muzzle(snout, nose mouth ect) depending on the anthro animal you go for it can be a short or long muzzle, (i show a canid)
stage 3: continuing on that same layer if you wish, draw the eyes, doesnt matter if you use came colour or different, i chose a different colour because its easier to trace over than guessing. also if you make a mistake its easier to erase without messing up the lines. when your happy with the placement of the eyes, shape of muzzle ect you can merge the layers into one base layer and that will be your guide to follow.
stage 4: on a NEW TRANSPARENT layer you will begin the lineing. but best to set the opacity of your base layer to 50% or lower, depending on the colour you wish to lineart with, if you used red for the base layer then i suggest a different colour for the lineart. Follow the lines but add your own touch, i.e Fur, eye brows, a neck, shoulders. if your chosen anthrp have nicks or tears in ears then adjust your line to accompany your characters features.
Stage 5: i like to give my anthro hair styles, it give them a human like to them. of course you dont have to if you dont want to, its just my chosen preference but if you do like to add hair style then fire away with it, any style to suite your characters. When you draw hair i suggest do it on a new transparent layer, again so you dont mess up the lines and ruin the image you just spent ages on. Chose a different colour when drawing your hair.
stage 6: now you have done the hair but wait, do you want to see the eyes? i know some anthro creators show the eyes underneath but in reality when our hair covers our face we dont see our eyes do we? didnt think so. so on your lineart layer erase the bits you see through the hair (as shown above) be careful not to erase outside of the hair line though.
Stage 7: remove the Rough base layer you started with till you just have your transparent image, merge the lineart layers (ou can do this by going into Layers menue, and scroll down to *merge visible layers* )
Stage 8: obviously your line wont be a ray of colours, you need to change it to the colour you desire when colouring, most artist choose black or near black/grey. to do this go in to the colors folder, scroll down to *Brightness/contrast* set brightness to the Left and Contract to the right, you will notice your lineart is darker but not black. if you chose to go completely black then repear thus method again. but if you choose to go grey then only adjust contrast to the left. adjust brightness as you please till you are happy.
And that my friends it how to do antrho heads Other artists differ with experience, this tutorial might not suit all artists but is a basic simple method