HOME | DD
 Chellosia — Blizzard Process

Published: 2015-10-15 03:47:10 +0000 UTC; Views: 910; Favourites: 14; Downloads: 6
Redirect to original
Description
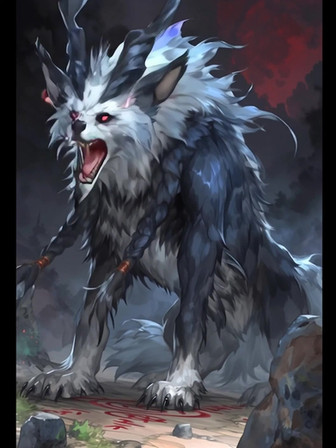
Basic Process thingy I like to do.From L-R
Picture 1: The sketch. General pose, fur direction included which is very useful! I decide to flip the picture. TIP: Always rotate your canvas horizontally to help pinpoint mistakes.
Picture 2: Background vaguely done, base colours of wolf added. Not much depth yet. This is the time to make changes. I can usually tell by this step if I like where the painting is going. Luckily this time I do, so I continue onward!
Picture 3: Blended out the wolf, started adding more details. Eyes fleshed out. After I have a base for the background, I don't really touch it until the end- I focus on the subject first.
Picture 4: Fur layer started on the face. I start with dark hairs, then fill in highlights and coloured hairs. Fur is not all one colour. Even though the wolf is technically white or grey, he still has many cream, tan, and blue tones to his fur!
Picture 5: Background work done here. Gaussian blurred background, but the left side looked a little odd and bland. I went in with a splatter brush, blending the colours a bit and adding some more highlights. I also finished the fur layer, added depth to the foreground and made an important decision- scrapped the tail. The pose looks stronger without it and it makes more sense anatomy wise. When painting, sometimes the smallest detail can make a huge impact- like his feet sinking into the snow. Little touches like that add realism (:
Picture 6: Background snow begins exactly like a real snowfall- a light, misty coverage. I add some snow to the wolf's body- he's dragging his paws through the snow, snow is landing on his back. I focus most of the snow on his toes and paws, snow would also land on his brows, nose bridge, ears and back.
Picture 7: The finished painting. More snow, some blurring a bit ( you could even do more), some saturation.
Want a more in depth description, or how I did the fur? Tutorial here: fav.me/d91fhag
Finished Painting: fav.me/d91cifq
+ Alt Version (red and cool): fav.me/d91ff1q
Partial Pose reference: fav.me/d5a1nao
Disclaimer: I am not a professional. I am not the best artist in the world, nor do I claim to be. I don't know everything, and I still have A LOT of room to improve- an endless amount really. I hope this is helpful for you guys. Feel free to ask questions~


