HOME | DD
 DanSyron — The Making of : Conference Call (step by step)
Published: 2012-12-02 09:05:42 +0000 UTC; Views: 13366; Favourites: 308; Downloads: 152
Redirect to original
Description
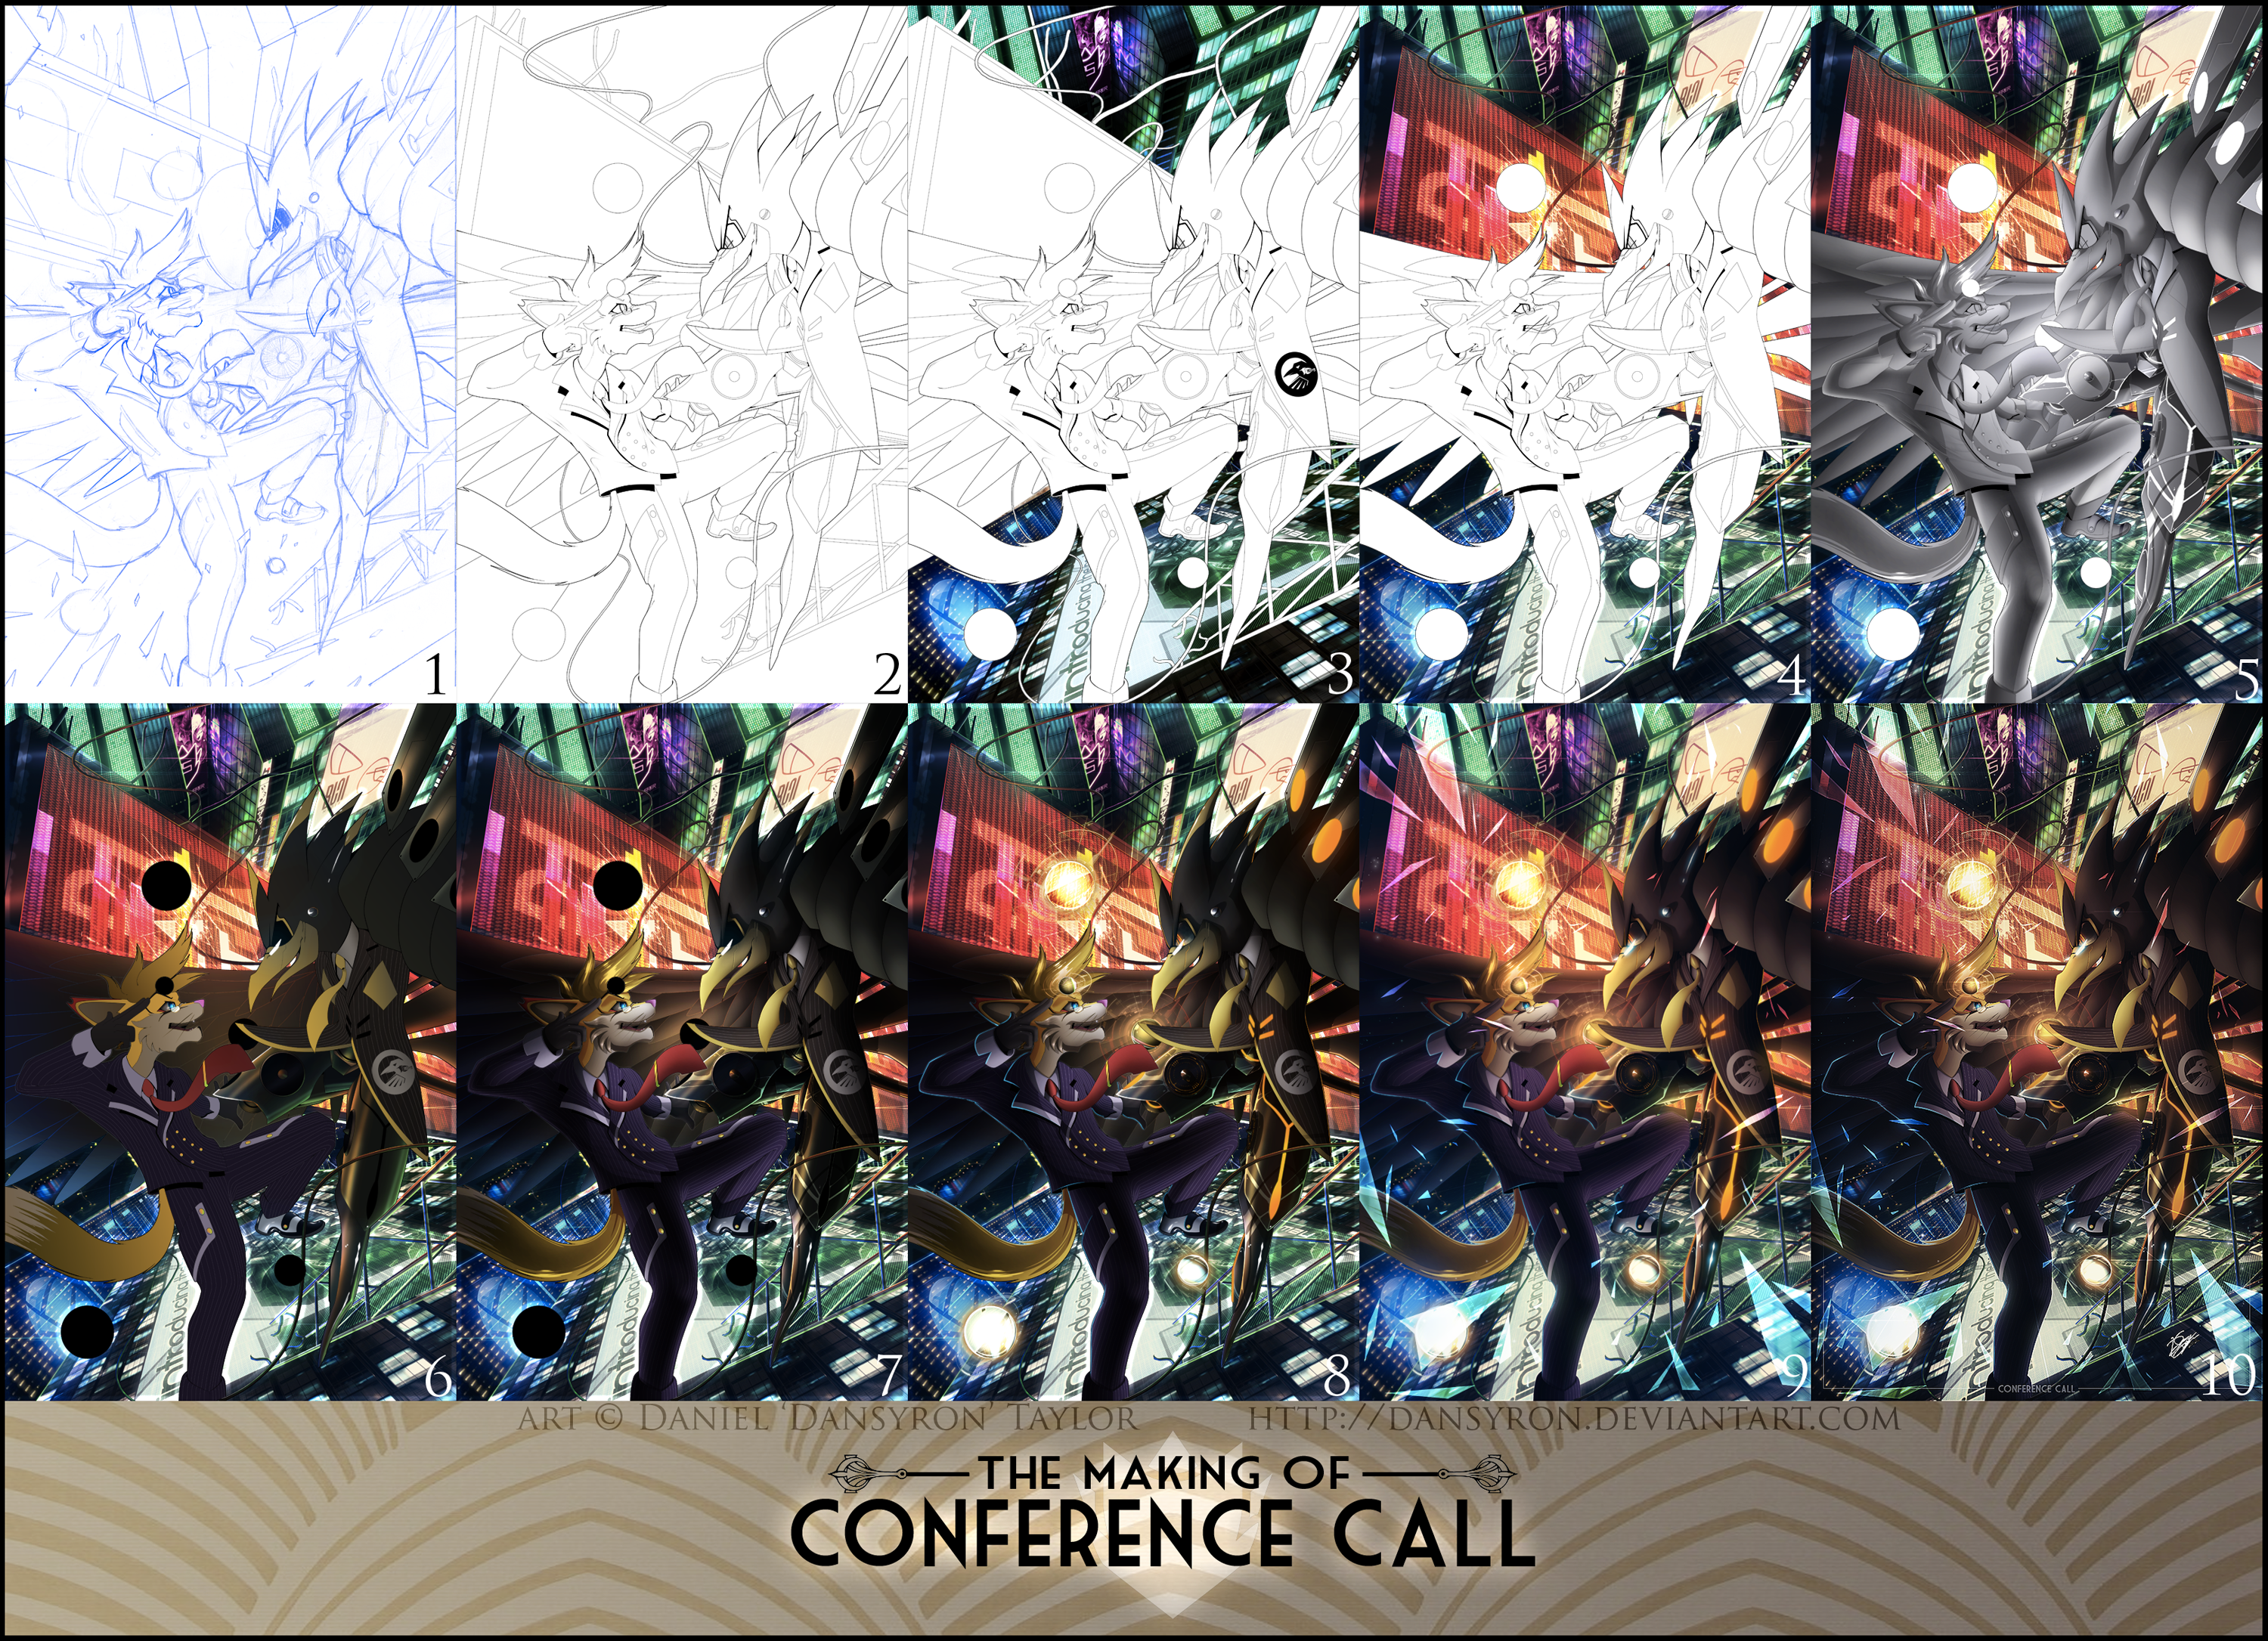
Decided that since I actually had the resources to do this, that I'd make a Step by step of how I made Conference Call:1.) sketch on 11x17 printer paper (nothing special)
2.) Lineart done with photoshop's pen tool. Unfortunately I don't and cant use paint tool SAI because i'm a mac user. Some line variation, but canvas is at 6500 px, so the size makes alot of pressure sensitivity unnecessary. Background lines are also incorporated, giving me the shape of the buildings and helping me establish the vanishing point I had set up.
3.) Further Background completed. I made a load of skyscraper textures in a separate file and brought them into the image, perspectivizing them (with the transform > perspective tool) along the buildings I set. I also add basic glows to the building and some of the billboards.
4.) Finished up with the entire background now. I added the color to the falling sign and the park on the left. Now the characters are separated from the background. The further background uses a cool color palette and the closer background uses a warm color scheme to better differentiate the two in terms of depth. Remaining billboards are added.
5.) I begin to add the multiplicity shading in greyscale under the lineart. Notice that there is a slight blue hint. this is because it works with colors better (i think). I do this because it helps me focus on accurate lighting and making sure that there is good balance. Keep in mind the primary light sources are the spheres, the building close to the characters, and the further skyscraper.
6.) I turn off the multiply colors and add the flat/semi gradient colors in. It looks funny here, but I get the proper hues this way. the metal gets an extra little reflection too.
7.) i put the color UNDER the multiplier layer and do something cool.
•first i make 3 duplicates of the multiply
•set bottom most to 100% opacity OVERLAY
•set secondary to 50% opacity OVERLAY
•set top to 45% MULTIPLY
it causes the colors to fade and pop accordingly, making a realistic light source.
8.) i refine the lighting and details slowly, adding the small little quirks in that add depth, including the gravity spheres, mathis' eye, the blue outside of faulkner's suit for the glow, the cybernetic lighting, etc. I also add the super vibrant highlights with a white and an outer glow of the light color. it adds intensity.
9.) Time for glass! i use the pen tool over the top to create glass shapes, set them to color dodge and overlay, and sharpen the image slightly, adding in the remaining rain streaks using a light opacity color dodge, I also add some back glowing that imitates how real light 'bleeds' over objects. this includes the small little flares that occur from when the human eye sees light (pretend you're driving at night and you see someone's tail lights. the little red light streaks? that's what i'm talking about.)
I also have a gradient action I made that helps get the color balance and composition to coordinate and drift together much better. It balances the piece.
10.) i collapse the image, sharpen using the smart sharpen (about .3 px and amount at 78 does the trick.) I touch it up by importing my signature and add some text and it's all done! I post a 1024px copy to the main picture and upload a 6500 px version for prints. that way I can get a poster
") .
.that's it! I know alot of people wanted to see this, so here you go! While it was one of the hardest images i've done, it was certainly one of the most fun.
_____________________
artwork © *DanSyron 2012.
Related content


Comments: 27

Let me say, How did you make a awesome grayscale shading on layer 5.
👍: 0 ⏩: 0

I tried to follow step 7 But I become confused with what is what. It would be easyer if you had a screenshot of what you are doing with the layers.
👍: 0 ⏩: 1

for layer 7, make 2 copies of the grayscale shading, the bottom one at multiply 80% and the top at overlay 50-100%, and have it so the coloring layer is normal and set to a clippingmask with the unaltered greyscale layer under it. should look like this:
Grayscale ( overlay 50-100%)
Grayscale ( multiply 80%)
Color (clipping mask - normal 100%)
grayscale (normal 100%)
👍: 0 ⏩: 1
Thanks, I will try it out and hope it works out for me. Now I just need to get the skill to draw in gray scale.
👍: 0 ⏩: 0
I have been trying to do a gray scale shadeing, and the colors never came out right. So I will try this out on one of my old works, thanks for showing this.
👍: 0 ⏩: 0


👍: 0 ⏩: 0

how did you make those skyscraper textures ? ")
👍: 0 ⏩: 1
those in particular were done by me by making a few window textures, duplicating them over a hgue area (like 4000px), and then perspectivizing them into place. Needless to say it was very lengthy and tedious
👍: 0 ⏩: 1
oh i see ....it would probably be a lot to ask but...could you make a tutorial about this ? your backgrounds are always sooooo good and it would be really helpful
 (Smile)")
👍: 0 ⏩: 0

ill never understand how people can make this that good. What tablet do you use cause all my lines come out jagged
👍: 0 ⏩: 0


Oh WOW *0* forgive me if you've already answered this, but how long did this take you?
👍: 0 ⏩: 0

There is a version of Paint Tool SAI for Mac. It just doesn't do pen pressure. Here: [link]
It is contained within a Wine wrapper, so it might need some setup, but it works well generally.
👍: 0 ⏩: 0


Huh, you color backgrounds first. Never would've have dawned on me to do that.
Does it make it easier to do a picture when you color the background first?
It's very interesting to see how other artists create pictures I gotta say
👍: 0 ⏩: 1
for me it does, because doing so gives me an idea on where the lighting is. then i can get my shading right
👍: 0 ⏩: 0

I love seeing well made W.I.P.'s, especially when the final picture's fantastic. Thanks for posting this.

👍: 0 ⏩: 0

So this smart sharpen thing.... I always saw a lot of people using it and could never really figure out what they were doing because just plain sharpen kind of makes pictures look like crap lol.. but this smart sharpen really puts it together in the end! So I'm wondering... what version of PS do you use? Is smart sharpen available in CS5?? Amazing amazing picture by the way!!
👍: 0 ⏩: 1
i use cs3, so smart sharpen i definitely available in CS5
👍: 0 ⏩: 0

This will be very useful in the future. Thanks for showing the development process |D
👍: 0 ⏩: 0

Woah, this is awesome! Thanks for showing us~
Are you going to do more like this in the future? ouo
👍: 0 ⏩: 0


This is so awesome thanks for showing us :'D
I find it kinda interesting that you sketch so big, as I've been aiming to do that, and was wondering if you ever sketched smaller then that on a piece similar to this and if it made a difference?
Oh and if you just made the background around your characters, or if you did it in full? (Sorry if that doesn't make much sense 
And jeez how many layers?
....and suddenly I'm asking alot of questions again haha;;; :D;;;
Either way this is really awesome to look at and I just kinda admire even more how much effort and care you put into your work, very nice job!! ;w;
👍: 0 ⏩: 0

You seriously got an insane eye for detail Dan.
The question for me is - how the effin' hell did you create those incredible backgrounds/billboards/skyscrapers??
I know you did the layer separate but I'm baffled on the 'how' - did you apply the same process of sketch + ink + colour? Was it 3D/computer generated?
Nevertheless great work and thanks for showing the process buddy.
Oh and one last question: It took 7 hours just on the BG but overall how many hours have been spent completing this amazing piece of artwork?
👍: 0 ⏩: 1
Bg is all 2d. Total time for this was around 28 hours
👍: 0 ⏩: 0

So when it comes to colouring, regardless of the quality level, it's always the background first followed by the characters if one wants to know how many and where the light sources are, eh? If that's the case, then I hopefully get it, sire~
Thank you very very much for sharing this with us, Dan.
 (Wink)")
👍: 0 ⏩: 1
exactly! the environment determines the lighting, which then i use to color.
👍: 0 ⏩: 0