HOME | DD
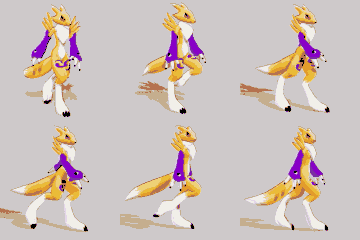
 DigimonReach — How to draw a furstyle Renamon

Published: 2011-09-26 23:39:43 +0000 UTC; Views: 4194; Favourites: 55; Downloads: 105
Redirect to original
Description
Step by step guide. Allow 30mins to an hour for making it depending on your style and detail.Step 1: Take your picture or sketch a picture and color it in ready for the effects.
Step 2: Use the brush tool, set the opacity to 40 and using a black circle brush with faded edges shade it in more.
Step 3: Make a new Photoshop page and it MUST be 10 by 10 pixels on a transparent background. Then take the Pencil tool and scatter around some random squares.
Once you have done that click Edit, then Define Brush Preset.
Step 4: With your new brush go to Dodge and Burn, set it to mid-tones and go over the fur. This gives us the hairs.
Step 5: Now use the smudge tool with your new brush and smudge the fur together. [Make sure to smudge with the flow of the fur]
Step 6: Detail using a soft light brush on the eyes and more shading. Use a normal brush for the claws and a smudge for the gauntlets if you are using a screenshot.
Step 7: Now just add your background, lighting and shadows to get the full effect.
Hope this helps, sorry that it was a rather crap picture but thats because I was using small pictures instead of one big one.
Here is a Tutorial video to watch [link]
Here is a video of me applying the idea to a screenshot [link]
Related content
Comments: 7

Really cool. looks like she wet and some1 used a blow dryer lol
👍: 0 ⏩: 1

That was a slight mistake. When you do it for yourself it should be a much larger picture
👍: 0 ⏩: 1

oh no theres nothing wrong with it
I just said that because she gets fluffier by each step
👍: 0 ⏩: 1

she gets fluffier by each step
👍: 0 ⏩: 1


