HOME | DD
 DudQuitter — Basic Cinema 4D Texturing
Published: 2010-09-06 21:19:39 +0000 UTC; Views: 14156; Favourites: 89; Downloads: 586
Redirect to original
Description
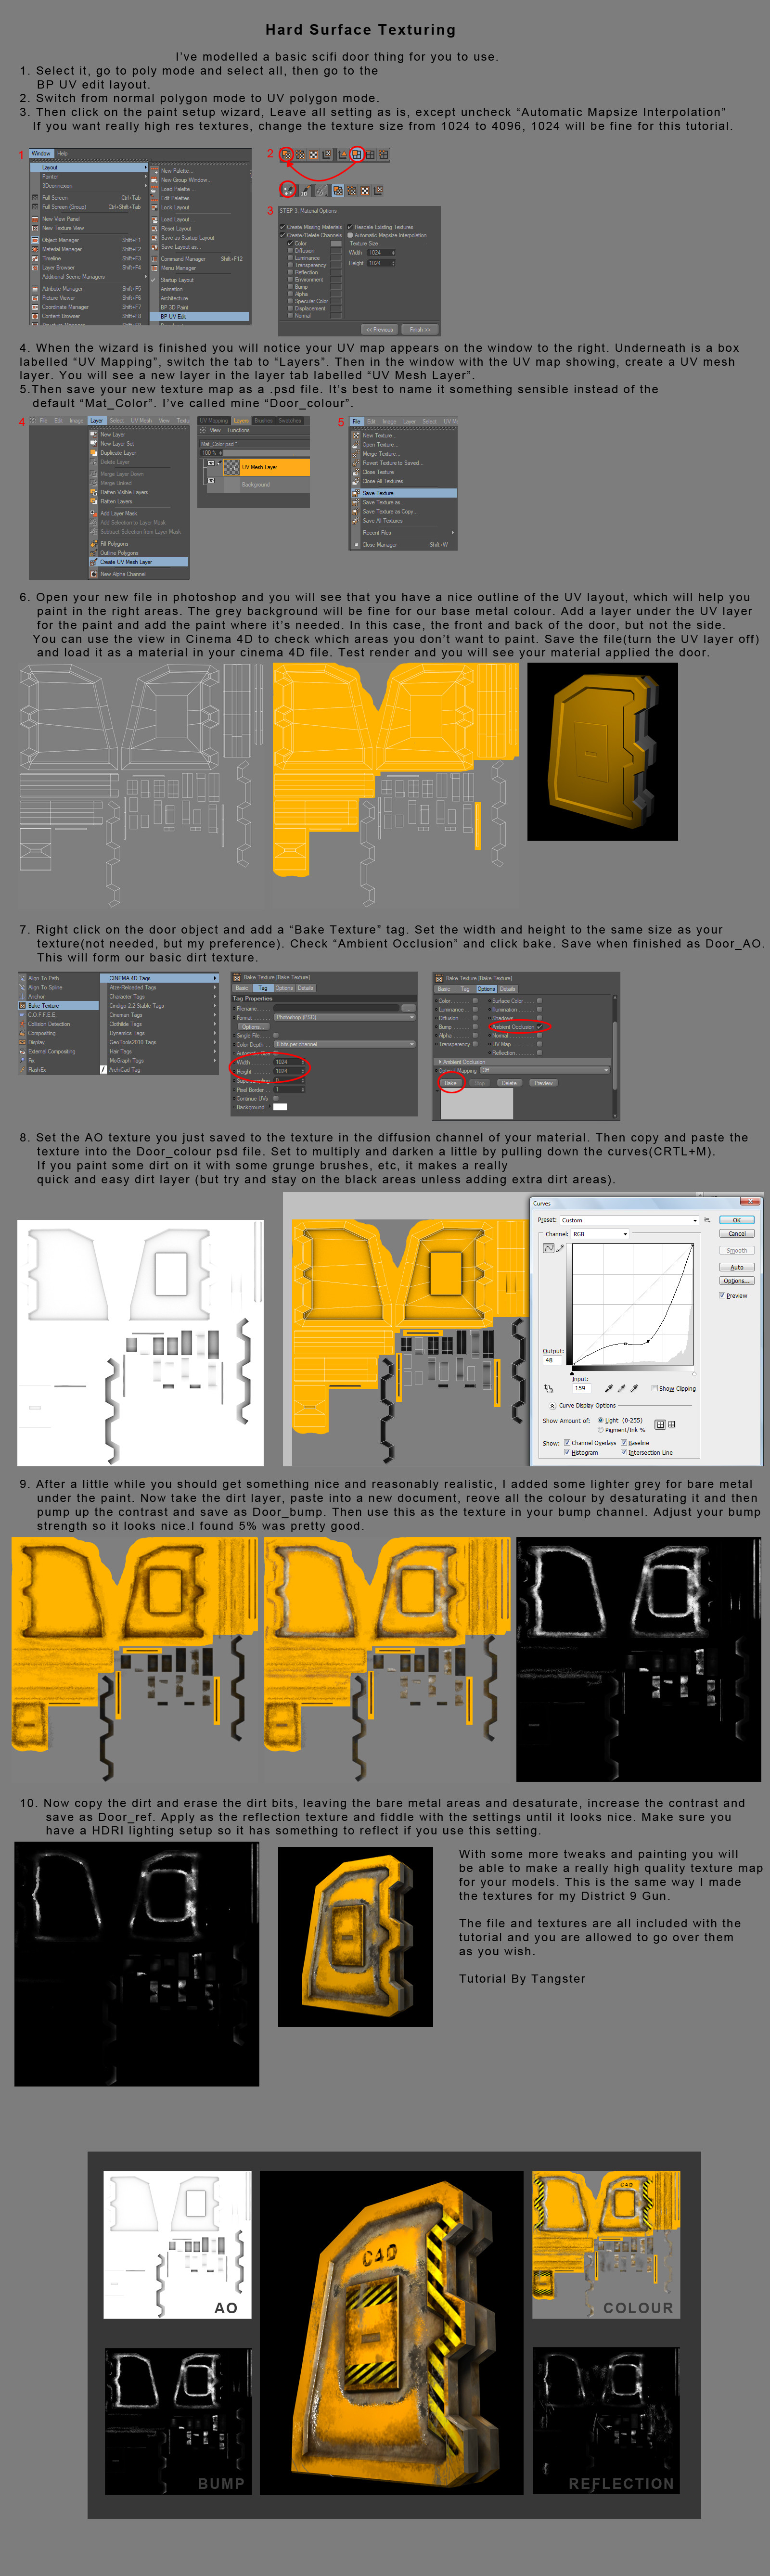
I don't go through the fancy bits of UV mapping in this tutorial(i.e. different projections, relaxing the UV's, changing the UV mesh to prevent texture stretching...etc)Just a rough and ready method of getting some UV'ed textures onto your model.
Aside from those aforementioned UV tweaks this method is very similar to my texturing method for the D9 Assault Rifle(although that uses several 4096px textures, compared to the single 1024px texture in the tutorial).
Cinema 4D r11.5, AR3 (although any version of Cinema 4D with Bodypaint will do, since Maxon haven't updated it recently)
Related content


Comments: 18


Nice job writing this tutorial; precise and simple to follow.
Texturing is certainly the final polish required for making that perfect model look realistic.
Nice work.
👍: 0 ⏩: 0


Thanks. I didn't want anyone to think the tutorial was a full UV'ing tutorial, just a rough and ready texture mapping tutorial.
 (Smile)")
👍: 0 ⏩: 0

Never completely got into Bodypaint, I think I will soon.
Thanks for the share :3
👍: 0 ⏩: 1
Yeah, I tried it failed, left it for 6 months or so then tried again after getting 3Dkiwi's bodypaint DVD
👍: 0 ⏩: 1
BP is not an easy theme, I guess...
Thanks again for the tut.
Speaking of 3DKiwi - I still need to register on C4D café...
👍: 0 ⏩: 0

My pleasure.*bows*
👍: 0 ⏩: 0

excuse my bad english , your tuto is correct but prefer Bodypaint 3d it's better, you can import yous photoshop filters if you will: click edit , preferences ,bodypaint 3d,bitmap filter use photoshop filters and write the acces, you can import yours ABR brushs too in the file C:\program files\Maxon\Cinema 4d r11.5\library\browser
you should've done a UV unfolding in one piece, because it is much easier to handle (imagine if you have 3000 polygons ...), it helps to have some connections textures mostly.... Bodypaint 3d is much more precise than photoshop and equally powerful...
👍: 0 ⏩: 2

Hey mate.. can you or dudquitter or anybody else explain me how to uv onfold this in 1 piece.. Like reflection diffuse color etc maps in one piece.. Thanks..
And how do you enter the bodypaint.. Bodypaint sounds interesting too.
👍: 0 ⏩: 0
I used Bodypaint, it's a standard feature part of Cinema 4D. I just don't like painting in Bodypaint.
👍: 0 ⏩: 0
this was exactly what i needed. ")

👍: 0 ⏩: 0