HOME | DD
 HiTechArtist — The Making of Six Part 2

Published: 2008-08-26 17:59:52 +0000 UTC; Views: 733; Favourites: 3; Downloads: 34
Redirect to original
Description
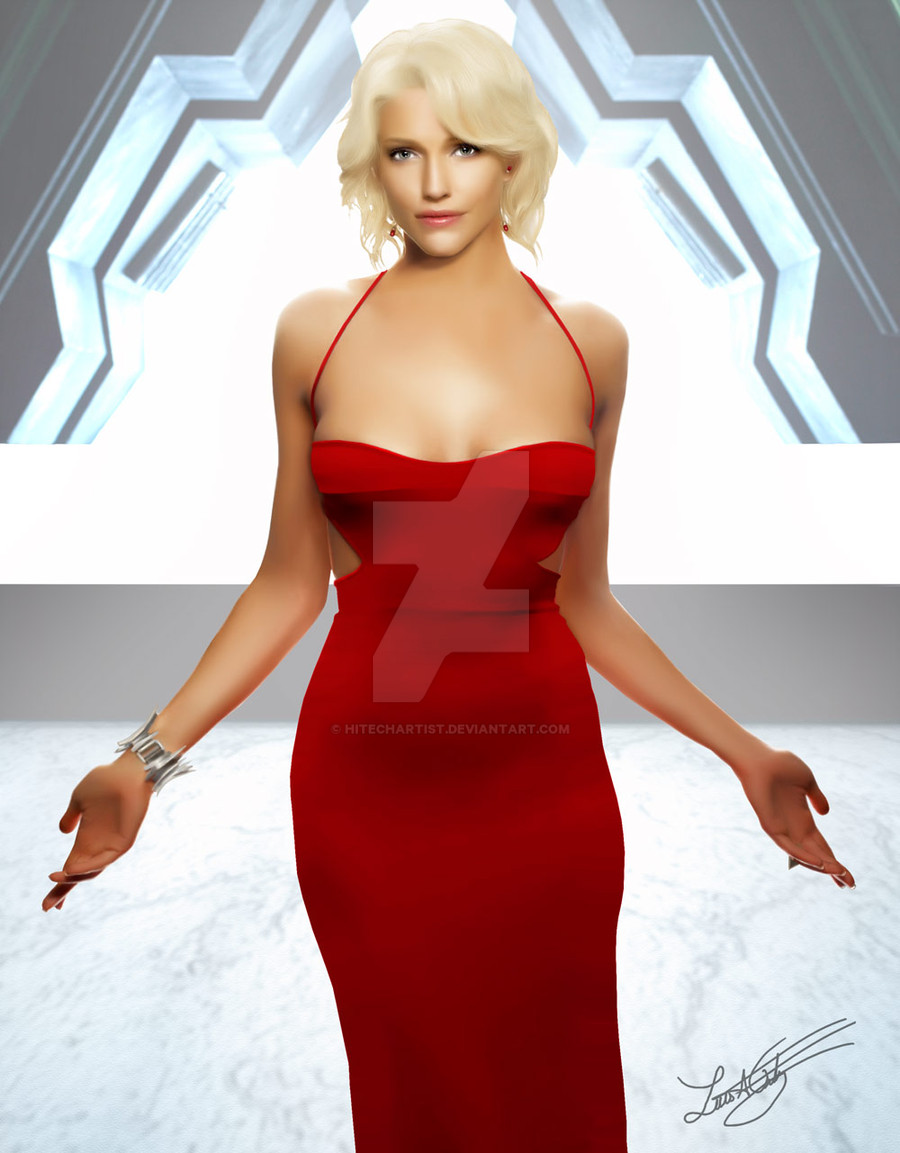
Step 1. Continuing from [link]Step 2. I decided I wanted her lighter, so I adjusted the brightness and contrast on the Skin Layer. I also worked on the dress details using dodge and burn as well as blur on the dress layer.
Step 3. I started working on the upper part of the background, again a separate layer. the texture is merely some blue and white scribbles I used blur on.
Step 4. I created a new layer for the bottom part of the background, and filled it with solid colors. I then laid down some random brushstrokes, making sure I did it a branching pattern, and again a ran the blur brush over it. Once i was happy with the marble pattern, I then distorted it to give it perspective. Finally, I merged the two layers
Step 5. I then used a large dodge brush at 25% opacity to lighten the background layer, behind Six.
Step 6. I dropped the opacity of the background layer to around 50% and brightened the dress layer.
Step 7. I deselected the background sketch layer so it wasn't visible. Created a new layer between Six and the background and painted behind her in white to simulate light pouring in behind her, I then dropped its opacity, rendering it transparent.
Step 8. Finally I deselected Six's sketch layer, leaving me with the finished piece.