HOME | DD
 iPhotoTutorials — Edited

Published: 2008-05-20 19:12:44 +0000 UTC; Views: 669; Favourites: 1; Downloads: 26
Redirect to original
Description
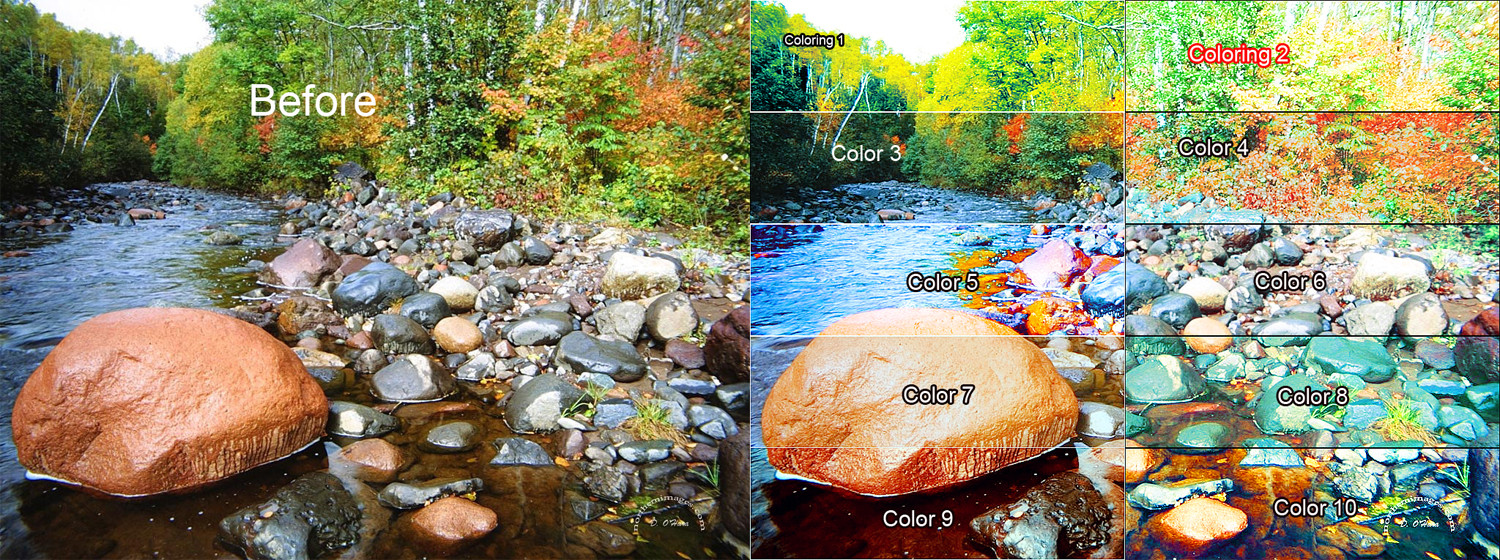
lets go ahead and edit this version of the photo to see what we can do to make it look better.Unless otherwise stated the path to the function I am using is in Image-Adjustments
I am going to start off with the levels, first I am going to click auto and see what they suggest. They didn’t suggest much of a change, so I went ahead and dragged the far left stop more towards the middle this will darken the lows, I also moved the middle marker more towards the right as well.
I am going to skip over the curves as I feel that with this particular shot it will not help us all that much.
We are at brightness/contrast now, I moved the brightness down to -11, to darken up the sky a little and jumped the contrast up to +18 to bring out the colors a little stronger, already we are looking at a better photo.
Now for the biggest change we are going to make, we go to Shadows and Highlights for some serious changes. We are going to keep the shadows where they are with this shot, and drag the highlights up some you can see in the preview how it its bringing out the sky a good bit, and it is making the grass look greener. To further this effect we are going to up the color correction a bit. Remember when doing these adjustments to photos not to overdo them, because you can really ruin a photo. I used about 35% Highlight adjustment and +44 midtone contrast as well as +44 Color correction.
As you can see here, our final shot is greatly improved from the original, but don’t you wonder if you could have done this without all of these editing steps? Well really it is not that hard, it just may take a few more minutes while shooting the photo, set your camera properly, think all of these things through before pressing down on the shutter. Go to the next photo for more information on how to do this.