HOME | DD
 JemDragon — Simple Hand Tutorial

Published: 2011-01-15 09:46:37 +0000 UTC; Views: 2285; Favourites: 22; Downloads: 7
Redirect to original
Description
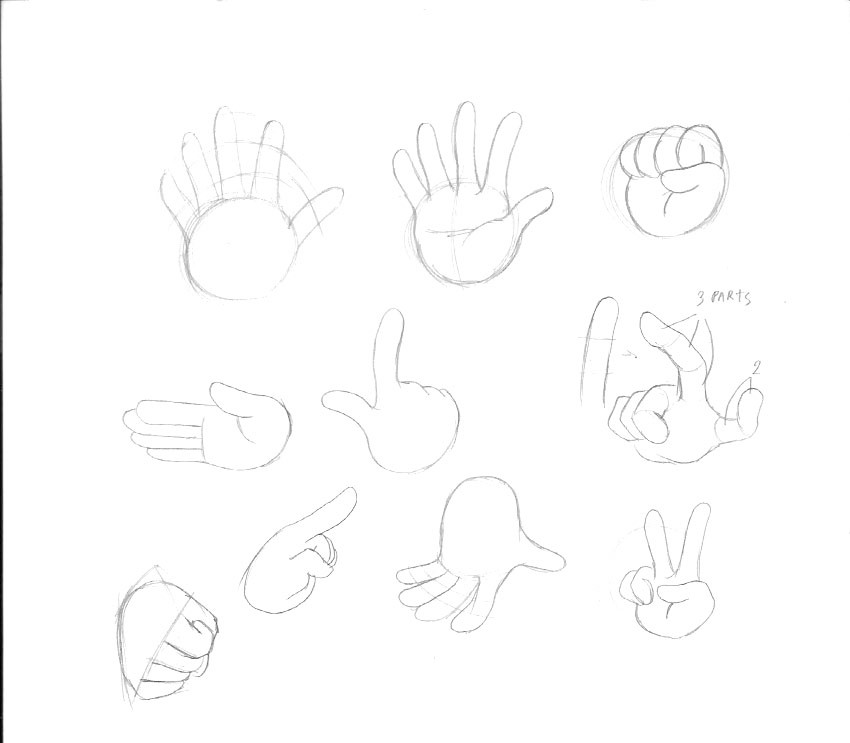
So this is a simple hand tutorial on how I draw my hands on pen and paper drawings. I did it on illustrator instead of a pencil because I lost my pencil. Red lines are the lines you draw in that step. Gray lines are lines that will eventually be erased. Black lines are lines that will make up the final hand.This is a very simple hand. Its not doing any poses or anything. If you'd like your hand to do poses, use steps 1-3 as a frame work to begin your hand. Use the small circles in step 3 as a way to see where the knuckles are.
Step 1:
Draw a circle. This will basically be were the wrist is.
Step 2:
Draw a rounded/lopsided triangle. The bottom point is basically in the circle from step one (this is not shown in the picture). The highest point on the triangle, or the point furthest away from the "wrist" is where the index finger will be. The angle closer to the "wrist" but not in the "wrist" will be where the pinky will be.
Step 3:
Draw 4 circles on the side of the triangle that is not touching the wrist, and 1 small circle in the middle of the side of the triangle where the point furthest away from the triangle meets that side. These 5 circles will be the knuckles for your fingers.
Step 4:
Draw tangent lines, using the 5 small circles, to mark were each finger will be. These lines will further help guide you in how to place and draw fingers.
Step 5:
Using the guide lines from step 4, draw each finger. Draw the palm of the hand as well.
Step 6:
Using the circle for the wrist as a guidance, draw two lines that curve slightly in opposite directions to form the wrist and the beginnings of the lower arm.
Step 7:
Erase (or delete) the guide lines and anything marked in gray in the tutorial.
Ta-da you drew a hand!
Also, I know the hand I drew looks bad. Its not so easy to draw with a broken mouse
")