HOME | DD
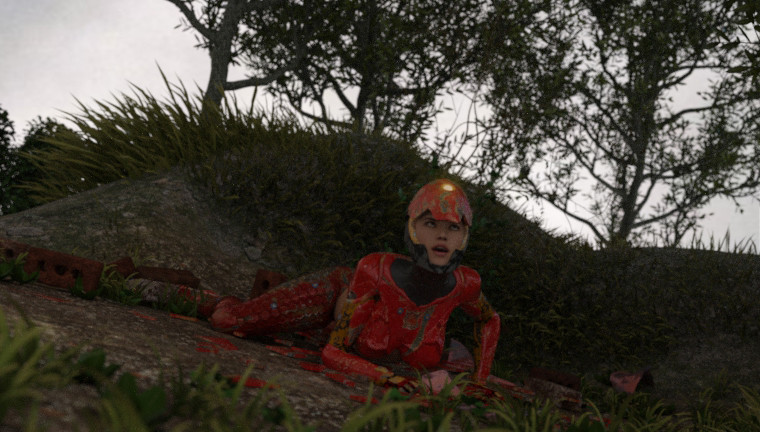
 JerryHacker — IronMaiden: Crash landed
#bot #broken #crash #genesis #hud #iray #ironmaiden #ironman #landing #machine #threat #jerryhacker #hackerrenders #impaintjob
Published: 2015-11-07 12:23:59 +0000 UTC; Views: 1727; Favourites: 6; Downloads: 0
Redirect to original
Related content


Comments: 11


its a bit of dull atmosphere plus it takes less time to get this realistic
effect with IRAY the full wallpaper version is bit different and foggy looking.
sta.sh/01toi2o9q8i9
👍: 0 ⏩: 0

I'm with this guy, a little more light might be good on this one. Looks great otherwise!
👍: 0 ⏩: 0
its one of my best renders so far i'm working on a full res wallpaper now
👍: 0 ⏩: 1

I am sure it will look great.
If you render it in a larger format you should brighten it up a bit.
👍: 0 ⏩: 1
well all these scene are set in an dull rainy/cloudy day so it may be a bit dull like this one
sta.sh/01toi2o9q8i9
👍: 0 ⏩: 1
about 3 minutes postwork in Photoshop
sta.sh/02yo7ceogqb
What do you think?
👍: 0 ⏩: 1
dude this is f***ing amazing,you gotta tell me how you add that effect
oh i used the dull settings to go with the foggy atmosphere but the face light you added
is awesome and maybe lest brightness on the armor though,you know to get a more realistic
look thats why i didn't bother with much post works but i was wrong about the face.you
gotta tell me from one jerry to another we could make one hell of a team
this is what i had in mind:
sta.sh/0afzjmhobt2
👍: 0 ⏩: 1
LOL
I am glad you like it.
The concept is pretty easy. If you have a dark render you can not find a focus point in the picture.
So when you create a picture you know what the person should look at.
ow you have to ways to draw attention - light it up or blur the rest around it.
As the environment was already foggy, lighting up is the way to go.
I increased the exposure to the point that I liked the face. The rest of the picture, especially the background became overexposed.
Next I layered the new overexposed picture on top of you render and painted in a rough mask. => mixed both renders.
Lastly I added a filter from Nik Tools (Photoshop plugin)
You should use postwork for every render, at least try Exposure.
If you need my help, do not worry send me a PM.
👍: 0 ⏩: 1