HOME | DD
 JMan-3H — Blackbolt tutorial by Jason
Published: 2008-11-01 22:20:43 +0000 UTC; Views: 2227; Favourites: 28; Downloads: 0
Redirect to original
Description
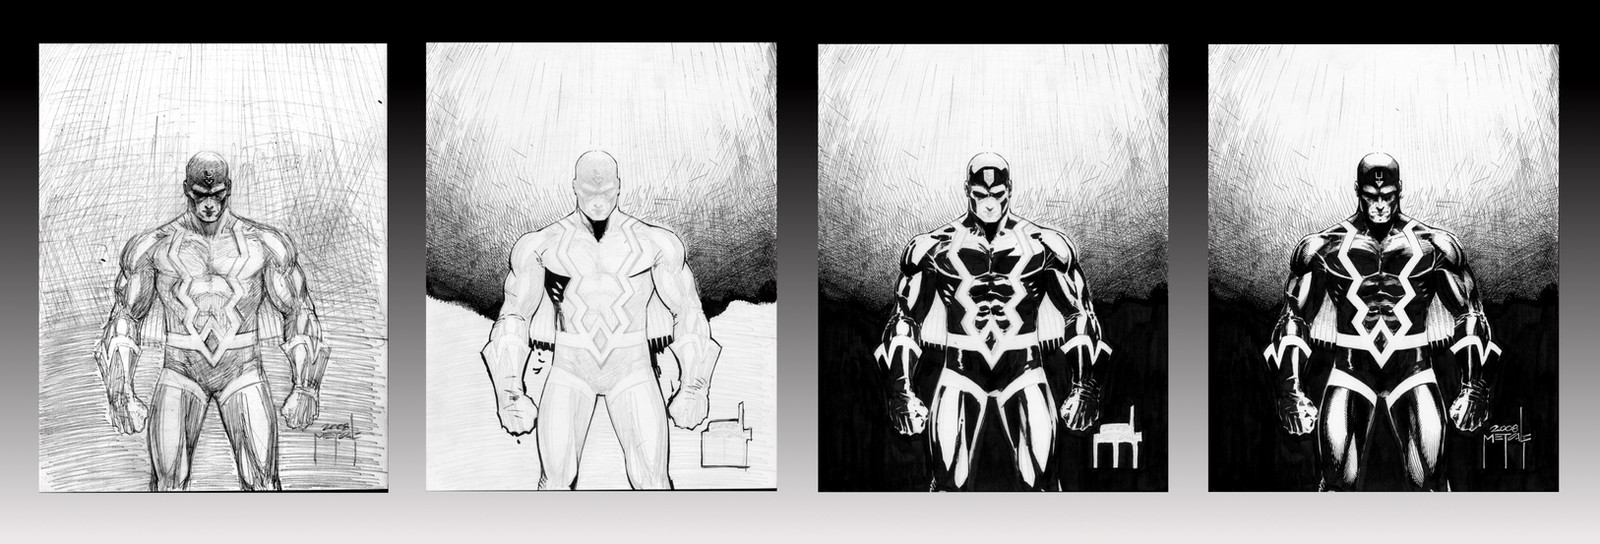
Here's a progression shot of the Blackbolt piece.Step 1 - pencil sketch
Step 2 - ink backgrounds, then ink figure outline(s) and foreground outline(s). I ink backgrounds first, very lightly, because it's easier then to do the foreground at the proper line weights to '
 op' the image.
Step 3 - blacks - dropped in with a brush. At this stage I'm interested in defining the lightsource and shadows on the figure(s) - really exploratory here, letting the form and shapes guide the light decisions.
Step 4 - linework detail - I do this with a crowquill, Hunts 102 or 107, working the fades from black to white on the lightsource-side of the forms.
Related content


Comments: 9

")


This is definitely exquisite work, remarkable indeed!
👍: 0 ⏩: 1

Very cool tutorial, especially for those of us with no artistic talent.
👍: 0 ⏩: 1
Meaning, since I don't have the talent for inking, It is nice to see the process step by step.
👍: 0 ⏩: 1

Ah, well, glad to shed some light then
 (Wink)")
👍: 0 ⏩: 0