HOME | DD
 keyokku —
Tutorial: How I Render Gold/Shiny/Metal Character
keyokku —
Tutorial: How I Render Gold/Shiny/Metal Character

#anime #animestyle #coloring #digitalart #digitalpainting #drawingtutorial #rendering #stepbystep #tutorial #drawingsteps #tutorialdrawing #tutorialhowto #vtuber
Published: 2022-11-09 04:15:57 +0000 UTC; Views: 665678; Favourites: 301; Downloads: 28
Redirect to original
Description
Hi! Thank you for all the love on my art! I wanted to share quick tips on how I render shiny objects/outfits. I LOVE coloring shiny things and you'll see it in my work.How I do it personally, suggestions, not rules! SUPER EZ and FUN!
------
1. Start with a base gold
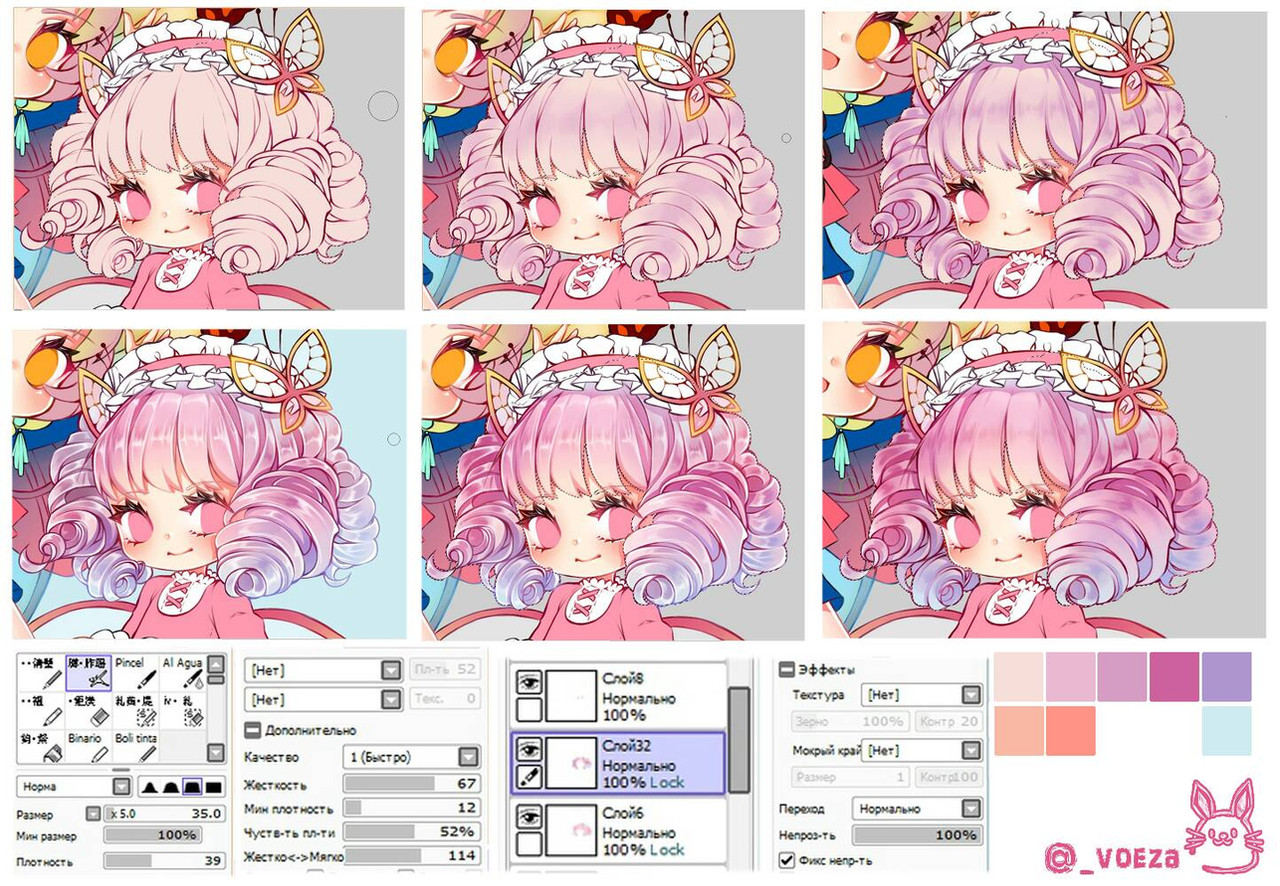
btw, I will be using a default basic Watery brush throughout the process, it is soft and with light pressure, it has wet mix/smearing effects. Below that, are the layers at the end:
- Highlights Add Glow (clipped)
- Dark Shadow Accent Multiple (clipped)
- Mid Shadow Normal (clipped)
- Tuning Gradient Normal(clipped)
Base
------
2. New normal clipped layer. I rough in mid tone shadow.
A. Note shape of object The edges of the thighs will curve inward and natural shadows there.
B. Due to reflective material, “diffuse” light will be pronounced on edges so leave the outermost edges lighter as necessary
C. Add “random” additional shadows: highly reflective material may appear to randomly have darker spots from whatever is around the area
I try to build it up but at this stage you can feel free to press harder and make more solid mid tone shadows
------
3. Add an “add (glow)” layer and use simple white or off white.
Of course add highlights where it belongs for the light source.
Use very gentle strokes and build it up
Don’t forget to add some additional reflection in “random” spots, that contrast the shadow spots. Highly reflective material will catch a lot of light at many angles and has many points of reflection
Try to follow the direction of the material with smaller brush strokes (in this case, horizontal) for texture
------
4. New multiply layer for a darker, red/bronze shadow
Sharpen and emphasize the shadows with touches of narrow dark accented shadows and reflections. This can reflect color from the environment, so adapt to your color scheme
But I think the reddish bronze is a good default.
Of course use directional strokes to build up texture.
------
5. Under all these clipping layers, new layer for overall gradient tuning
Using a soft airbrush, I might choose to go over some parts to darken or lighten and create a gradient to emphasize proper general lighting. Lower on her leg is darker and farther from light source, so slightly reducing the brightness and dulling that area helps
------
Apply these concepts to more complicated shapes
Tip 1: Don’t be afraid to trial and error until it looks right. Build it up
Tip 2: Don’t be afraid to be RANDOM, highly reflective material will look random.
Tip 3: And ORGANIC, so don’t put uniformly spaced shadows and light
Tip 4: Follow the form and shape of the object of course, sharp edges will have a sharper reflection, but even softer surfaces will still reflect sharply if there are strong light sources, so be a bit bolder and define some of the light and shadow lines
Tip 5: After doing all the light, shadow and reflection, reevaluate overall lighting condition and make use of the bottom gradient layer to refine. Note the crown has white gradient to lighten up the middle and dark gradient on the sides.
Hope this helps!
Related content


Comments: 5

👍: 0 ⏩: 0

👍: 0 ⏩: 0

👍: 0 ⏩: 0

👍: 0 ⏩: 0

👍: 0 ⏩: 0