HOME | DD
 Kyttias — SAI Tutorial - How To Make a Border Effect
#guide #sai #tutorial #painttoolsai
Published: 2015-12-15 12:40:52 +0000 UTC; Views: 17438; Favourites: 197; Downloads: 50
Redirect to original
Description
Below is a transcript of the above!
-
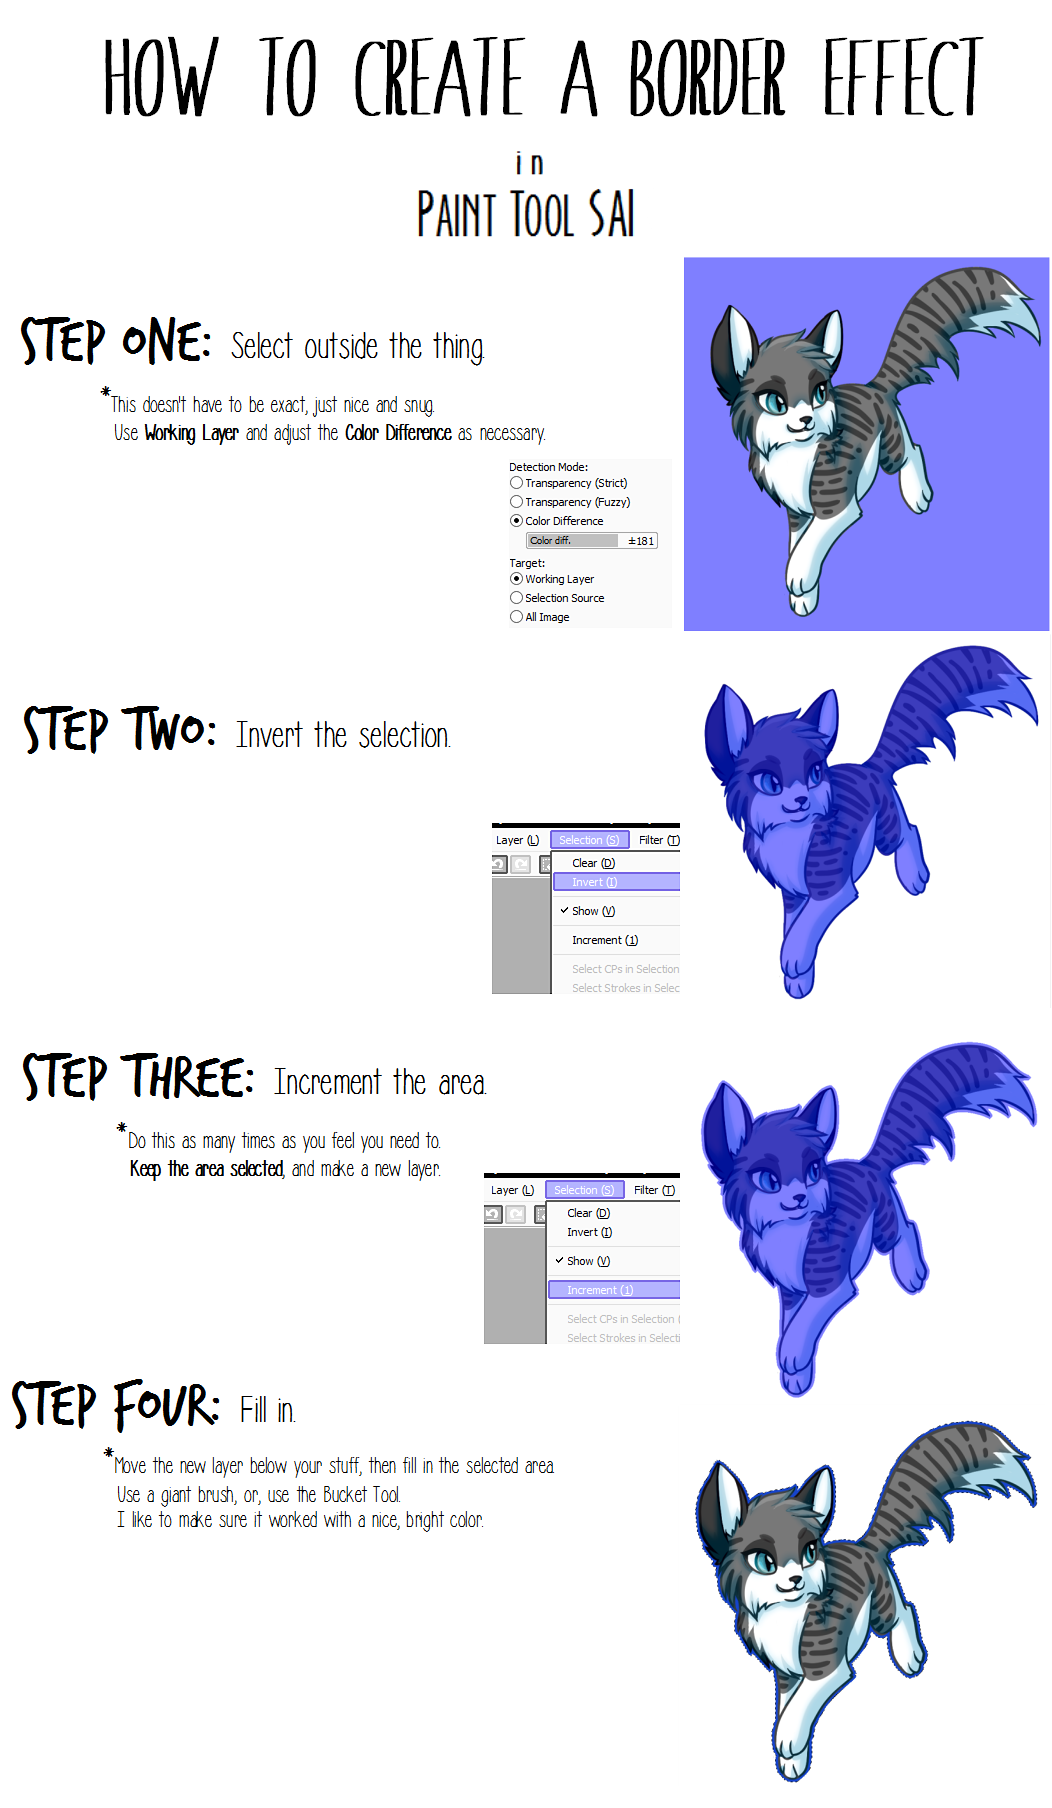
How To Border Effect
in
Paint Tool SAI
Step One: Select outside the thing.
*This doesn't have to be exact, just nice and snug.
Use Working Layer and adjust the Color Difference as necessary.
Step Two: Invert the selection.
Step Three: Increment the area.
*Do this as many times as you feel you need to.
Keep the area selected, and make a new layer.
Step FOUR: Fill in.
*Move the new layer below your stuff, then fill in the selected area.
Use a giant brush, or, use the Bucket Tool.
I like to make sure it worked with a nice, bright color.
Related content


Comments: 14


I've seen this method a billion times yet for some reason my selection creates jagged lines, like so.
I want smooth outlines, not pixely outlines. How do I fix this? I've seen people use the blur tool to fix it but I also see some people who don't even have jagged edges and therefore don't need the blur tool. Very confusing.
👍: 0 ⏩: 1

I would definitely try making sure that "Anti-aliasing" is checked on when using the selection wand. Without it checked, it will produce sharper outlines when inverted (which might be good for pixel art, but agreeably, not for normal art).
👍: 1 ⏩: 2

👍: 0 ⏩: 0
Unfortunately it is checked.
👍: 0 ⏩: 0

Have'nt tried yet, but seems good. Thank You! <3 XO
👍: 0 ⏩: 0


I love these tutorials and I thank you for making them, but I can't get the border to work right. Idk what I'm doing wrong. Everything worked fine, but the border color is coloring on the art too.
👍: 0 ⏩: 1
While the selection still exists, but before you go to color it in, create a new layer beneath your art and fill in the selection there. I hope that helps explain things a bit clearer?
👍: 0 ⏩: 1
When I do that, the color doesn't show up unless I put the work on 'multiply' or something like.
👍: 0 ⏩: 0

Aww finally this tutorial really help me.. i've been so long try to find tutorial like this.. th nk you so much ^^
👍: 0 ⏩: 0