HOME | DD
 Lennachan — Steins Gate: Hacking to the Gate
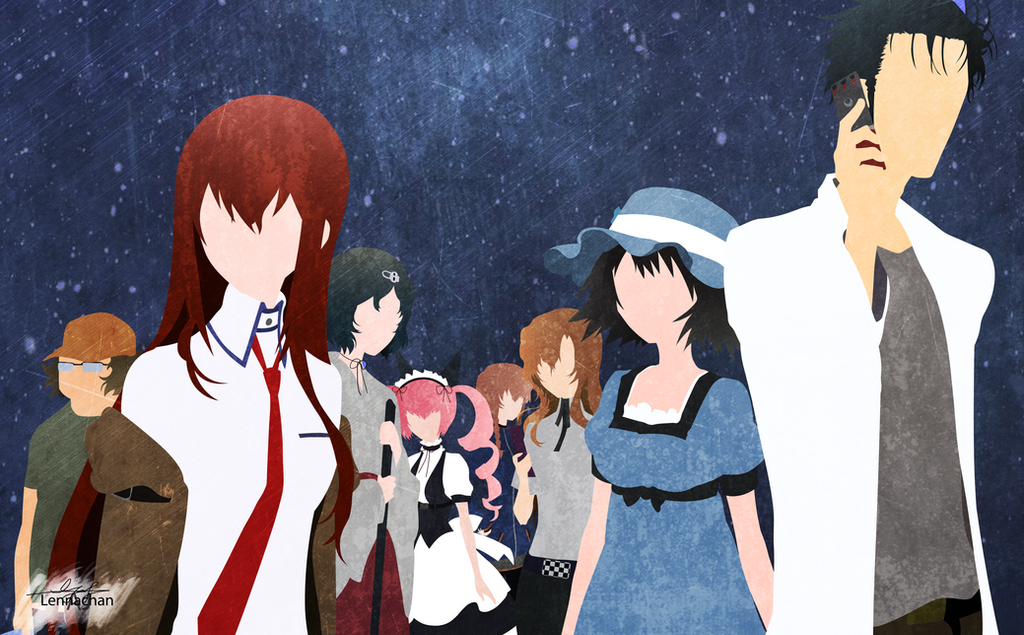
#blue #group #grunge #metaltexture #minimalist #vector #wallpaper #steinsgate #makisekurisu #okarin #amanesuzuha #shiinamayuri #okaberintarou #urushibararuka #hashidaitaru #kiryuumoeka #akiharumiho
Published: 2016-05-20 14:02:34 +0000 UTC; Views: 2587; Favourites: 29; Downloads: 109
Redirect to original
Description
This is one of the reasons I love anime.When it comes to 'Time and Space' I get really hooked in it, plus the art is reaally awesome; simple yet scientific(?).
*I do not own the reference image*
The reference image was from this link here: i.kinja-img.com/gawker-media/i…
The metal textures were from these links here: bgfons.com/upload/iron_texture… , www.texturesforest.com/wp-cont…
The grunge background was from this link here: i.ytimg.com/vi/hFjOiAkN8ew/max…
The chessboard design was from this link here: upload.wikimedia.org/wikipedia…
The overlays were done using Adobe Photoshop CC
The whole vector image was done using Adobe Illustrator CC
Related content


Comments: 6

Jesus christ this is pretty af. Where do you usually get textures in high-res? I'd love to try something like this out myself.
👍: 0 ⏩: 1

Thanks, I appreciate it!
For the textures... I just basically search it via google. For example, I just simply search "metal textures". Afterwards, I just find the image that is suitable, then that's just it.
I use Adobe Photoshop to kinda 'overlay' the textures.
 (Smile)")
👍: 0 ⏩: 1
I only work in Illustrator for now but I've been interested in how the 2 programs can work with each other tho. Do you perhaps have a tutorial somewhere on overlaying textures?
👍: 0 ⏩: 1
Well, I just did an experiment...
These are the steps on how I do it:
1) After you finish making your vector image, export and save as PNG file so it would be kinda high quality.
2) Open your Adobe Photoshop and click on the magic wand thing.
3) If you want to select a lot and miss some parts, hold Shift while clicking with the magic wand. Hold Control and click the wand if you want to deselect.
4) If you want the whole image to me 'overlayed' simple create another layer.
5) On the right portion of Photoshop, you can see a "Normal" with a dropdown menu button. Click on it, then change to overlay.
6) Search your texture via google and google images, then click on it. Afterwards, click and hold on the image, then drag it onto your Photoshop file, thus creating another layer.
7) After you have selected what you want to have a texture, press Ctrl+J.
8) Resize your texture image (either you want it small or large enough to fit your selections).
9) On the right portion of Photoshop, make sure that the "Layer" texture is above the newly created Layer after you've pressed Ctrl+J.
10) Right click on the texture Layer on the right portion of Photoshop and click "Make Clipping Mask"
👍: 0 ⏩: 1
...here I was expexcting a link and you just took the effort to actually write out your own. Thanks, I'll try it out on one of my completed works.
👍: 0 ⏩: 1
Haha, no prob. I just experimented on overlays that's why I am not prepared about sending out links, sorry.
(|| ^ ^)V
👍: 0 ⏩: 0