HOME | DD
 LornaKelleherArt — A New Adventure! Process Steps
#pokemon #tutorial #tutorialphotoshop #lornakelleherart
Published: 2015-01-21 22:51:44 +0000 UTC; Views: 1722; Favourites: 51; Downloads: 0
Redirect to original
Description
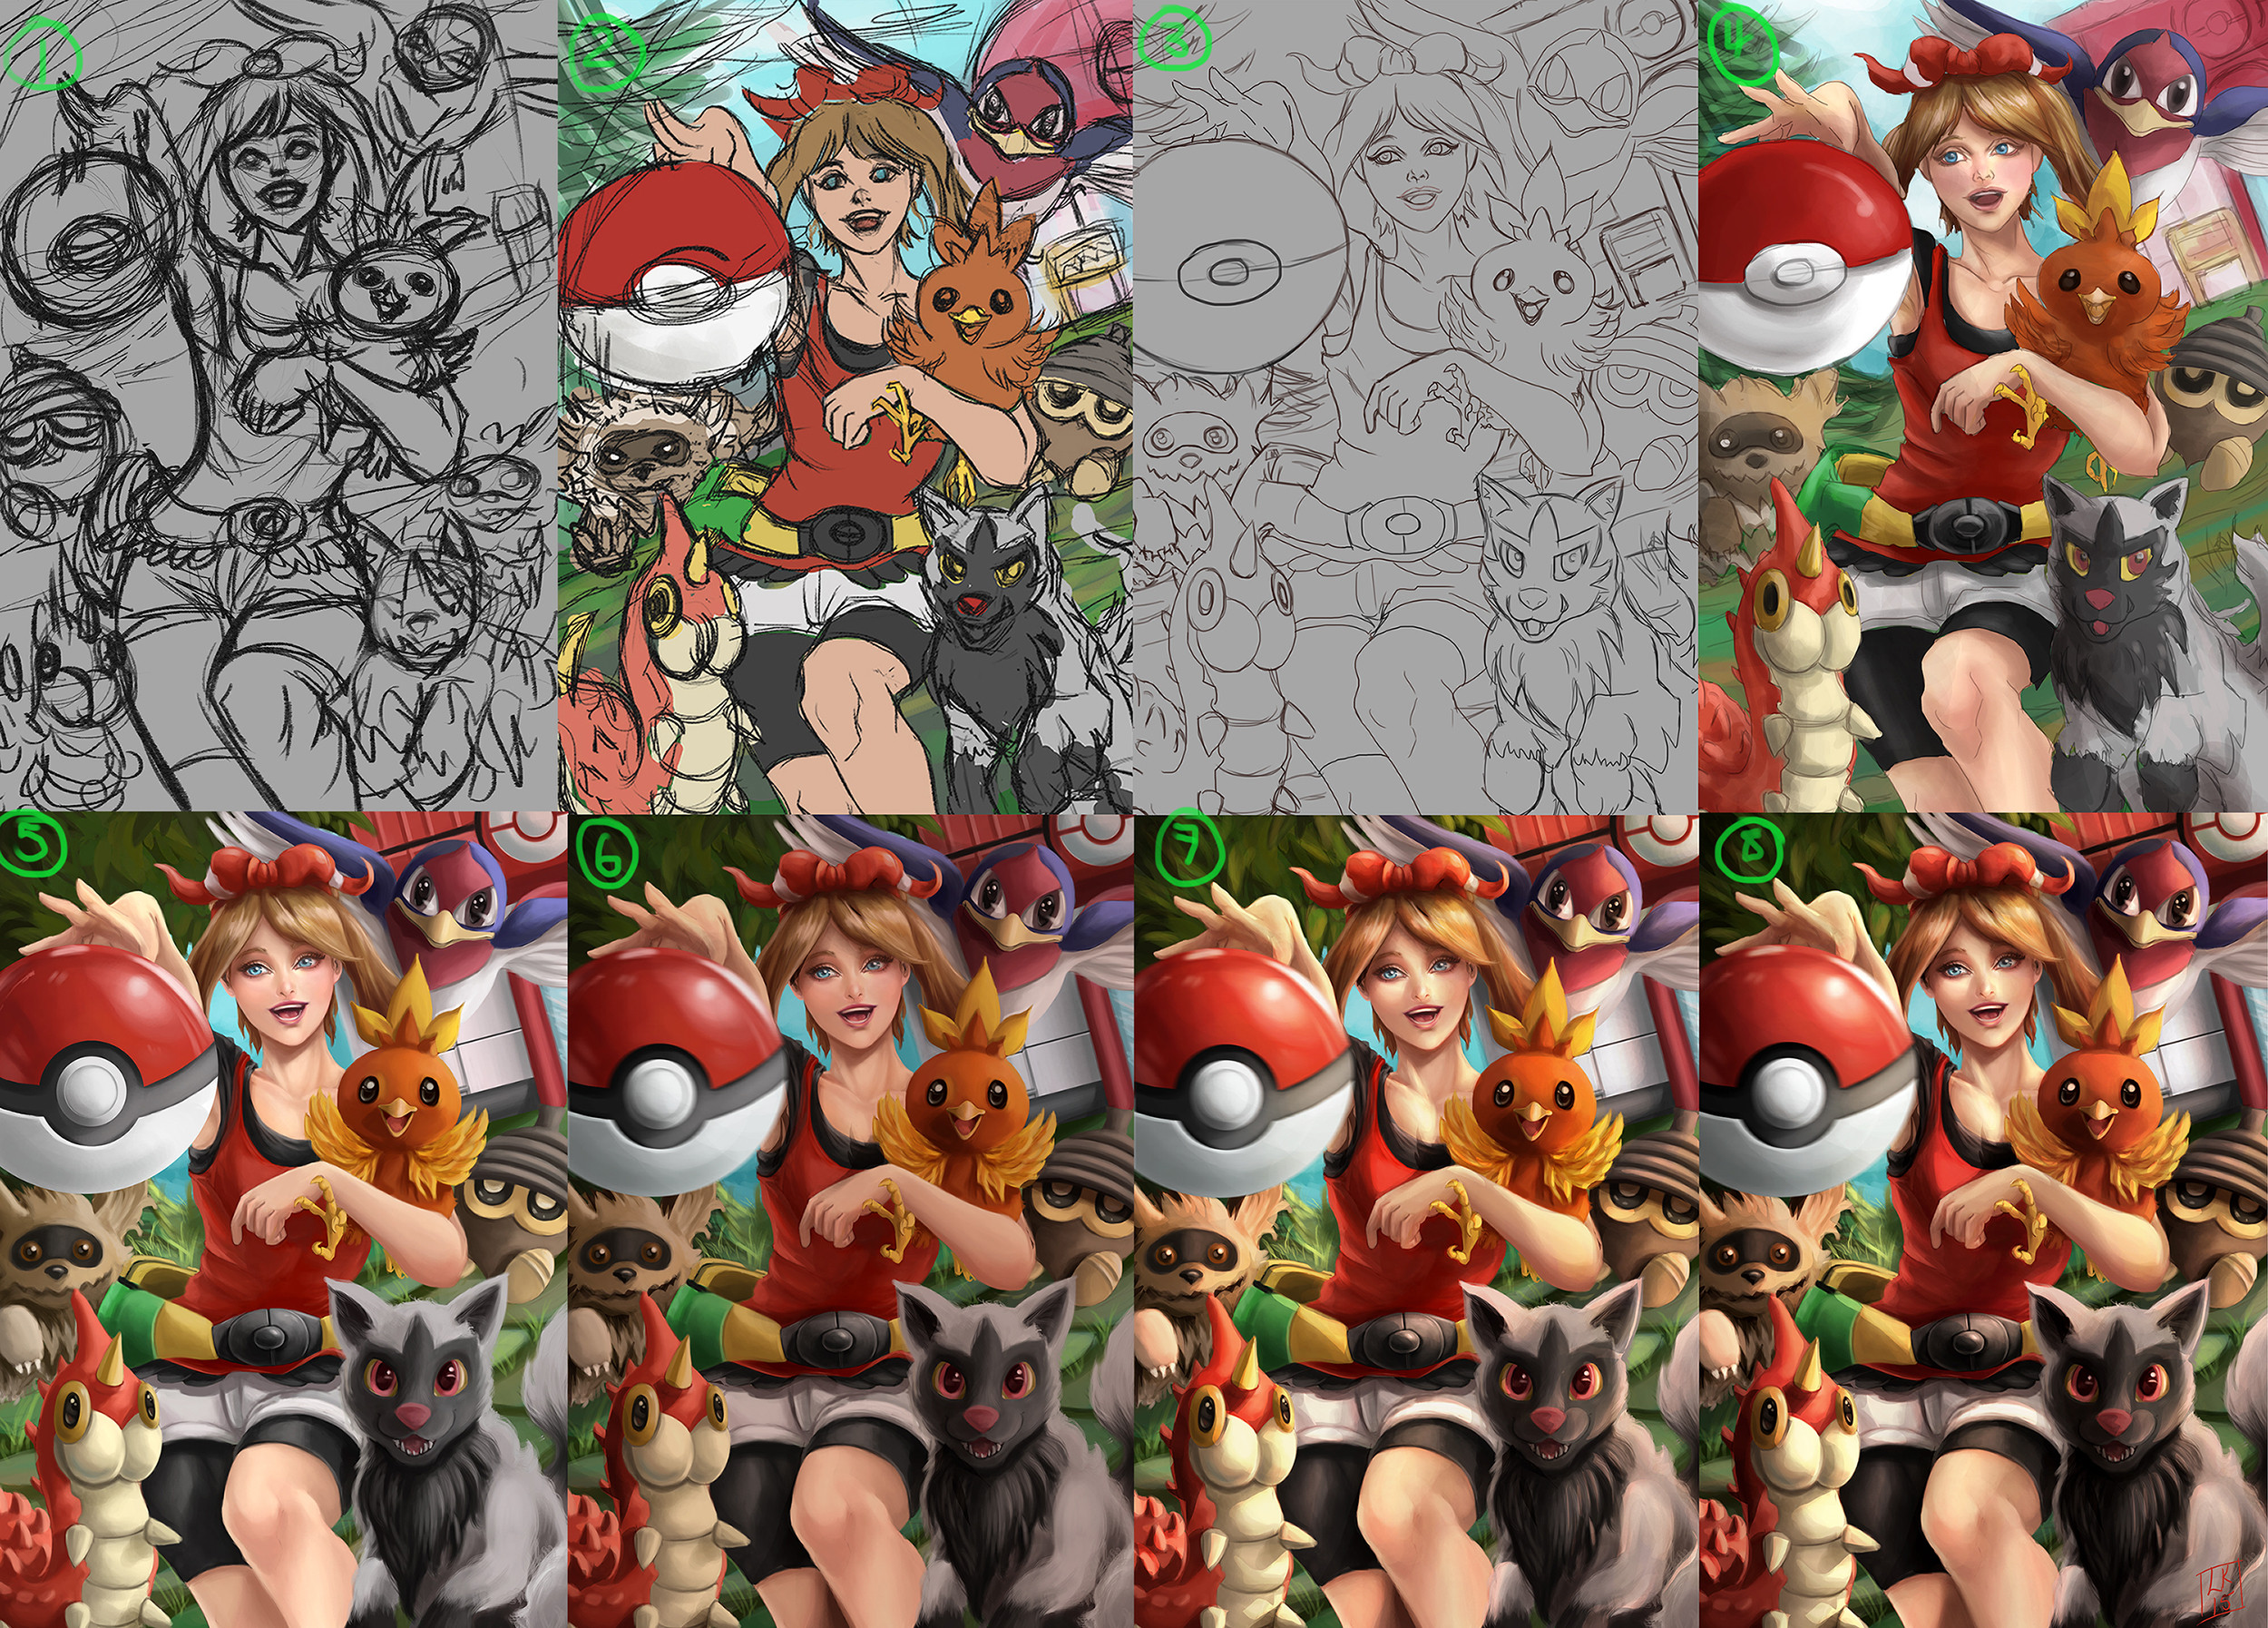
I'm not sure if anyone is entirely interested in seeing my process steps throughout this drawing, but I personally love to see other peoples step-by-steps; especially when you can pinpoint the moment where you can see where it really took shape. Just thought I'd share mine too! This is pretty much my working process for all my pictures at the moment, so I'll even go into a little detail!1. So, I always do a VERY rough sketch at the beginning just to get the figure down and placement, see if it looks somewhat alright composition-wise. Also, I guess it gets the "scribbles" out of me by warming up a little, haha!
2. I do a very quick tidy of the image and make any adjustments if something isn't working - such as here I switched Seedot and Zigzagoon. I add quick colours too to see if the colour scheme is going to work. Obviously; it wasn't going to make too much of a difference here since the colours are what they are, but in general I would throw down a colour palette here.
3. Maybe my timing isn't efficient, but I do a cleaner lineart around now (even though I don't actually keep the lineart at the end); this is just to make sure that I have my shapes/sizing good to go before I start colouring. There have been times where I didn't bother with this stage, and it took me longer to adjust things I didn't like after I started adding colours. I'm still learning Photoshop, so I still haven't found a process that's perfect for me yet.
4. Added the base colours, as well as rough shadows and highlights. I do this on a separate layer to the lineart to keep them both intact; that way I can paint directly wherever I want without screwing up the lines, and I do a lot of colour adjusting and experimenting. When I'm happy enough that I have enough colour tones, merge the layers so that I can paint over the lines.
5. So, this is how it looks once I've pretty much painted the entire picture. What I like to do (because I'm a scaredy cat) is for each new element; paint it on a new layer. So here, every time I started refining a new pokemon, I painted on top on a new layer. Once I'm happy with it; I merge it back down and repeat wit hthe nest Pokemon. I really hate working on too many layers for a few reasons: 1. I get confused 2. Photoshop gets confused and laggy 3. I feel it wastes a lot more time. I ALWAYs keep characters and background on separate layers. I also changed Poochyena a little bit here, because I didn't feel it looked cute enough!
6. A complete shadow layer set to multiply on the entire image; I also added more depth to some of the deeper shadows. I added a small motion blur to the Pokeball to make it look like it's been thrown! (I mean, I tried. Ack)
7. This part is the fun part. Adding light. I used a lasso tool to select areas of where the sunlight should be, created a new layer on top and set it to colour dodge and used the fill bucket with a medium orange/brown tone. Obviously, the lines are too harsh, so I used the brush/erase tool to soften areas. This is a new technique I learned from yuchenghong's video tutorial (I've been raving about it; honestly; check it out). It is definitely the most efficient way of getting lights and shadows into your paintings.
8. At the end of my painting, I just do lots of checks; adjusting colours, the levels, contrast; whatever I think might look better. Painting over any corrections that might be needed and so on. Technically, the picture was pretty much fininshed around step 5, and everything afterwards is just adding on different layers of adjustments. Oh, and signature!
")
Well, let me know if this was interesting/helpful, and if anyone would like any other details, then definitely feel free to ask!
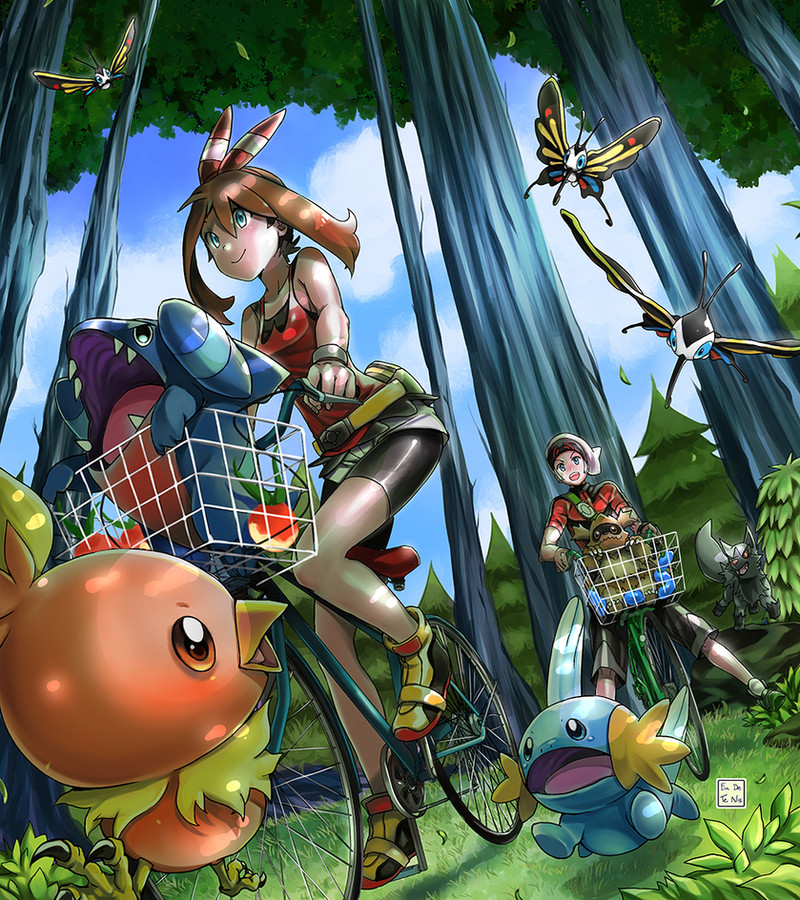
Here's the final picture:
Related content


Comments: 6

This is really interesting and helpful! I have paint shop pro, but I've never attempted 'colouring' with it - I've only ever done wallpapers etc. But I'm definitely going to have a try after reading this! Thankyou for posting it - and awesome picture btw!!
👍: 0 ⏩: 1

I'm glad you find it helpful! Hmm, never used paint shop pro; it sorta looks like a cross between Photoshop and Painter. Just out of interest, why is it you chose that particular program?
Anyway, thank you very much! Not that I'm an expert, but if I can help in any way possible, then I'll do it
👍: 0 ⏩: 1
I bought it a loooong time ago! Lol 
👍: 0 ⏩: 1
Haha, ah, ok then; I was a little confused because I don't know many people who use it, but it makes sense that you've had it ages!
No problem! I'm glad you found it useful

👍: 0 ⏩: 0

You have no idea how much this helps me.  (Smile)")
👍: 0 ⏩: 1
That's great! I'm delighted that if it at least helps one person; then it's still something.
👍: 0 ⏩: 0