HOME | DD
 m-ajinah — Editing colors Tutorial

Published: 2007-04-22 13:29:47 +0000 UTC; Views: 5819; Favourites: 38; Downloads: 374
Redirect to original
Description
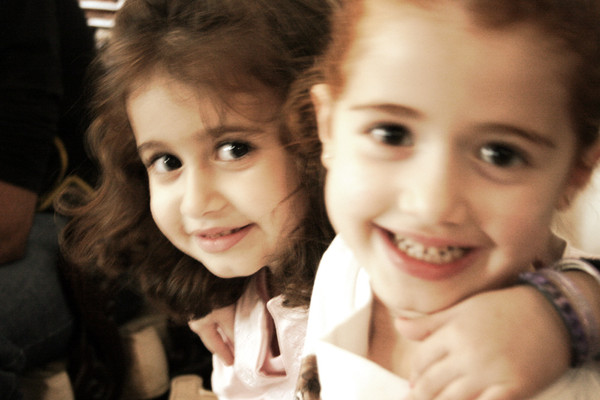
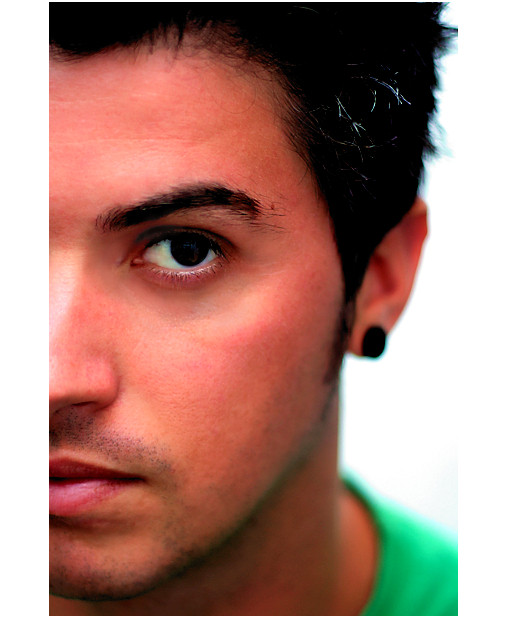
this image is a flash animation incase it doesnt loop or play.. just click on it and then click again with the right mouse button and click on loop and play..program - photoshop
camera - canon 400D
Steps:
1.what i called original in the animation, is a dark version of the photograph used as a base for editing. (the original photograph is a bit brighter)
first u should duplicate the original image layer..
now to make the image a bit darker just go to image>adjustments>Levels... and adjust it manually to be darker a bit.. do not play with the contrast.. it will reduce the quality of your image.. just move the middle arrow a bit to darken the image.. dont touch the arrows one the sides..
2. u duplicate the original image layer again and make the new layer a bit brighter with the same technique of the first step..
now this is all done to to reduce contrast..
now u select a blurred eraser to erase the very bright areas in the bright layer..
I basically do this to make the bright areas in the image a little darker and the dark areas to be a bit brighter..
3. now u go back to the original photo layer and duplicate it.. move it to top.. now u need to select the blurring tool.. then blur the areas that needs cleaning out.. like cheeks and forehead.. nose.. stuff like that..
now go to image>adjustments>hue and saturation.. increase saturation a little bit..
now make the layer transperancy 50%
4. now u take the original photo and duplicate it again and put it on top again.. and make the layer option as color.. this will add a good saturation to the colors of the photo..
5. pick the brush tool.. creat a new layer on top.. make the transperancy 50% and the layer option to "color burn".. pick a color such as green.. paint a bit on the edges..
6. creat a new layer.. paint it all with a similar color but a bit less saturated but brighter.. somewhere in the top middle of the color chooser.. then make the layer option to be multiply and set the transperancy to be 50%
7. is the same as step 5.. just did it on the top part of the shirt to make it go with the rest of the photo..
8. make a new layer.. transperancy 50% and make its type as multiply.. pick a bright middle saturation brown color.. and paint a bit on the edges to darken the image from the edges..
and thats all..
Related content


Comments: 13


thank you for the fav and for passing by
👍: 0 ⏩: 0

")
 (Smile)")
i am sending u a reply now.. thank you ryye i REALLY appreciate this..
👍: 0 ⏩: 0


