HOME | DD
 MikariStar — Background and CSS
Published: 2010-05-29 20:21:38 +0000 UTC; Views: 3452; Favourites: 34; Downloads: 143
Redirect to original
Description
I bring you my very first tutorial; it's about how to make pretty background and code the CSS that goes along with it. This is how I made some of the backgrounds I use on my sites.I used Gimp, though I'm sure there are other programs with similar functions that could work too. Open Gimp or your program of choice and start with a blank file. I gave mine a height of 600 pixels because I wanted all the shades to be seen on smaller resolutions, but don't worry about the big resolutions because the CSS will make it fade out perfectly.
This background is going to tile horizontally so it doesn't need to be too wide; anything from 100 to 300 pixels is fine. The width could be less if you're only keeping the colors without the sparks effects.
Select the background and foreground colors of your choice, for example yellow and orange for a fiery look, or any other colors you wish to combine.
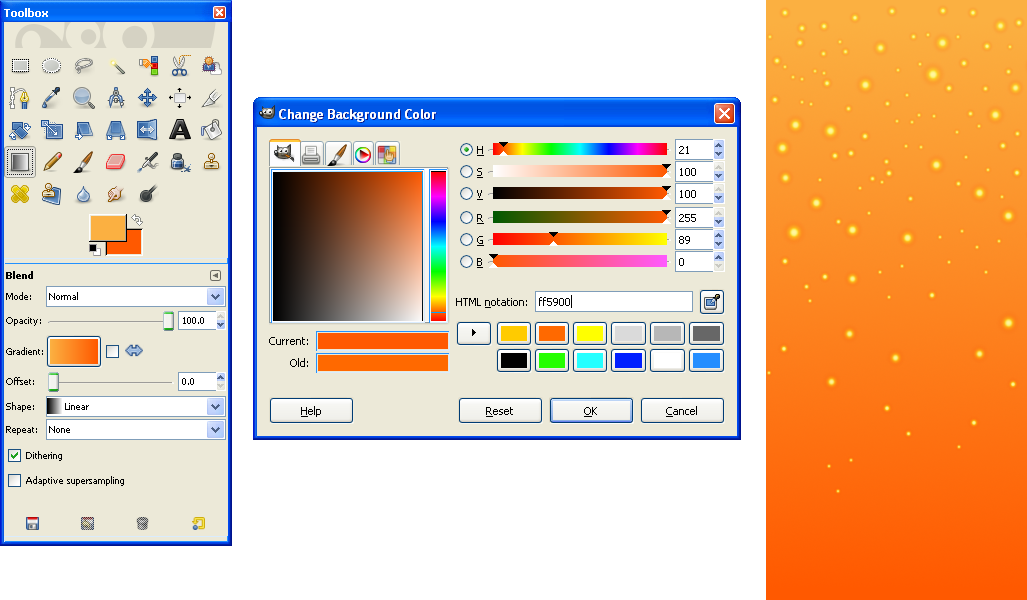
Choose the Blend Tool (selected in the screen shot) and choose the opacity. With layers you can combine different bland effects by placing them on top of each other as semi transparent images, but for now let's stick to the basics, I'm leaving the opacity as 100% and the offset at 0 for a smooth transition between the colors.
Trace a vertical line along on the black file and it will be filled with color. If you trace a diagonal line, the color will be filled in that direction. For this particular CSS background effect we need a straight vertical line so that the sides tile perfectly.
Now that you have your colors, you can keep them this way or play with the brushes to add some extra effects. I used the Sparks brush which came with Gimp. It's important to stay away from the edges of the picture so as to not affect the tiling there.
A nice trick if the effect you want requires you to edit the area close to the edge of the picture is to copy the image, to make the image width twice big horizontally, then paste the initial image into the blank space and flit it horizontally to tile on both sides.
Save the image, the background is done, but now you have to code it. In this example we're placing the image on top of the page and having it tile only horizontally, then blending into the bottom color at the end.
Here's the code, it goes in a .css file access through a link tag or between the style tags in the header of your webpage. For more CSS information I suggest visiting W3schools.
body { background-image:url(fire.png); background-repeat:repeat-x; background-position: 0px 0px; background-color:#ff5900; background-attachment:fixed; }
Now I'll explain each part of the code and how to edit it.
background-image:url(fire.png);
This code tells the page where to find the background image. Replace the filename for the name you gave your image and its location in your web-directory.
background-repeat:repeat-x;
This code tells the page that it will repeat the background horizontally.
background-position: 0px 0px;
The background will be place on the top left.
background-color:#ff5900;
Replace the number code for the color on the bottom of the picture. This should be the same color you chose to combine with another before, but if you need to find it again to obtain this number zoom into the bottom of the image, then use the Color Picker Tool, it's the second from the left on the second row in the screen shot. Now click on the square with the color you just picked to get a popup and you'll find the needed code in the HTML Notation box. This is done so the bottom of the image fades seamlessly.
background-attachment:fixed;
This creates the effect that the content "floats" over the background; that is to say that when you scroll, the background does not move along with the content. I personally like this effect, but if you want the whole page to move together as it is default you can remove this code.
That's it for now, I hope you enjoyed the tutorial and found it useful.
 (Smile)")