HOME | DD
 Miss-Raynie — Cat Drawing (More of Color) Tutorial

Published: 2012-07-15 01:02:22 +0000 UTC; Views: 1381; Favourites: 24; Downloads: 23
Redirect to original
Description
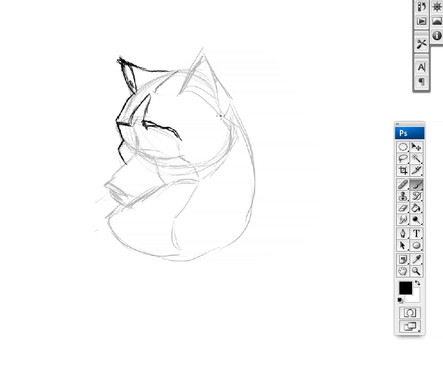
This took a while to make. Here are instructions:1. To start off, create several layers. The second-to-top one should be a line-art layer.
2. Sketch, in a light color, the main body shapes. Use circles and triangles. Basic shapes go a long way.
3. In a slightly darker/similar color, sketch in where the fur would fluff up. This is mainly at bends and “corners” along the body, such as the tail, bunched up legs, cheeks, etc.
4. Choose a color that stands out against the others, and sketch in the face. If you added crossing lines on the face, where they meet is where the nose should go. The middle of the mouth is on the middle vertical line, and the eyes are on either side of the vertical line, directly about the horizontal line.
5. On the line-art layer, start drawing the final lines. To make it look somewhat realistic, it’s best to do the line-art in a near-black version of the main fur color. In this case, I thought I was going to do a grey cat, but ended up doing an orange after I drew the lines, so it looks more cartoonish, I suppose.
6. If you press Ctrl while on the line-art layer, green dots show up. Clicking and dragging on these dots moves the line, so if you can’t get it straight no matter how many times you draw it, you can fix it easily.
7. The face is drawn with a smaller pen size than the rest of the body. This goes for the ear hair, too.
8. Delete the layer with the guidelines so that all you have is the line-art.
9. On the bottommost layer, color in the lines with the main color of the cat. An easy and fast way to do this is simply to color the outlines using the brush, and then fill in those lines with the bucket.
10. Using the airbrush, choose a color slightly darker (and later, slightly lighter) than the base color. Airbrush where the darker parts would be, and also where the light parts should be. Once you’ve done this, use blur ONLY on the edge of your airbrush lines to make it look like a natural shadow.
11. On the layer above the bottom, select Layer Clip. This will make it so that you don’t need to worry about going outside the lines. Now base-color your markings in. For this cat, she has brown points and a white muzzle/chest area. Blur where the markings meet the base color.
12. Shade the markings like you did the base.
13. Next are the eyes. Outside the circle is white. To shade the circle, use a really light grey and blur them together. This gives the eye depth. Inside the circle, use the main color that the eyes are, like you did with the body. To create the “gradient” look, choose two colors, the first darker than the base and the second darker than the first, and color them in stripes from the bottom up. Use blur to make them run together in a smooth, color-change.
14. For the pupils, they’re darker than the darkest color of the gradient. They take up the top third of the iris, and then dip down into the rest, though still leaving room for you to see the actual eye color. I should have gone darker with mine.
15. The shine on the eyes goes over all the lines and colors. Make sure you put them in the same spot in the same size on both eyes; the light is shining from one side, not two. Don’t mirror the “shinies.”
16. For a fancy background, do the same thing you did with the eyes. However, you’ll need several other colors. Do them in stripes, darkest to lightest, and then blur them together.
17. Voila! That’s that!
I'd like to see any that you do yourself! ^^
Related content
Comments: 2

Wow I'm totally going to use this c: thank you!!
👍: 0 ⏩: 1


