HOME | DD
 moriarty-party — COMPLETE EMOFURI TUTORIAL
Published: 2014-08-08 23:19:08 +0000 UTC; Views: 104794; Favourites: 980; Downloads: 0
Redirect to original
Description
body div#devskin0 hr { }
So a lot of people have been asking me various things about how to Emofuri and stuff like that, so I've decided to make this tutorial to satisfy everyone's needs. I am going to try and cover EVERYTHING in this tutorial, from installing the software all the way to creating and saving your finished animation. This tutorial is going to be really long and a lot to read. Please bear with me though, this is my VERY FIRST TUTORIAL that I am ever making and I will try to be as specific as I can, but if you need any further explaining just drop me a note or leave a comment or something, ok? ^-^ here we go, let's start
First of all in case you were wondering, Emofuri is a completely FREE animation software that can really do wonders if you know what you're doing. Unfortunately it is all in Japanese which throws a lot of people off, but stick with me and you'll be pretty ok. However, as a disclaimer I do not speak Japanese and I have only been taking Japanese class for 2 years so I may not be able to answer any questions regarding what things mean and stuff... ok, so enough talk, let's get started!
Part 1- Installing everything
1. The first thing you need to do before you do ANYTHING is change your system locale to Japanese. If you do not do this before you install the software, NOTHING WILL WORK just trust me
Go to your control panel, language and region, and then advanced settings, then click on the "change system locale" button and choose Japanese. This step varies depending on what operating system your computer has. I have 8.1 so some of this stuff may not look familiar but do not freak out, just look around and you'll find it.
Choose Japanese and do not worry, your computer will look pretty much the same and you won't lose files or programs or anything. You'll have to restart your computer right after this though, so make sure you aren't in the middle of anything important.
2. Now that that's over and done with, time to install Emofuri! Go to this website here and click the huge pink button to download. The installation stuff is all in Japanese, but click the buttons that have the blue frames around them because those are the ones you want to click. I didn't take any screenshots when I was installing so I can't show you but if you get lost ask me for help
3. So now you're finished installing Emofuri, but it is probably still not working for you. Don't worry, there's still one more step- that's installing DirectX. It makes everything work and it's special. Install it here
Now we have finished installing everything! The program should run and open properly and you should have no trouble! Now, time to start preparing our drawing!
Part 2- preparing your drawing
Before we get started on part 2, there are a few things you should know: First of all, emofuri is really picky with layer names so follow my instructions carefully. It is also pretty important that the layers are in the correct order as well, although it's not the end of the world if you don't (it just might look a little weird.) Also, you must save your drawing in a PSD (photoshop format). Most art software can save files in PSD format. It doesn't matter what software you use to draw.
Ok, let's open up our drawing software! I use Artweaver which hardly anyone has ever heard of, but it's free and legal and does everything I want it to do so it's totally cool with me. Some things might not look the same on whatever you're using but it's not too different so don't worry.
So there are two ways to do this part- one would be to make an entire new drawing from scratch or the second way would be to use the template found in computer, C, program filesx86, m2tools cheeseware, emoteMovieMaker, template, サンプルPSD, E-mote3.0入門用テンプレート基本画像.psd. This is the sample that they give you with all the layer names and stuff and all you have to do is erase everything on each layer and replace it with your own drawings. I would recommend making your own drawing from scratch though, I just think it's a lot more fun that way??
1. Create a new file (or open up the template if you'd rather do it that way). Emofuri likes the dimensions 1100x1200 but they aren't too anal about it. I'm just going to use these dimensions anyway. The name of your file also doesn't matter.
2. Now we're gonna make a basic sketch. It doesn't have to be pretty. This is just to give you an idea of where things are and stuff
so here's my crappy sketch.
Now change your sketch layer to a lower opacity and now we can start making layers.
3. You are now going to draw all of the different body parts on different layers, using the layer names I am about to give you. Draw each separate body part on its corresponding layer. Use your sketch as a guide. If you need more than one layer for each thing (for example if you need more layers for color,) name them the same thing so that when you merge them the name stays the same.
Layer names:
前髪 - front of hair, bangs
マブタ通常 - outline of eye, neutral state
瞳通常 - iris, neutral state
白目通常 - eye whites, neutral state
マブタ半閉じ - eye outline, half open (optional)*
白目半閉じ - eye whites, half open (optional)
マブタ閉じ - eye closed
マブタ笑じ - happy closed (optional)
眉 - eyebrows, neutral state
鼻 - nose
クチ - mouth
クチ開き - mouth open
輪郭 - head including ears and everything**
胸 - boobs (optional)***
胴体 - body
後髪 - back hair****
*You don't have to make all the different types of eyes- if you just want to make neutral eyes that is fine because Emofuri kind of adjusts the eyes to make them look happy/sad or you can adjust them too if you really need to. I'll show you how to do that later.
** For the head as well as the body, make sure to draw and color all of the hidden parts. draw and color the top of the head and the top of the neck even though they are hidden behind other stuff, because when your character starts moving a lot things will get uncovered. Same thing goes for shadowing. That's also why you should draw your ears on the head layer too, even if your ears are hidden by the hair. It also looks good when you add some little side hair around the ears too, it prevents awkwardness and gives the hair more of a layered look
here, so you can see how I drew the entire head under the front hair layer as well as the side hair and the back hair
***Emofuri has boob physics where the character's boobs bounce up and down when it moves. If your character is a boy it's ok to leave this layer blank but make sure it is there. However, you can also use the boob layer for scarfs and stuff, which I am going to be doing since my character has a scarf
****Back hair is also optional if you are making a boy but I'm going to use it
Oh, I forgot. Special parts such as glasses, ahoge, necklaces, etc. go under the name of 追加_[name] insert whatever name you want in the brackets.
You can also add different expressions for things like eyebrows and mouths like this
[part]哀 - sad
[part]怒 - mad
[part]笑 - laughing
so "mad eyebrows" would be 眉怒
Once you're done drawing everything on its designated layer, we can now move on to making parameters! Oh, and delete your sketch layer after you're done drawing everything.
That sure was a heck of a lot of layers, wasn't it? Well good news: we're not done yet and there are WAAAAAY more!
4. Parameters. The most awkward but also the most IMPORTANT part.
This is where we are going to make really awkward squares and rectangles around all of the body parts so that Emofuri knows where things are. and yes, you get a whole new set of layer names.
Center points- mark these with colored squares. Put these layers above all of your other layers.
原点 - the center of your entire character
首中心 - chin origin (the top of the character's neck where it ends and around the mouth area)
腰中心 - back origin (around hip area or waist)
areas- mark these with colored rectangles. These layers go under your center points but still over the rest of your layers
目L枠 - left eye area
目R枠 - right eye area
眉L枠 - left eyebrow area
眉R枠 - right eyebrow area
頬枠 - cheeks (but you don't need these for this template so ignore that)
鼻枠 - nose area
クチ枠 - mouth area
The next three layers need to be under the rest of your layers
頭部全体枠 - head area, around entire head and back of hair
胴体全体枠 - entire body area, from bottom to end of neck. make sure to leave a bit of space at the bottom. The rectangle must be 100% opacity
トリミング枠 - trimming area, around the entire character. The rectangle should also be 100% opacity and this layer should be under everything
The color or opacity of your rectangles and squares do not matter, except for the body area and the trimming area which should both be at 100% opacity.
So here's my finished thing- yeah it looks pretty awkward and goofy but do not worry. Also since Artweaver can't make squares for some reason I copied and pasted the circle cross hair things from template. Good news is you're all done and now we're ready to import it to emofuri!
Part 3- Importing to Emofuri
So now that all the hard stuff is about done, it's time to open up Emofuri! Everything is in Japanese but don't panic because I'm about to tell you what everything means
or at least, whatever I know
First of all, the top bar thing at the very top. And sorry, I don't know what most of these things mean but what you'll be using the most is file.
And here's what the things mean in "file"
So to start, the very first thing we need to do is open an existing MMO file. we are going to open the template that they have already provided us, and you can find it in Computer, C, Program files x86, m2tools cheeseware, EmoteMovieMaker, template, E-mote3.0テンプレート, and then E-mote3.0入門用テンプレート.
so now you should have something like this.
Oh, I forgot- before you do anything you should save this file under a different name so that you will always have the original template to use for other things
So now that we have that open, let's go ahead and click file, import PSD.
You get this scary window with all these boxes and stuff. Don't worry, it's not actually that scary.
The things in the sidebar are all of the different parameters. Click on them to see what each one is. The ones in red are the ones that have errors. Right now my background layer is red because I don't have a background. I'm just going to leave it there because I don't have a background anyway, but if any of your important parts are colored red, go back to your psd and check your layer names. Keep in mind that if you accidentally pasted a space when you were copying and pasting the layer names, it will not work because it counts the space as a character. Delete spaces.
The blue ones are the special parts and you're gonna have to do a little extra with those. I'll explain that later.
You can also zoom in and out using that slider thing up at the top.
So what you wanna do here is mostly click on everything and make sure they fit correctly in their boxes. As you can see here, my front hair isn't completely fitting in the box. So all I'm going to do is click on one edge of the box, and drag it until it fits around the whole thing. See?
I did the same for the body and the "boob" layer (which I am using for the scarf instead)
The special parts are the things in blue. Click on those because they're important.
Now that's different. There's a big grey button thing at the top. Go ahead and click that. This is where you define what kinds of movements your special parts are going to have. You're gonna get all these menus but don't worry I'm going to tell you what each thing means
The first menu
Since I'm doing glasses, I'm gonna choose head.
Independent as in the object is just free floating, frame sync as in the movement of the object is in sync with another frame, and I honestly don't really know what cutout means sorry
So I'm gonna choose frame sync here, because the glasses are in sync with the head movement
And here are all the different types of movements. For glasses, I'm going to choose "no movement" because glasses don't really move all that much.
For the Ahoge, I'm using head, frame sync, and front movement. For things like Ahoge, the movement kind of depends on what type of Ahoge it is. I suppose it doesn't really matter what movement type you choose because you can always edit the positions and warp it after you import it. Don't worry too much about that yet.
So when you're done defining the movement type for your special parts, they should turn green. Now we're ready to click the left button at the bottom to import it!
If your import was successful, it should look something like this. If something looks a bit funny or if certain parts were cut off, you can undo your import (ctrl+z) and try editing the boxes again. If your character looks transparent, go back to your PSD file and make sure all of your layers are at 100% opacity. Also check the opacity of your last two rectangles- the body area and the trimming area. They should also be 100% opacity.
Ok, let's move on to editing stuff!
Part 4- Editing stuff
Of course, your character is going to have a bunch of imperfections and weird positions after you've just imported it. Which is why we need to edit stuff!
First of all I'd like to call some attention to this cute little side menu here because it's pretty important.
I really don't know what the first one does, sorry. But let's go ahead and click on the blue tab. We need to edit the positioning of our parts before we can go into any animation.
So here's what all the menus in the blue part are for.
Four main parts basically. General (we don't use that very much, it's just general positioning and centering and stuff), face (eyes and everything) head, and body.
Face:
Head:
Body:
Each one of these things I labeled here contains another menu when you expand it. Let's expand one and take a look.
So as you can see I expanded the face part. There are a bunch of slider thingys, as well as a bunch of other buttons with those icons that look like graphs. When you slide the slider thingys around, the head changes position. You may notice that when your head is in certain positions, it looks a little funny. (It may not, in which case, that's great and you don't need to change anything for the head!) But if it does, like mine, don't worry because fixing it is pretty easy. See those three sidebar buttons with the little graph icons? Guess what- they correspond to the three sliders! Try clicking on one of those little graphy icon things.
So now we get this cool square thing. This is where we can edit the positioning of things. See the three buttons on the bottom of the sliders? Those are the three points in the positioning. Click on each one of them to see what they do.
So this is what his head looks like in the most upward position. It looks a little weird so I'm gonna adjust it. You can click and drag anywhere on the square grid to warp it however you want. Drag the white square at the top to adjust the overall placement/location of the part. This sets your default position for the face when it is in the absolute upward position.
Just keep doing this for all of the parts and all of the positions until you're happy with how everything looks!
Oh, and I forgot to mention, to edit the special parts you have to go to the last tab on the sidebar with the tail icon.
Sorry, I forgot another thing! If you are moving your parts around and discover that something is wrong with your drawing, for example if you didn't fully color the face behind the hair and it's showing and looks weird, you can edit your PSD and import it again and all of your parameters and adjustments will STILL BE THERE. This really makes life sooooo much easier. You can fix up and re-import your drawing as many times as you want, and you won't lose any of your other work!
When you're all done editing your parts and making your character look great in all positions, let's move on to animation!
Part 5- Animation
Phew, now that all of those hard steps are over and done with, we finally get to see our character move! This is the funnest part.
First thing, go ahead and click that red tab with the flower.
Now click the one I circled, and you'll see all these slider things like this.
The sliders position different parts of your character. Slide different things around to pose your character.
When you get a pose you like, click the third gray button from the left at the top (the one I circled) and this will save your pose. Make all the different poses that you will be using in your animation. And when you're done, click the fourth button to see all of the poses that you saved, and it should look something like this
So here are all of my poses! Now you're ready to start making your timeline.
Now click the plus sign next to the fourth button under the red tab, and a really long menu will drop down.
The long list of things are all of the sample animations that Emofuri gives you, you can click any of them to see what they do. But for now, we're going to be making our very own animations, so click on at big gray button I circled at the top to create a new timeline.
Now you have something that looks like this. The bottom part is your timeline. Remember all of the snapshots you took earlier when you were posing your character? This is where we put them.
The numbers on the top area of the timeline are the number of frames, I think. Emofuri runs at 60 FPS, so 60 on the timeline is one second. Keep this in mind when you are adding things to your animation.
To add something to your animation, click somewhere on the timeline so that the blue line is at however many frames you want that part of your animation to last. So if you wanted the first snapshot to be half a second, click on 30.
Also I took this screenshot after finishing my entire animation because I forgot to screenshot while I was in the process, so ignore the extremely high numbers. Sorry :C
Now, click
the button that I circled, it'll lead you to the list of all of the poses that you saved. Click the one you want and now your timeline will have a bunch of blue lines that go up to whatever point on the timeline you clicked. Keep adding your different poses into your timeline, and if you want you can adjust the lengths of individual things by clicking and dragging the ends of the blue bars. And sorry, I completely forgot to take screenshots when I was doing this so I'm just going to show you my part of my finished animation here
It's good to stagger the lengths of the blue bars for the different parts for a smoother animation. For example if you want the eyes to close before the head turns you can just shorten the bar for the eyes. I didn't do any of that because I am lazy.
Luckily the sidebar with the part names have the English names as well, so you can see what does what without having to guess or translate anything.
you can also use this slider thing here to edit the positioning of any part.
Click play to preview your animation and make any last adjustments, and you're ready, click the export button to export your file!
This is your export window and sorry I don't know the meanings of everything. Adjust the size and positioning of your image using the offsets, scale, and length/width. You can select a file type with the top drop down menu and the rest is pretty self explanatory. If your animation is pretty long like mine, it's best to choose 100ms for the frames. Keep in mind that if you're choosing to export as a GIF file, you can't use the 20ms setting for some reason. I don't really know the reason this but I heard it crashes if you do. When you're done, click OK!
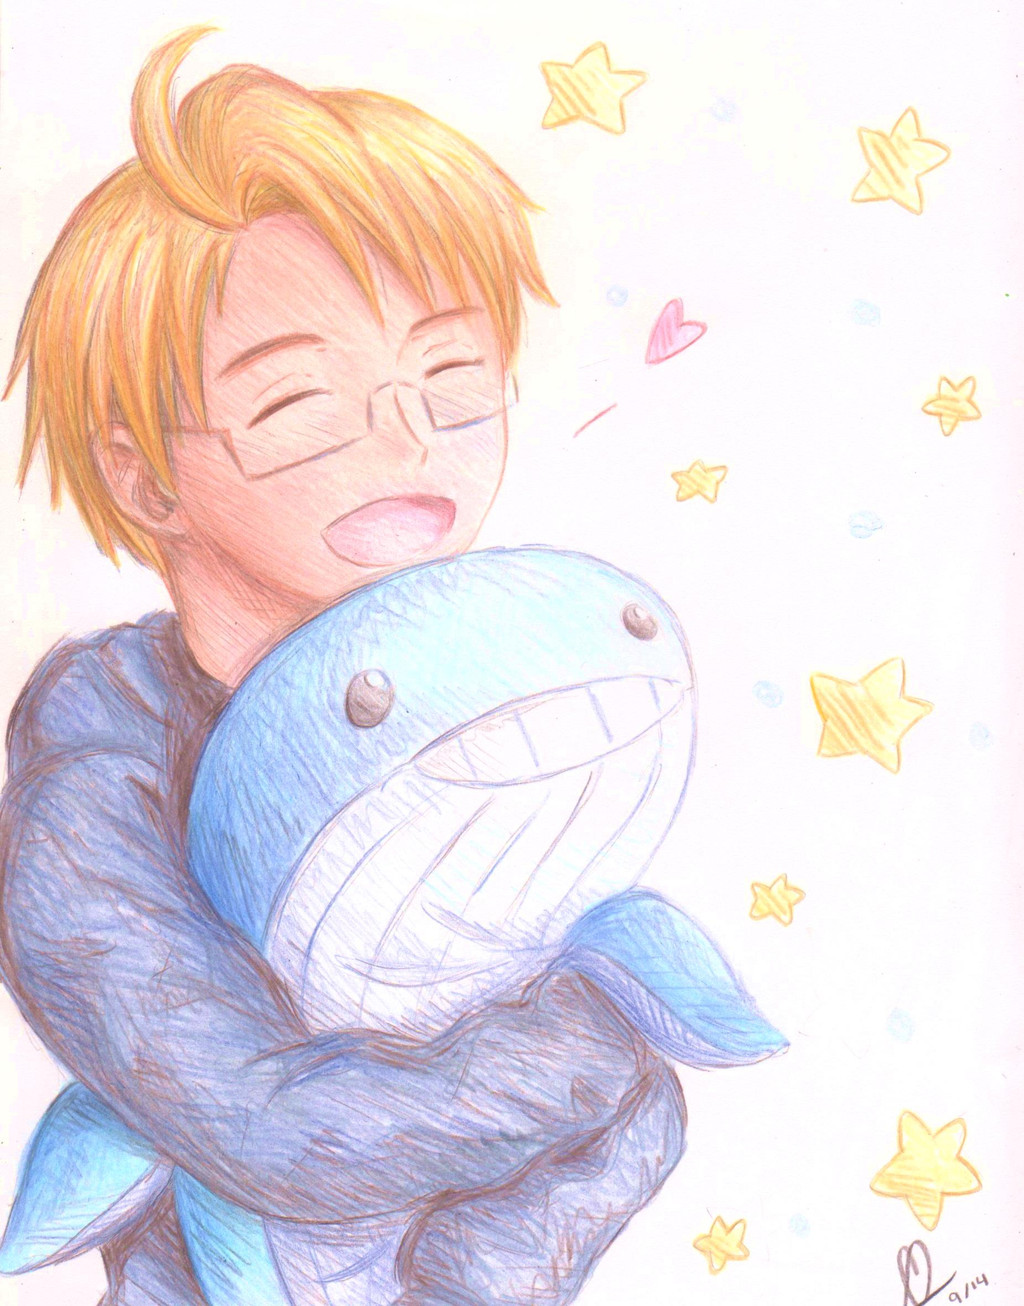
And now you can laugh and cry as you watch your OC come to life and give yourself a big pat on the back for finishing this extremely long and wordy tutorial and bearing through this long and painstaking process. You are amazing and I am so proud of you and Yukio here agrees (yeah I think that's his name though I might change it later on)
CONGRATS FOR FINISHING AND THANK YOU SO MUCH FOR READING THIS TUTORIAL even though it is so long. I apologize if this was hard to understand- I'm not that great at explaining things and again this is my very first tutorial ever. But if you have any questions, please drop me a note or write a comment!
I will try my best to answer all of your questions to the best of my ability but please know that I am no expert at this- I'm just some loser that sits at home and does things like this all day because I have no life
Also, I would love to see your finished works! Have fun, and happy Emofuri-ing!
Related content


Comments: 160


wait so, did you draw you dude on emofuri or another program
and like all off(color ect., boxes) on the other program or just one part of it..?
👍: 0 ⏩: 0

Nice tutorial, I installed this programme a year ago but didn't understand it so deleted it but now I might use it again, thanks.
👍: 0 ⏩: 0

thank you very much!  (Smile)")
i had emofuri before but i already forgot and this one came out lovely!
(and i had to make her armless because im a lazy fuck)
cr3mb-pon-y.deviantart.com/art…
👍: 0 ⏩: 0

for some reason your direct x link sends me tu www.microsoft.com/en-us/softwa…
and im sure my windows 10 is up tu date :/
👍: 0 ⏩: 0

were you able to understand it in Japanese?
👍: 0 ⏩: 0

BLESS THIS TUTORIAL THANK YOU SO MUCH!!
👍: 0 ⏩: 0

Quick question, I drew some variant eye and mouth shapes using the same layer names as one of the templates, but I can't seem to find any way to access any other than the standard open and closed mouth/eyes. They show up in the source tab, but I can't figure out how to pose the character with them. Has anyone been able to do it?
This tutorial is a godsend, by the way.
👍: 0 ⏩: 0


Great tutorial! Thank you so much for making it! i looked one up on Youtube, and even the best Emofuri tutorials on youtube don't give much information about the options, so thank you so much for doing this! I only have one question, though...Do the Special parts (such as tails, for example) have a specific layer name that you have to give them for them to load? or do they need to be attached to a different layer?
👍: 0 ⏩: 0

Everytime I try to upload my psd files in emofuri it's invisible... I dunno what to do :c
👍: 0 ⏩: 0

I have a question: do I need to put the irises layer UNDER the skin or is it okay if the white of the eyes and the irises are on top of the skin ? Because I fear they exceed the eyes outlines..... D:
👍: 0 ⏩: 0

May I ask a question?
I'm pretty new to this program but if we have a character with big ears which layer would we put them on?
My problem is my character has a floppy ear and I don't know where it goes ;v;
👍: 0 ⏩: 1

tbh i'd probably put the ffront of the ear on the boob layer
👍: 0 ⏩: 1
In the end I managed to get this done
👍: 0 ⏩: 1
omg thats great
ahh can you help me with exporting?? it crashes every time hh
👍: 0 ⏩: 2

You need to enter the program as an administrator in order for it to let you export. I had the same problem and that solved it
👍: 0 ⏩: 1
I am entered as an administrator- not to mention that fact that you can only export 4(5?) times, because it's a free trial version. I use a gif recorder and it works just fine for me
👍: 0 ⏩: 0
I use a gif recorder to export mine since mine always crashed when I tried to export
👍: 0 ⏩: 1

Heeey it's a nice tutorial!
But i have a problem, i make a gif and when i pressed "ok" a blu window open for a few seconds and then it crashes. I don't know if it saves my animation
")
👍: 0 ⏩: 1

It did the same for me because I had the files and the software installed twice on my computer ^^ . Maybe is this same for you ? You should check it out .
👍: 0 ⏩: 1
i think i will delet it and install it again
Thanks!
👍: 0 ⏩: 0
Hello excuse me to ask but , I've been trying to export my file but it will not work .
I have tried in png , wmv and gif but no it won't . I have tried to make it very short like around ~2 or seconds yet it will not work either . I really cannot understand what it says or even what is the issue.
Would you mind helping me out because it took me 3 days to install darn Emofuri and photoshop and make it work properly . I am about to sink into lunacy .
(Anyway , thanks for the tutorial ! Very helpful !)
👍: 0 ⏩: 0

Complicated software, why has nobody just gone and made a freaking english patch yet ? lol English patches are like, maybe not 'simple' but certainly 'easy' to make...a lot of programs have them...even Sai...
Thank goodness Tyranobuilder has live 3D, it's pretty much this, maybe not as involved, but it uses static images (in parts and layers, similarly to this program) to create simi 3D 'models' you can animate with. More or less the same thing though, I have yet to try it because I have no art assets of my own to use XD
I may ask my DA buddy to try making characters for my VN that way first.
👍: 0 ⏩: 0

How do I import the words?
Every time I paste it into my layer name it comes up as "??_[name]" and not "追加_[name]"
👍: 0 ⏩: 1

Ah yes, i have the same problem in Sai. But the only way for me is to open the .psd with Manga Studio, rename that layer, save it as .psd and finally re-open it in Sai. I'm not sure if this will help you...
")
👍: 0 ⏩: 0

Question ;0; Do we have to name the layer files in japanese before we export the files to Emote?
Thanks for this tut btw!! ;v;
👍: 0 ⏩: 1
Never mind, found out already aaa
But the pupils and the whites don't show?? I'm a little confused on that ;-;

👍: 0 ⏩: 0


Thank you. This helped me a lot !
👍: 0 ⏩: 0

when I try to export my character it opens an error message and closes the programm
👍: 0 ⏩: 1

It will only export the first 4 times since it's a trial (if you have the free version). Starting at the 5th time the program denies regular export.
👍: 0 ⏩: 0

thanks so much ahh! i watched a bunch of videos but they dont cover everything you'd actually need to know to make a finished project. still kind of confusing for me, but i'm sure i'll figure it out exponentially faster with this guide =w=
👍: 0 ⏩: 0

Thank you so much for the tutorial!
But I have a problem, I did everything until the pic is done, then when I import to emofuri, the pupils and the white eye parts are missing :/
I already double checked the layers, and nothing wrong with it, can you help me? :'
👍: 0 ⏩: 1
Not OP but have you made sure there is no space after the layer name? That's the most easy to miss and common issue.
👍: 0 ⏩: 1
yes, I'm sure there's no space :/
and I'm sure the white eyes and the pupils are full of the colors
👍: 0 ⏩: 1
Okay let's see. I thought this trough and really, the only option I could have imagined (I will assume here you already checked those things either way from what it sounds like)
- no space after or before the layer name
- no spelling error
- opacity at 100%
- eyes are within the respective box-layers
- the box layers are correctly named
- the layers are in the correct order within the psd file
I just list this here in case anyone else has an idea about anything else that could've caused this so... There we go! I'm sorry I couldn't help but let's keep our fingers crossed!
👍: 0 ⏩: 1
whoaa thank you for the helps!
I hope next time I don't have any problem like before.
👍: 0 ⏩: 0

Thank you so much for this tutorial! I don't understand Japanese, so this will be very, very helpful to me~
👍: 0 ⏩: 0


Hi!
Thank you very much for sharing this tutorial!
However, there is a problem: I don't know where I saved my animation... -.-' When I save the animation, a blue box appears and when I close that, the program shuts down as well. I had considered that I successfully managed to save it, but then I couldn't find it anywhere... T_T


👍: 0 ⏩: 1
Not OP but if you use the free trial:
I was under the impression that after saving 4 times it will shut down the program instead of saving (since it is a trial).
So your only other alternative would be a screenrecorder like hypercam (assuming that's your issue).
👍: 0 ⏩: 1
Ah I understand T_T
yes then I will use a screenrecorder. Thank you for everything!
👍: 0 ⏩: 1
You are most welcome. Good luck~!
👍: 0 ⏩: 0

I could read japanese- anybody, contact me if you need help!
(BTW, the "???" is how to contact them and stuff. Just ignore that!)
👍: 0 ⏩: 0

Hii i need some help too, sorry ;~;
Ive been using emofuri since last year and ive never had this problem, but i drew a new character and did everything the same as how i did before, but when i import psd the program just freezes. and now whenever i import ANY psd file it freezes (i mean for past characters ive done that have worked before) I dont know what this is but im hoping you could help? ><
👍: 0 ⏩: 0

can you PLEASE help me? I've done all the steps FOUR times and I still can't open the program ;____; it only shows a blue screen;...
👍: 0 ⏩: 0

I need some help! I followed all the instructions, I tried to export my emofuri animation, and it cuts off the top of my character's head.
Here are some pictures. Do you know what I'm doing wrong? The resolution of the picture is 1200x1100 so it can't be too big
👍: 0 ⏩: 2

Sorry in advance if you already solved this problem, but --
After you extend the image to 1100 x 1200 (600 x 600 is much too small, as the file was originally created to be 1100 x 1200), you should be able to click on the canvas being displayed at the side and drag your character toward the center until they completely fit in the small screen.
👍: 0 ⏩: 1
| Next =>