HOME | DD
 moriarty-party — COMPLETE EMOFURI TUTORIAL
Published: 2014-08-08 23:19:08 +0000 UTC; Views: 104783; Favourites: 980; Downloads: 0
Redirect to original
Description
body div#devskin0 hr { }
So a lot of people have been asking me various things about how to Emofuri and stuff like that, so I've decided to make this tutorial to satisfy everyone's needs. I am going to try and cover EVERYTHING in this tutorial, from installing the software all the way to creating and saving your finished animation. This tutorial is going to be really long and a lot to read. Please bear with me though, this is my VERY FIRST TUTORIAL that I am ever making and I will try to be as specific as I can, but if you need any further explaining just drop me a note or leave a comment or something, ok? ^-^ here we go, let's start
First of all in case you were wondering, Emofuri is a completely FREE animation software that can really do wonders if you know what you're doing. Unfortunately it is all in Japanese which throws a lot of people off, but stick with me and you'll be pretty ok. However, as a disclaimer I do not speak Japanese and I have only been taking Japanese class for 2 years so I may not be able to answer any questions regarding what things mean and stuff... ok, so enough talk, let's get started!
Part 1- Installing everything
1. The first thing you need to do before you do ANYTHING is change your system locale to Japanese. If you do not do this before you install the software, NOTHING WILL WORK just trust me
Go to your control panel, language and region, and then advanced settings, then click on the "change system locale" button and choose Japanese. This step varies depending on what operating system your computer has. I have 8.1 so some of this stuff may not look familiar but do not freak out, just look around and you'll find it.
Choose Japanese and do not worry, your computer will look pretty much the same and you won't lose files or programs or anything. You'll have to restart your computer right after this though, so make sure you aren't in the middle of anything important.
2. Now that that's over and done with, time to install Emofuri! Go to this website here and click the huge pink button to download. The installation stuff is all in Japanese, but click the buttons that have the blue frames around them because those are the ones you want to click. I didn't take any screenshots when I was installing so I can't show you but if you get lost ask me for help
3. So now you're finished installing Emofuri, but it is probably still not working for you. Don't worry, there's still one more step- that's installing DirectX. It makes everything work and it's special. Install it here
Now we have finished installing everything! The program should run and open properly and you should have no trouble! Now, time to start preparing our drawing!
Part 2- preparing your drawing
Before we get started on part 2, there are a few things you should know: First of all, emofuri is really picky with layer names so follow my instructions carefully. It is also pretty important that the layers are in the correct order as well, although it's not the end of the world if you don't (it just might look a little weird.) Also, you must save your drawing in a PSD (photoshop format). Most art software can save files in PSD format. It doesn't matter what software you use to draw.
Ok, let's open up our drawing software! I use Artweaver which hardly anyone has ever heard of, but it's free and legal and does everything I want it to do so it's totally cool with me. Some things might not look the same on whatever you're using but it's not too different so don't worry.
So there are two ways to do this part- one would be to make an entire new drawing from scratch or the second way would be to use the template found in computer, C, program filesx86, m2tools cheeseware, emoteMovieMaker, template, サンプルPSD, E-mote3.0入門用テンプレート基本画像.psd. This is the sample that they give you with all the layer names and stuff and all you have to do is erase everything on each layer and replace it with your own drawings. I would recommend making your own drawing from scratch though, I just think it's a lot more fun that way??
1. Create a new file (or open up the template if you'd rather do it that way). Emofuri likes the dimensions 1100x1200 but they aren't too anal about it. I'm just going to use these dimensions anyway. The name of your file also doesn't matter.
2. Now we're gonna make a basic sketch. It doesn't have to be pretty. This is just to give you an idea of where things are and stuff
so here's my crappy sketch.
Now change your sketch layer to a lower opacity and now we can start making layers.
3. You are now going to draw all of the different body parts on different layers, using the layer names I am about to give you. Draw each separate body part on its corresponding layer. Use your sketch as a guide. If you need more than one layer for each thing (for example if you need more layers for color,) name them the same thing so that when you merge them the name stays the same.
Layer names:
前髪 - front of hair, bangs
マブタ通常 - outline of eye, neutral state
瞳通常 - iris, neutral state
白目通常 - eye whites, neutral state
マブタ半閉じ - eye outline, half open (optional)*
白目半閉じ - eye whites, half open (optional)
マブタ閉じ - eye closed
マブタ笑じ - happy closed (optional)
眉 - eyebrows, neutral state
鼻 - nose
クチ - mouth
クチ開き - mouth open
輪郭 - head including ears and everything**
胸 - boobs (optional)***
胴体 - body
後髪 - back hair****
*You don't have to make all the different types of eyes- if you just want to make neutral eyes that is fine because Emofuri kind of adjusts the eyes to make them look happy/sad or you can adjust them too if you really need to. I'll show you how to do that later.
** For the head as well as the body, make sure to draw and color all of the hidden parts. draw and color the top of the head and the top of the neck even though they are hidden behind other stuff, because when your character starts moving a lot things will get uncovered. Same thing goes for shadowing. That's also why you should draw your ears on the head layer too, even if your ears are hidden by the hair. It also looks good when you add some little side hair around the ears too, it prevents awkwardness and gives the hair more of a layered look
here, so you can see how I drew the entire head under the front hair layer as well as the side hair and the back hair
***Emofuri has boob physics where the character's boobs bounce up and down when it moves. If your character is a boy it's ok to leave this layer blank but make sure it is there. However, you can also use the boob layer for scarfs and stuff, which I am going to be doing since my character has a scarf
****Back hair is also optional if you are making a boy but I'm going to use it
Oh, I forgot. Special parts such as glasses, ahoge, necklaces, etc. go under the name of 追加_[name] insert whatever name you want in the brackets.
You can also add different expressions for things like eyebrows and mouths like this
[part]哀 - sad
[part]怒 - mad
[part]笑 - laughing
so "mad eyebrows" would be 眉怒
Once you're done drawing everything on its designated layer, we can now move on to making parameters! Oh, and delete your sketch layer after you're done drawing everything.
That sure was a heck of a lot of layers, wasn't it? Well good news: we're not done yet and there are WAAAAAY more!
4. Parameters. The most awkward but also the most IMPORTANT part.
This is where we are going to make really awkward squares and rectangles around all of the body parts so that Emofuri knows where things are. and yes, you get a whole new set of layer names.
Center points- mark these with colored squares. Put these layers above all of your other layers.
原点 - the center of your entire character
首中心 - chin origin (the top of the character's neck where it ends and around the mouth area)
腰中心 - back origin (around hip area or waist)
areas- mark these with colored rectangles. These layers go under your center points but still over the rest of your layers
目L枠 - left eye area
目R枠 - right eye area
眉L枠 - left eyebrow area
眉R枠 - right eyebrow area
頬枠 - cheeks (but you don't need these for this template so ignore that)
鼻枠 - nose area
クチ枠 - mouth area
The next three layers need to be under the rest of your layers
頭部全体枠 - head area, around entire head and back of hair
胴体全体枠 - entire body area, from bottom to end of neck. make sure to leave a bit of space at the bottom. The rectangle must be 100% opacity
トリミング枠 - trimming area, around the entire character. The rectangle should also be 100% opacity and this layer should be under everything
The color or opacity of your rectangles and squares do not matter, except for the body area and the trimming area which should both be at 100% opacity.
So here's my finished thing- yeah it looks pretty awkward and goofy but do not worry. Also since Artweaver can't make squares for some reason I copied and pasted the circle cross hair things from template. Good news is you're all done and now we're ready to import it to emofuri!
Part 3- Importing to Emofuri
So now that all the hard stuff is about done, it's time to open up Emofuri! Everything is in Japanese but don't panic because I'm about to tell you what everything means
or at least, whatever I know
First of all, the top bar thing at the very top. And sorry, I don't know what most of these things mean but what you'll be using the most is file.
And here's what the things mean in "file"
So to start, the very first thing we need to do is open an existing MMO file. we are going to open the template that they have already provided us, and you can find it in Computer, C, Program files x86, m2tools cheeseware, EmoteMovieMaker, template, E-mote3.0テンプレート, and then E-mote3.0入門用テンプレート.
so now you should have something like this.
Oh, I forgot- before you do anything you should save this file under a different name so that you will always have the original template to use for other things
So now that we have that open, let's go ahead and click file, import PSD.
You get this scary window with all these boxes and stuff. Don't worry, it's not actually that scary.
The things in the sidebar are all of the different parameters. Click on them to see what each one is. The ones in red are the ones that have errors. Right now my background layer is red because I don't have a background. I'm just going to leave it there because I don't have a background anyway, but if any of your important parts are colored red, go back to your psd and check your layer names. Keep in mind that if you accidentally pasted a space when you were copying and pasting the layer names, it will not work because it counts the space as a character. Delete spaces.
The blue ones are the special parts and you're gonna have to do a little extra with those. I'll explain that later.
You can also zoom in and out using that slider thing up at the top.
So what you wanna do here is mostly click on everything and make sure they fit correctly in their boxes. As you can see here, my front hair isn't completely fitting in the box. So all I'm going to do is click on one edge of the box, and drag it until it fits around the whole thing. See?
I did the same for the body and the "boob" layer (which I am using for the scarf instead)
The special parts are the things in blue. Click on those because they're important.
Now that's different. There's a big grey button thing at the top. Go ahead and click that. This is where you define what kinds of movements your special parts are going to have. You're gonna get all these menus but don't worry I'm going to tell you what each thing means
The first menu
Since I'm doing glasses, I'm gonna choose head.
Independent as in the object is just free floating, frame sync as in the movement of the object is in sync with another frame, and I honestly don't really know what cutout means sorry
So I'm gonna choose frame sync here, because the glasses are in sync with the head movement
And here are all the different types of movements. For glasses, I'm going to choose "no movement" because glasses don't really move all that much.
For the Ahoge, I'm using head, frame sync, and front movement. For things like Ahoge, the movement kind of depends on what type of Ahoge it is. I suppose it doesn't really matter what movement type you choose because you can always edit the positions and warp it after you import it. Don't worry too much about that yet.
So when you're done defining the movement type for your special parts, they should turn green. Now we're ready to click the left button at the bottom to import it!
If your import was successful, it should look something like this. If something looks a bit funny or if certain parts were cut off, you can undo your import (ctrl+z) and try editing the boxes again. If your character looks transparent, go back to your PSD file and make sure all of your layers are at 100% opacity. Also check the opacity of your last two rectangles- the body area and the trimming area. They should also be 100% opacity.
Ok, let's move on to editing stuff!
Part 4- Editing stuff
Of course, your character is going to have a bunch of imperfections and weird positions after you've just imported it. Which is why we need to edit stuff!
First of all I'd like to call some attention to this cute little side menu here because it's pretty important.
I really don't know what the first one does, sorry. But let's go ahead and click on the blue tab. We need to edit the positioning of our parts before we can go into any animation.
So here's what all the menus in the blue part are for.
Four main parts basically. General (we don't use that very much, it's just general positioning and centering and stuff), face (eyes and everything) head, and body.
Face:
Head:
Body:
Each one of these things I labeled here contains another menu when you expand it. Let's expand one and take a look.
So as you can see I expanded the face part. There are a bunch of slider thingys, as well as a bunch of other buttons with those icons that look like graphs. When you slide the slider thingys around, the head changes position. You may notice that when your head is in certain positions, it looks a little funny. (It may not, in which case, that's great and you don't need to change anything for the head!) But if it does, like mine, don't worry because fixing it is pretty easy. See those three sidebar buttons with the little graph icons? Guess what- they correspond to the three sliders! Try clicking on one of those little graphy icon things.
So now we get this cool square thing. This is where we can edit the positioning of things. See the three buttons on the bottom of the sliders? Those are the three points in the positioning. Click on each one of them to see what they do.
So this is what his head looks like in the most upward position. It looks a little weird so I'm gonna adjust it. You can click and drag anywhere on the square grid to warp it however you want. Drag the white square at the top to adjust the overall placement/location of the part. This sets your default position for the face when it is in the absolute upward position.
Just keep doing this for all of the parts and all of the positions until you're happy with how everything looks!
Oh, and I forgot to mention, to edit the special parts you have to go to the last tab on the sidebar with the tail icon.
Sorry, I forgot another thing! If you are moving your parts around and discover that something is wrong with your drawing, for example if you didn't fully color the face behind the hair and it's showing and looks weird, you can edit your PSD and import it again and all of your parameters and adjustments will STILL BE THERE. This really makes life sooooo much easier. You can fix up and re-import your drawing as many times as you want, and you won't lose any of your other work!
When you're all done editing your parts and making your character look great in all positions, let's move on to animation!
Part 5- Animation
Phew, now that all of those hard steps are over and done with, we finally get to see our character move! This is the funnest part.
First thing, go ahead and click that red tab with the flower.
Now click the one I circled, and you'll see all these slider things like this.
The sliders position different parts of your character. Slide different things around to pose your character.
When you get a pose you like, click the third gray button from the left at the top (the one I circled) and this will save your pose. Make all the different poses that you will be using in your animation. And when you're done, click the fourth button to see all of the poses that you saved, and it should look something like this
So here are all of my poses! Now you're ready to start making your timeline.
Now click the plus sign next to the fourth button under the red tab, and a really long menu will drop down.
The long list of things are all of the sample animations that Emofuri gives you, you can click any of them to see what they do. But for now, we're going to be making our very own animations, so click on at big gray button I circled at the top to create a new timeline.
Now you have something that looks like this. The bottom part is your timeline. Remember all of the snapshots you took earlier when you were posing your character? This is where we put them.
The numbers on the top area of the timeline are the number of frames, I think. Emofuri runs at 60 FPS, so 60 on the timeline is one second. Keep this in mind when you are adding things to your animation.
To add something to your animation, click somewhere on the timeline so that the blue line is at however many frames you want that part of your animation to last. So if you wanted the first snapshot to be half a second, click on 30.
Also I took this screenshot after finishing my entire animation because I forgot to screenshot while I was in the process, so ignore the extremely high numbers. Sorry :C
Now, click
the button that I circled, it'll lead you to the list of all of the poses that you saved. Click the one you want and now your timeline will have a bunch of blue lines that go up to whatever point on the timeline you clicked. Keep adding your different poses into your timeline, and if you want you can adjust the lengths of individual things by clicking and dragging the ends of the blue bars. And sorry, I completely forgot to take screenshots when I was doing this so I'm just going to show you my part of my finished animation here
It's good to stagger the lengths of the blue bars for the different parts for a smoother animation. For example if you want the eyes to close before the head turns you can just shorten the bar for the eyes. I didn't do any of that because I am lazy.
Luckily the sidebar with the part names have the English names as well, so you can see what does what without having to guess or translate anything.
you can also use this slider thing here to edit the positioning of any part.
Click play to preview your animation and make any last adjustments, and you're ready, click the export button to export your file!
This is your export window and sorry I don't know the meanings of everything. Adjust the size and positioning of your image using the offsets, scale, and length/width. You can select a file type with the top drop down menu and the rest is pretty self explanatory. If your animation is pretty long like mine, it's best to choose 100ms for the frames. Keep in mind that if you're choosing to export as a GIF file, you can't use the 20ms setting for some reason. I don't really know the reason this but I heard it crashes if you do. When you're done, click OK!
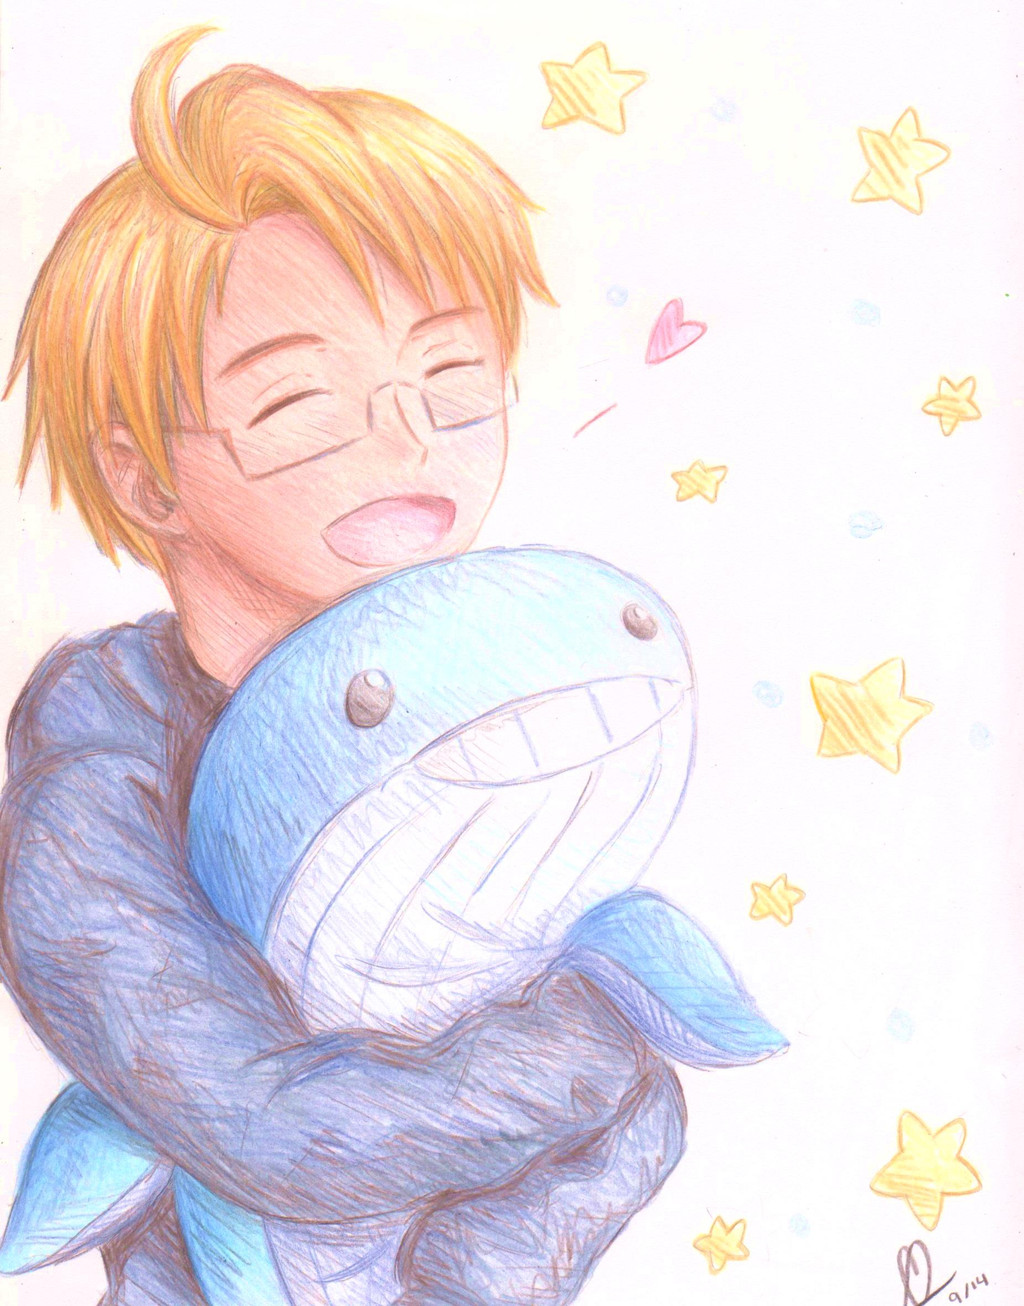
And now you can laugh and cry as you watch your OC come to life and give yourself a big pat on the back for finishing this extremely long and wordy tutorial and bearing through this long and painstaking process. You are amazing and I am so proud of you and Yukio here agrees (yeah I think that's his name though I might change it later on)
CONGRATS FOR FINISHING AND THANK YOU SO MUCH FOR READING THIS TUTORIAL even though it is so long. I apologize if this was hard to understand- I'm not that great at explaining things and again this is my very first tutorial ever. But if you have any questions, please drop me a note or write a comment!
I will try my best to answer all of your questions to the best of my ability but please know that I am no expert at this- I'm just some loser that sits at home and does things like this all day because I have no life
Also, I would love to see your finished works! Have fun, and happy Emofuri-ing!


Comments: 160

Thank you for helping but it seems the top of my characters' head is still cut off. It just made the photo a bit smaller in the preview.. :\ I had a double check in the psd tile and everything seems to be normal, like all of the squares are covering what they should be.
👍: 0 ⏩: 1

Hmm... I understand you extended the canvas, but did you actually click the image and drag it about until it fit correctly in the center?
sta.sh/0ymz14km19s
See how the character is displayed in that screen? (Right before you export the animation) You should be able to left click on your character and drag it.
If you already did this and it didn't work, I'm sorry I couldn't be of more assistance ;n; I only used this program once.
I hope you can find a solution to your problem! ~
👍: 0 ⏩: 1
Yeah, the character is right in the middle umu It just has a big chunk of his head missing when it should be in the frame....
Oh, it's okay! I'll figure it out some day xD
Well thank you very much for trying to help

👍: 0 ⏩: 1
I'm not sure what's wrong then ;n;
No problem, man! Good luck ;w;
👍: 0 ⏩: 1
Yeah it's weird xD
Thanks!
👍: 0 ⏩: 0

Ahh, no idea if you solved this or not, but see where it says "600" on the third line? Try changing it to somewhere around 700-800ish! It's for extending the canvas as far as I know!
👍: 0 ⏩: 1
Oh, thank you! I'll try that. C:
👍: 0 ⏩: 1
you're welcome! i hope it works for you!
👍: 0 ⏩: 1
Hm, the top of his head is still cut off. Could it be that his hat is attached to the head layer?
👍: 0 ⏩: 1
Hmmm! That's really odd! I don't think that the hat being attached to the head layer would be a problem! I honestly would've thought that changing the number to a higher one would've worked! Did you click outside the line after changing the number to make sure it changed?
👍: 0 ⏩: 1
Yeah I know it's super odd ")
Don't worry I did. The picture got smaller, but half of his head was still cut off.
👍: 0 ⏩: 1
hmmm, that's weird! it should have gotten bigger if anything. maybe play around with the numbers until something works? >.< or maybe your trimming layer was a little too small when you made it?
👍: 0 ⏩: 0
This is extremely helpful. Thank you so much for making this!
👍: 0 ⏩: 0

How to copy your Japenese names into Paint tool sai? It appears "???" when I paste them in. I want to add the layers like happy eyes or angry eyebrows which were not in the template?
👍: 0 ⏩: 1
I have the same problem. Apparently, English Paint Tool SAI doesn't support Japanese writing at all, so just import your SAI file into Photoshop or something, since PS supports it.
👍: 0 ⏩: 1

Is there a way to save this with a transparent background? I've been using Emofuri for quite some time now, and it's becoming grueling work to get rid of that white background when I save....
👍: 0 ⏩: 0

Oh my God, everything on Tumblr is gone, thank you so much for this tutorial here, you're my personal hero now ;o;
👍: 0 ⏩: 0

The "Import PSD" button seems to be unavailable or unclickable for me? i dont know why.
👍: 0 ⏩: 1


Great tutorial. You, and others, may be intertested in this link: mattintosh.hatenablog.com/entr…
It shows a way to install program in such a way that you will not have to change the System Locale to run it.
Also, any chance of getting this in a PDF or RTF download?
👍: 0 ⏩: 0

Hey There! When i tried to add in the Japanese characters for additional parts,
it ends up in "??"
I was wondering is there something i did wrong?
👍: 0 ⏩: 0

hey! any idea why this pops up? i.imgur.com/L6DImvX.png
i fix all the boxes and such, then i press import but this pops up.
help?
👍: 0 ⏩: 0

really good tutorial thank you for sharing!
i have a question about the mouths. thanks to your tutorial i found how to add different kinds of mouth expressions, but one of them doesn't show up. i'm trying to make a 2nd open mouth layer, but writing 'クチ開き笑' doesnt seem to have it show up (i look at them through the green tab at the emofuri menu)
do you know how to make it show up?
👍: 0 ⏩: 1

Hi, thanks for checking out my tutorial!
Unfortunately, I have been having the same problem
However there are a lot of emofuri help blogs on tumblr who actually know how to read japanese and might be able to help you out. Sorry for not being able to help though! D:
👍: 0 ⏩: 1
actually, i found it. you have to name it to 'クチ笑開き', not 'クチ開き笑'! now i just have to figure out how to actually put it on a slider or something lol
👍: 0 ⏩: 1
Nice job! ")
👍: 0 ⏩: 0

Hey, I need some help... I made this i.imgur.com/NE4VVW3.png
the glasses don't move, some hair is cut (the bottom bangs and the cat ears) and he doesn't have irises. btw he's blinking on the image, the eyes aren't like this xD
Your tutorial is super cool btw, but I'm new on emofuri and I get errors ;v;
Thanks!
👍: 0 ⏩: 1
Thanks for reading my tutorial and for sending me a picture of what you need help with (this makes it way easier for me to help you lol) I would say for the bangs being cut off, your problem would be in the importing window. Don't forget to edit the sizes of all of the boxes so that they enclose the entire designated parts, and nothing gets cut off before you complete the import. As for the irises, it looks like you forgot to merge your color layer and your outline layer in your PSD. Make sure that when you are doing this, you name the layers the same thing so that when you flatten them, the name doesn't change. For the glasses, you can edit their movement under the special parts tab (the orange one with the tail icon.) I go more in depth about this in part 4 of the tutorial. I hope this helps and let me know if you still have trouble!
👍: 0 ⏩: 1
Thanks for the fast reply!
And I didn't notice the box thing, I edited it but the ears are still out. If I try to edit the box it gives me an error and emofuri crashes : imgur.com/yQjNvnW
Oh crap, I think I did the iris inside the eye outline xD it's fixed, but it doesn't show it, I don't know why.
I'll edit the glasses when I get to the part 4
If you want to check the psd file, here it is: sta.sh/0mn2f7v7nsi
👍: 0 ⏩: 0

I keep having this issue i.imgur.com/ZxwYVxA.gif but the one I uploaded to DA the first test I didn't have that problem.
I've messed with cropping, neck, mouth and everything but my friend and I both can't seem to figure out how to fix it.
The problem is with themouth.
Would you know what to do?
👍: 0 ⏩: 1
It looks like you're going to have to edit the parameters for the mouth under the blue positioning tab. For this, I believe you're going to have to expand the blue tab, expand the face tab, and then find the parameters for the mouth. Then warp the grid and move it around to set your default positions for the mouth.
👍: 0 ⏩: 1
Would you be able to look at my.psd? Cause that didn't work. X.x
👍: 0 ⏩: 1
Sure! I'm pretty busy right now with school but I'll take a look when I have a free moment
👍: 0 ⏩: 1
Thank you ^^
sta.sh/0jcpph4qgsr
👍: 0 ⏩: 0

hi, i have a problem with this emofuri ... I wonder if you could help me?
I've asked about that for some people previously but nobody could explain or solve it.
look: sta.sh/0dz8cwcqgo3
when I upload the PSD into the program, all parts such as eyes, mouth and hair come out of place.
and during the animation, these parts don't follow the movement of the head or body.
I did all the steps above and I can say with certainty .... it has nothing related to the colored squares or the names of the layers.
👍: 0 ⏩: 1
Hmm.. if your problem is not in the squares or the layer names, try and manually edit the positioning of the affected areas under the blue tab. The blue tab is great for stuff like this- just find the affected areas, and expand things under the blue tab to find where it allows you to warp the grid and set the default positions of each individual part. I covered that in the tutorial but if you still need help let me know!
👍: 0 ⏩: 1
thanks for replying ^^
actually I've also tried the blue tab, even repairing the positions of every part, at the moment of the animation the same thing happens,
the parties don't follow the movement of the face ...
I simply move on the blue tab until the correct character appears again, but this doesn't affect the animation ...
If you want to try it .... later I can give you my psd. with drawing and you try to open it in your program to see if the problem repeats with you, or if it's just me

👍: 0 ⏩: 1
that's weird, I don't know why that's happening! Can you screenshot and show me what you are doing? And yeah, if you give me your psd I can try it out sometime and see what the problem is.
👍: 0 ⏩: 1
okay! later I can send you some photos ^^
this is my psd: sta.sh/039j9epnhx1
and a detail, the fact that bangs of him be in the same layer of the head, is because the bangs didn't accompany the animation ...
then I put them together to avoid the problem (yeah it worked)
👍: 0 ⏩: 1
Ok, I'll take a look at this when I have the time. I'll let you know if I find any problems
👍: 0 ⏩: 1
ok i'll wait for this  (Smile)")
👍: 0 ⏩: 0

uuuuuhh...i installed directx but i still cant open the program....
👍: 0 ⏩: 1
make sure you get the latest version of DirectX which I believe I provided with a link and make sure you changed your system locale before you installed Emofuri. If that still doesn't work there is another way, but I have to find the link. I'll get back to you on that.
👍: 0 ⏩: 1
well, apparently the file is damaged or incomplete....so i cant install it.i also apparently have direct x installed beforei first installed it.
👍: 0 ⏩: 1
That's what happened to me at first, so I uninstalled it and changed my system locale to japanese, then installed it again. I'm still trying to find the thing that works but keep trying I had to try like over 5 times
👍: 0 ⏩: 1
but when i check to uninstall directx, it dowsnt show up.....its like i never installed it at all....
👍: 0 ⏩: 2
here I found the link for the download thing that apparently makes it work www.microsoft.com/en-us/downlo…
I don't exactly know what it is but people claim it works.
👍: 0 ⏩: 1
<= Prev | | Next =>