HOME | DD
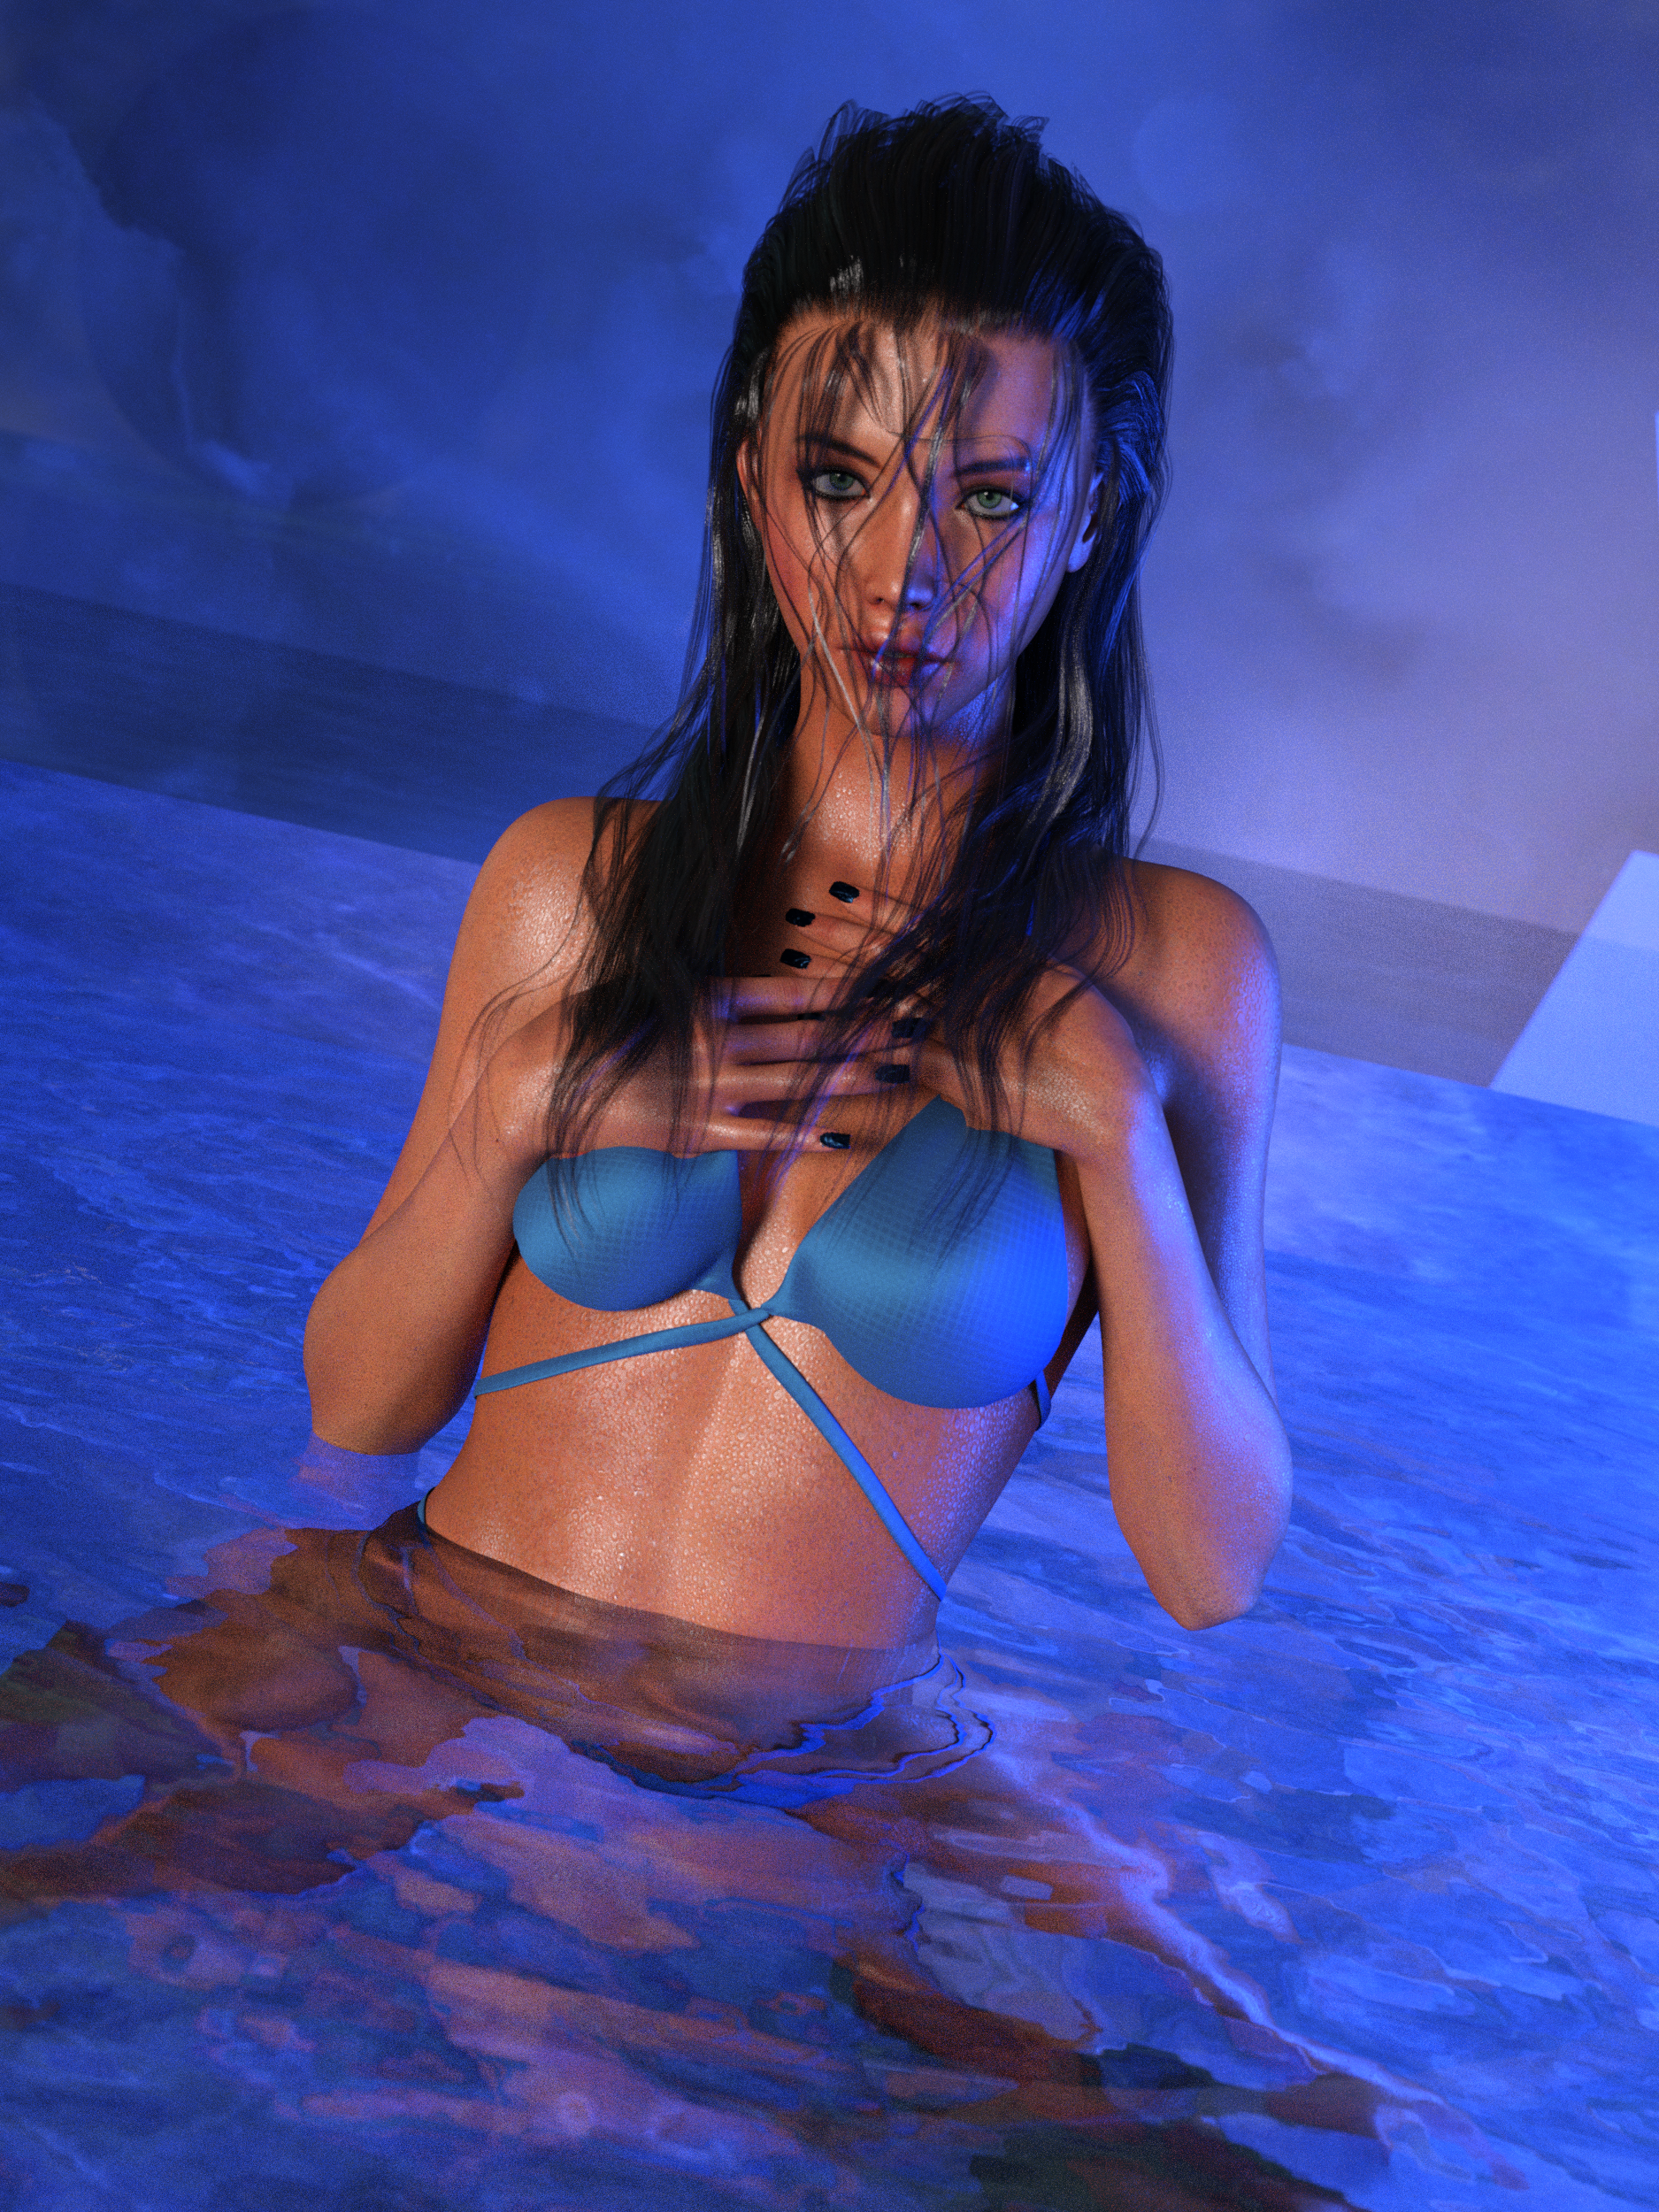
 parallux3D — Out-of-the-water

#bikini #drops #female #girl #splash #water #wet
Published: 2016-08-03 18:11:44 +0000 UTC; Views: 1155; Favourites: 23; Downloads: 43
Redirect to original
Description
Tools used: Daz Studio 4.9 Iray, Hexagon and Photoshop CS6.A lot of work with textures, shader settings, normal maps, D-formers, mesh adjustments etc...
Related content


Comments: 12

Excellent! And interesting to read your technical notes
👍: 0 ⏩: 1
Very nice work with water and lighting. Seems very real.
👍: 0 ⏩: 1
You're very welcome.
👍: 0 ⏩: 0

Nicely done. Would love to know even a little more about what parts of the scene needed the work with normal maps, Hexagon, etc,
👍: 0 ⏩: 1

I'll give it a try... remember I'm just an amateur.
Hexagon was used to make the waves. Bit by bit of the plane and using different settings of soft selection. Used deformers for some though, when I got tired of Hexagon crashing. And deformers to get the waves just around the girl. I also used Hexagon to stretch and bend the mesh on the splashes to get the right shape and angles (could've done better, but hexagon is a frustrating tool). And hexagon was used to make some morphs for the hair and especially flatten it (it will take a while before I try that again). Gave her a touch of some muscles on arms and legs using Hexagon too.
A normal map was used for the foam (not sure if any difference is even visible in the render...). Also used normal maps for the splashes. And for textures on the female of course. The maps are made from bump maps in photoshop with Nvidias plugin (some contrast/level adjustments and with added noise layer for micro structure on her skin - it's probably not visible, but I know it's there...). And for textures on her "bikini". (The "bikini" is a converted V4 that also was avaible for V3...)
Another thing that's hardly visible are veins. I'm using AJ's Blood vessels which I (usually) put in the translucency color setting in Daz studio. I also used them to make normal maps. I combine the normal maps with the texture normal map in photoshop (video-howto www.youtube.com/watch?v=-sR8sI… ).
Shader settings is a whole chapter of its own. Lets just say it takes its time. I don't know if I'm doing something wrong, but I can rarely use the same skin settings twice. Every scene need its own settings. I suppose it's depending on the light. Settings that looked awesome in a previous scene looks like sh*t in a new one. I figure it might be like photography irl... new scene and new light require a different kind of makeup to look good.
 (Wink)")
👍: 0 ⏩: 1
Good to know I'm not the only one who has Hexagon crash *all* the time, I've really just given up on it.
Another thought I had as I read your post... I don't play with normal maps nearly as much as I should.
I find this stuff really interesting, thanks for all the info.
👍: 0 ⏩: 0

This looks great  (Smile)")
👍: 0 ⏩: 1
Thanks
The splashes... "To be, or not to be" - "To blur, or not to blur"... I think it's about motion blur. Or lack of it. Spent a long time deciding whether I should add motion blur or not.
👍: 0 ⏩: 0

Fantastic render - The water (splash) looks very realistic
👍: 0 ⏩: 1