HOME | DD
 sandervandenberg — Tutorial V2

Published: 2008-01-10 21:01:25 +0000 UTC; Views: 4405; Favourites: 26; Downloads: 285
Redirect to original
Description
Photography Hints and TipsBy Sander van den Berg
Introduction
Please note that I’m not a professional (well, not yet), nor do I imply that I am an authority on the field of photography. This is merely an overview of tips that might be useful to others. It’s things I’ve learned along the way. Some may be obvious to more experienced photographers. Also, some of the tips apply to digital photography only.
Composition
1. It might be a cliché, but the Rule of Thirds does work for good compositions. Centered subjects can work, but often it looks much more dynamic if you apply the rule of thirds.
This is how the rule of thirds works:
You virtually divide the view in 3 parts, horizontally and vertically. The point(s) of interest should be on the point(s) where the lines cross each other. Please remember that there are exceptions, but this technique is a very handy tool.
2. Placement of the horizon. Avoid placing the horizon in the middle of the image. Often the point of interest is either part of the land or it’s the sky, so you’d want to have that take up the majority of the shot. A shot with the horizon in the middle usually looks sort of “static”.
3. Use reflections. Reflections are often an overlooked feature of nature. So also point your camera to water every now and then.
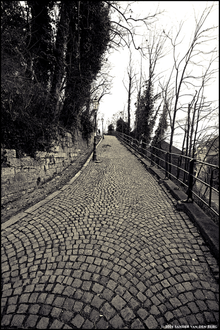
4. Line Play. Lines can be of great benefit to your composition. Lines on a building, the lines of a road, etc. Experiment with diagonal lines, too.
5. Combine foreground and background. Ok, a landscape picture with a pretty sunset is nice. But if you want to add depth to your picture, try to find an object in the foreground (a tree or bush, for instance) and include that. You might want to experiment with turning your camera a bit down (while still including the sky). Especially in wide angle shots, the results can be great.
Techniques
1. Buy a tripod! (sort of speaks for itself)
2. If for whichever reason you don’t have a tripod with you, but you do want to do a long exposure shot, use the self timer. You activate the self timer, meter, put your camera on a steady underground (a fence, a rock, etc) and press the shutter button. Doing long exposure shots while holding the camera is a bad idea.
3. Use exposure compensation. I couldn’t live without it. If you use a digital camera, play with the exposure a bit, to get the best result. Standard metering of the camera is not perfect, especially in harder conditions (snow, for instance, but also fog and direct sunlight).
4. Meter at several spots in your view. If you are trying to photograph a tree (for instance), but you also want the clouds to look good, it’s possible that if you point at the tree, the sky will be one white sheet. A good technique to get the sky right is pointing at the sky, then moving you camera in the right position again and shoot (without metering again). Be sure that the tree is still sharp and not to dark.
General tips
1. Bring enough batteries. It’s a photographer’s nightmare to be at an interesting, photogenic place without being able to shoot it. So always bring some spare batteries.
2. [digital camera only] If your camera tells you you’re almost out of batteries, but you still want to shoot some more, shut down the LCD screen. The LCD screen takes up a lot of battery power. By shutting it off and just using the viewfinder instead, you can usually take at least 20 more photos before it runs out.
3. Bring a plastic bag. Most cameras don’t like rain. So if you do get into heavy water, make sure you have something to protect your gear.
4. If you have a certain style, keep trying to improve that style. But on the other hand, don’t be afraid to try out different styles as well. You might think that it’s not interesting, or that you’re not good at it, but sometimes you can really surprise yourself. And keep some variation in photography, for yourself. It also helps to avoid the risk of repeating yourself.
5. Always place the cap back on the lens, even if you’re taking a lot of photos. With keeping it off while you walk around you risk damaging the surface of the lens, and the chance of dust in dirt getting in/on your lens is higher.
This tutorial is the new version, updated on 10 January 2008 (added tips and rephrased some existing ones).
Related content
Comments: 6

nice and simple... it´ll surely help a lot of people
👍: 0 ⏩: 0

Thanks for this, I have just bought my first good camera(finepix s5800)to start looking to take some good shoots with it,which i hope to put on here at some time,and you have given me some very good advice that I will use when I take my photos.THANKS nice one.
👍: 0 ⏩: 0

This is pretty cool, I heard a lot of this already, but there are some new things. Thanks for posting the tips.
👍: 0 ⏩: 0

Bedankt voor de uitleg! Kan ik denk ik wel gebruiken!
👍: 0 ⏩: 0


