HOME | DD
 tatasz — Weird Tiling Workflow 1: Things Inside Tilings
#apophysis #fractal #fractalart #tessellation #tile #tiling #tutorial #workflow #ifstile
Published: 2018-02-23 11:58:39 +0000 UTC; Views: 1864; Favourites: 19; Downloads: 0
Redirect to original
Description
/* Journal Top */ body div#devskin11548908 .gr-box { background:#617360; } body div#devskin11548908 .gr-top h2, body div#devskin11548908 .gr-top h2 a { text-transform:uppercase; letter-spacing:2px; padding:5px 20px; font-size:29px; } body div#devskin11548908 .timestamp, body div#devskin11548908 .commentslink { text-align:center; padding:5px; text-transform:uppercase; letter-spacing:2px; } body div#devskin11548908 .left { width:17%; } body div#devskin11548908 .right { width:83%; } body div#devskin11548908 .right { float:right; } body div#devskin11548908 .left { float:left; } /* Box and Square Headings */ body div#devskin11548908 h1, body div#devskin11548908 h2 { text-transform:uppercase; font-weight:normal; font-size:14px; font-weight:bold; font-family:'open sans'; } body div#devskin11548908 h1 { letter-spacing:2px; color:#fff; padding:5px; background:#617360; } body div#devskin11548908 .text h2 { padding-left:10px; letter-spacing:1px; margin:5px 0 -5px 0; border-left:20px solid #617360; } body div#devskin11548908 h1:hover, body div#devskin11548908 h2:hover { font-weight:bold; } body div#devskin11548908 .p1 { background:#617360; } body div#devskin11548908 .b1 { background:#617360; } body div#devskin11548908 .g1 { background:#617360; } body div#devskin11548908 .p2 { border-left:20px solid #617360!important; } body div#devskin11548908 .b2 { border-left:20px solid #617360!important; } body div#devskin11548908 .g2 { border-left:20px solid #617360!important; } /* Mini Gallery Code */ body div#devskin11548908 .mini .shadow-holder { display:inline-block; width:150px; height:150px; overflow:hidden; } body div#devskin11548908 .mini .shadow-holder img { padding:0px; max-width:none; margin:0 0 0 0; } body div#devskin11548908 .mini .lit { width:150px; height:150px; } body div#devskin11548908 .mini .shadow-holder:hover img, body div#devskin11548908 .mini .shadow-holder:hover .lit { position:absolute!important; z-index:2; margin:7px 0 0 -63px; padding:5px; } body div#devskin11548908 .b .shadow-holder:hover img, body div#devskin11548908 .b .shadow-holder:hover .lit, body div#devskin11548908 .embedded-deviation img:hover, body div#devskin11548908 .embedded-freeform-deviation:hover { background:#617360; } body div#devskin11548908 .g .shadow-holder:hover img, body div#devskin11548908 .g .shadow-holder:hover .lit, body div#devskin11548908 .embedded-deviation img:hover, body div#devskin11548908 .embedded-freeform-deviation:hover { background:#617360; } body div#devskin11548908 .y .shadow-holder:hover img, body div#devskin11548908 .y .shadow-holder:hover .lit, body div#devskin11548908 .embedded-deviation img:hover, body div#devskin11548908 .embedded-freeform-deviation:hover { background:#617360; } body div#devskin11548908 .shadow-holder:hover img, body div#devskin11548908 .shadow-holder:hover .lit, body div#devskin11548908 .embedded-deviation img:hover, body div#devskin11548908 .embedded-freeform-deviation:hover { background:#617360; } body div#devskin11548908 .mini.b .shadow-holder:hover { background:#617360; } body div#devskin11548908 .mini.g .shadow-holder:hover { background:#617360; } body div#devskin11548908 .mini.y .shadow-holder:hover { background:#617360; } body div#devskin11548908 .mini .shadow-holder:hover { background:#617360; }
Tiles are awesome but totally underused, maybe because the maths requirements to create them.
But now that we have IFStile, things are way easier ^^
Here, I document my workflow. This is not a tutorial.
Getting the tiling ready to work
Of course, you can make a tiling from scratch, but i am lazy and I just grab something from IFStile (ifstile.com/ ).
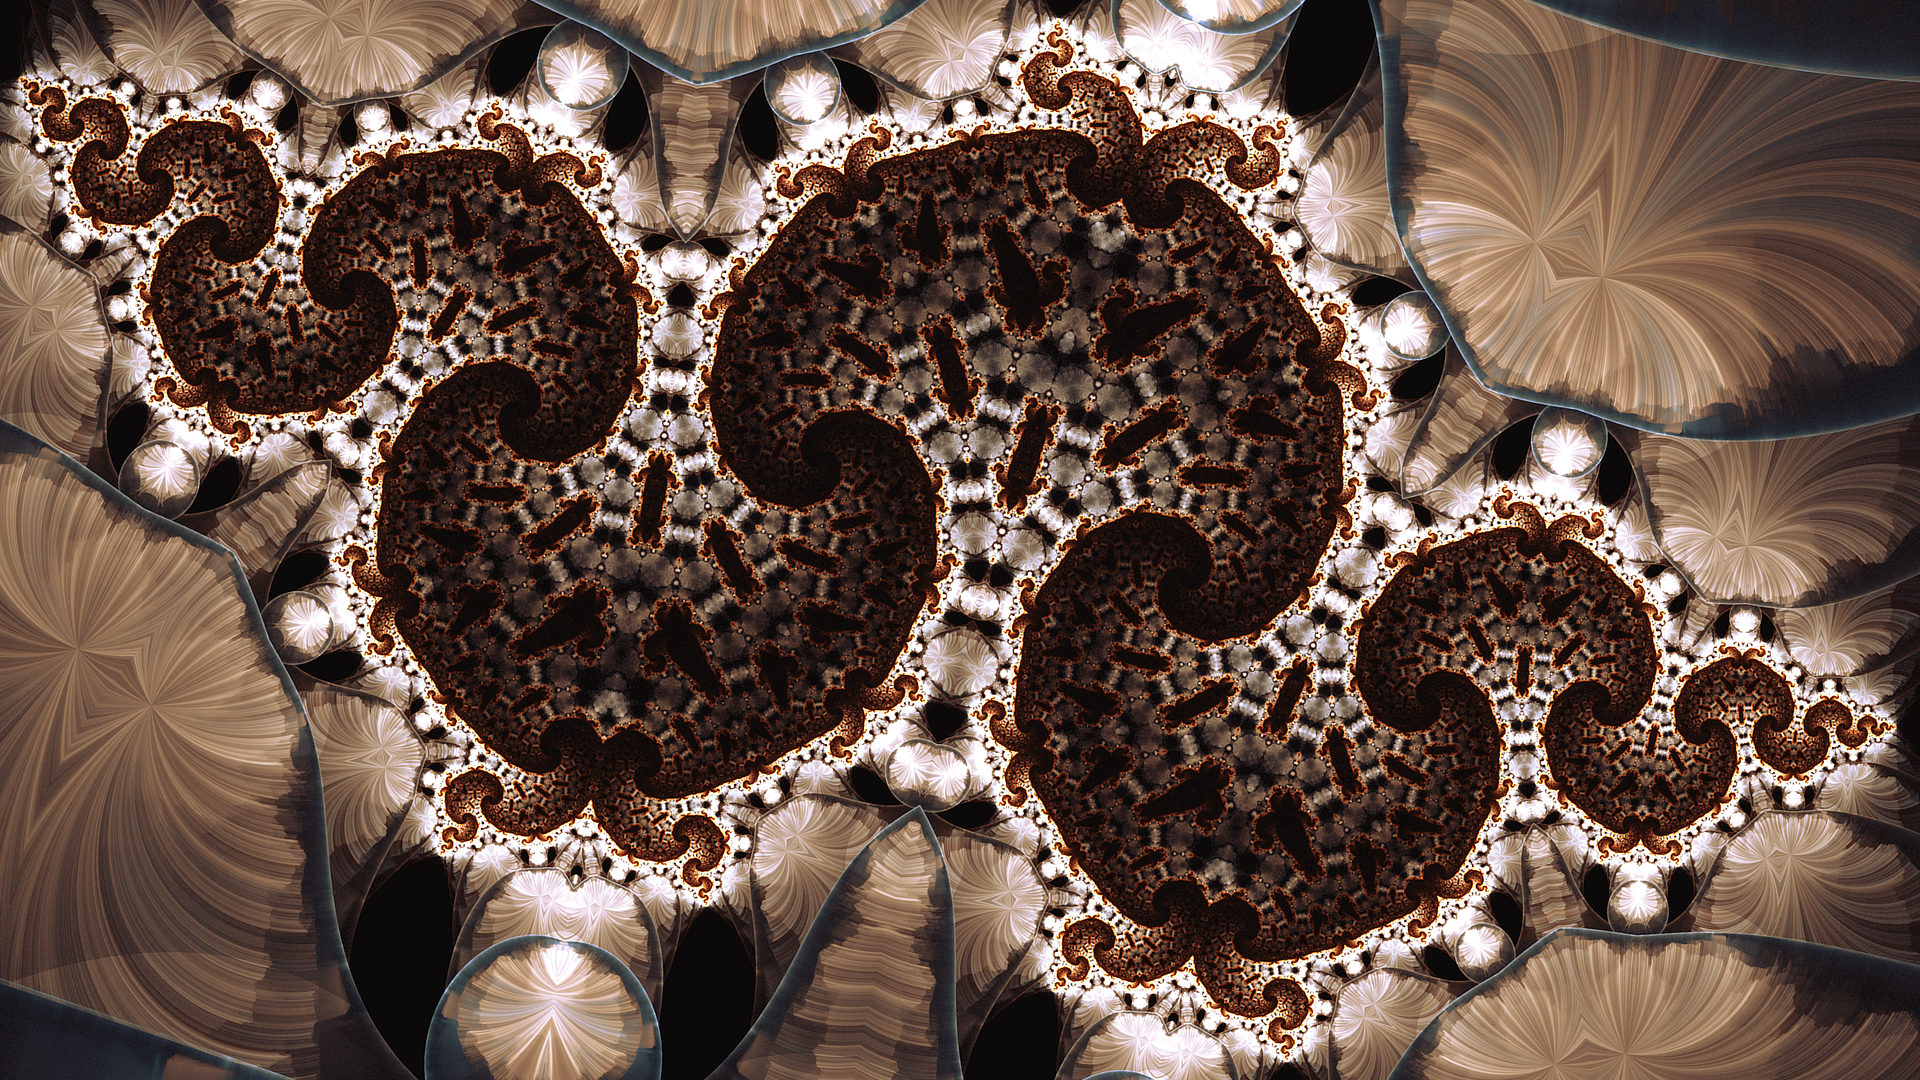
This one looks nice (after a lot of searching and pondering). So I´ll just export it to Apo.
Observe that this tile is made of 2 different shapes (overall 7 transforms). Fun stuff to play with
At this stage, i try coloring it - if not the final version, something close to it. Once I get tons of weird stuff and xaos, the efficiency will drop a lot, making it hard to visualize, which will make coloring pretty painful.
Another important step is to visualize the xaos structure of your future work. Sometimes, i keep it in my head, but sometimes I actually need to draw it.
So the idea here is:
1. Crop a hole in the tiling
2. Put the cropped part into some framework (i´m thinking flux here)
3. Then, fill the hole in the tiling with the framework shaped to fill it.
:thumb:
Actual satanic magic
Now that I have the tile and the plan, time to work.
The first step is to smartcrop a hole in one of the tiles. To position the hole, i move the transform and the post transform in opposite directions: post transform moves the hole, and the regular transform cancels the changed shift.
Now, i need something from the tile to feed into flux. Since the tiling shape is pretty irregular, what I will do is to duplicate the crop, and then invert it, then I will have a circle, nice and ready to use.
At this point, the things I will do will break the tile. Its kinda annoying because harder to track if everything will work fine or something is broken beyond repair.
Here, I tweaked a bit the crop, for a bigger piece of the tile to go into it. Then, I reset the final transform and use it to scale it back to a unit circle:
Yep, now it looks like crap
The next step is to apply curl to map it to a halfplane. For more details, you can check the double bubble tutorial by piethein21 , for example.
Now I can add flux. Since lazy, I just duplicate the curl transform and change xaos to take points from curl and from itself only.
For now, I will not tweak the flux since the visibility is meh
Next step: I add a container transform which contains the flux, and goes into the tile.
Since I want something round, I start with a sineblur, since its easier to visualize and tweak. I also scale and position it to fit the crophole:
Notice that I messed up some xaos in there, missing one of the transforms.
Now, I can replace the sineblur with a hemisphere, and then tweak both hemisphere and flux to get a nice picture.
I also switch the visibility to flux because its cooler and add a final transform.

")