HOME | DD
 TLund — Wrong Normal Map X_X
by-nc-sa
TLund — Wrong Normal Map X_X
by-nc-sa
Published: 2008-03-16 16:23:14 +0000 UTC; Views: 351; Favourites: 0; Downloads: 2
Redirect to original
Description
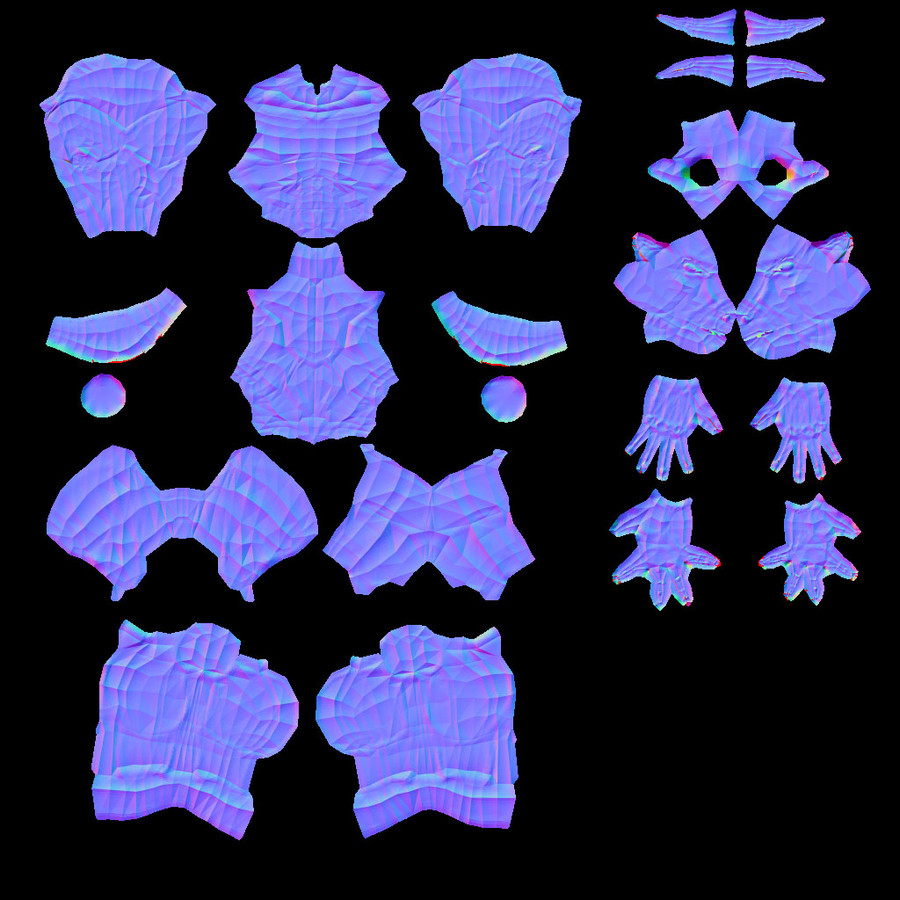
Well i don`t know what i`m doing wrong, but somehow al the edges of my lowpoly model it`s really marked on the normal map . . .Somebody please HELP ME!!, . . . before i find a clift and jump
well thats it`s, . . . greetings and have a nice Sunday
Thor
P.S. : sorry about my english (may be a shoud add this line to mi signature
") )
)
Related content


Comments: 8

oh yeah... big time agree with sahib's wasted space...
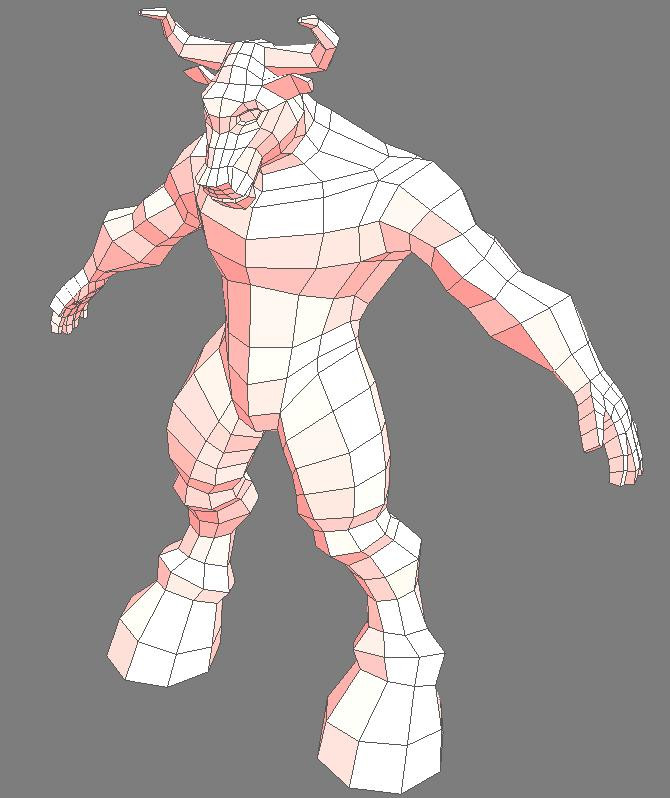
another thing you could do for the low poly... if you're running a symmetry, and there's not any specific details that would show only on one side of the model.... you can get away with mapping only HALF of the model...
That's a good way to cheat some space and get more details into the final map... also, don't be afraid to rotate your UV's so you can pack them more tightly... Max has a '
👍: 0 ⏩: 1

Thx Daelayna, i`m gonna mirror some of the parts
greetings
cya
👍: 0 ⏩: 0
Sahib is right
-one thing too... if you're generating the normal map in photoshop... and you have your template on a lower layer.... you could also be projecting the template into the uv filter... been there.... done that...
it's more likely got to do with smoothing groups...but just another possibility ^_^
👍: 0 ⏩: 0

Yup, thats it, smoothing group problem.
Also, just in addition, make sure you give the WHOLE model the SAME smoothing group.
_________________________________
Also, i would suggest to weld those seams inbetween the two heads, you should take care of seams wherever possible and having a seam there might cause problems later.
_________________________________
Also, Those red spots in the normal map? e.g. in the hands and the ears? (you see them?) are overlapping uvs/ unprojected uvs. Those red spots are going to give you black spots on the model when you render.
You can either :-
a) Clean them up with the clone tool in photoshop; or
b) Increase the size of your cage when projecting. (You can check out [link] tutorials on everything including normal mapping)
_________________________________
Also, dude , youre wasting too much uv space. This wasted UV space couldve been used to increase your pixel density, let you get into more details.
Maybe before projecting it once more, go over the uvs and make everything larger so you have much less wasted space.
But dont forget to increase according to the size on the model. E.g. You shouldnt have your hand uvs bigger than your torso uvs.
Remember, the main emphasis is on PACK THOSE UVS TIGHTLY.
_________________________________
Hope it helps!
 (Smile)")
👍: 0 ⏩: 1
Of course it helps, and a lot thx for the reply and all your tips.
Cya
👍: 0 ⏩: 0

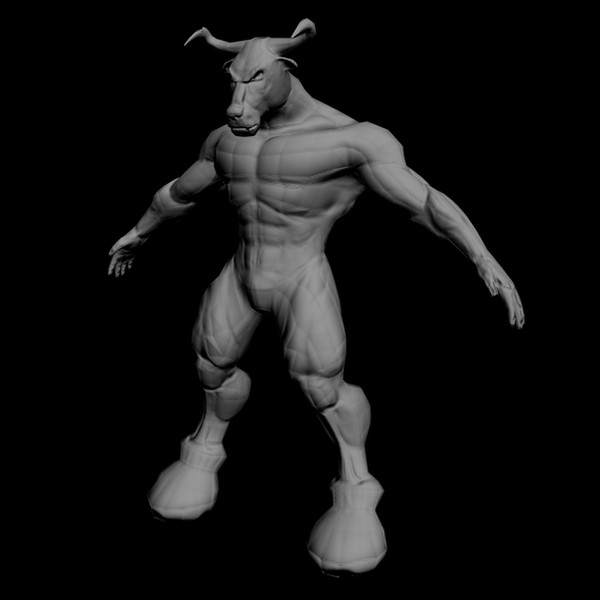
If you used a lowpoly model when generating the normal map, then thats the answer, smooth it before normalmapping it and it SHOULD be okay. No guaranties though, Im not that experienced with normal maps, but its worth a shot.
👍: 0 ⏩: 1
You where right, . . . that was all
Looks like a was Drowning in a glass with water XD
[link]
Thx man
")
👍: 0 ⏩: 0