HOME | DD
 Tounushi — 1-UP Camouflage tutorial
Published: 2010-03-30 11:32:39 +0000 UTC; Views: 5621; Favourites: 32; Downloads: 204
Redirect to original
Description
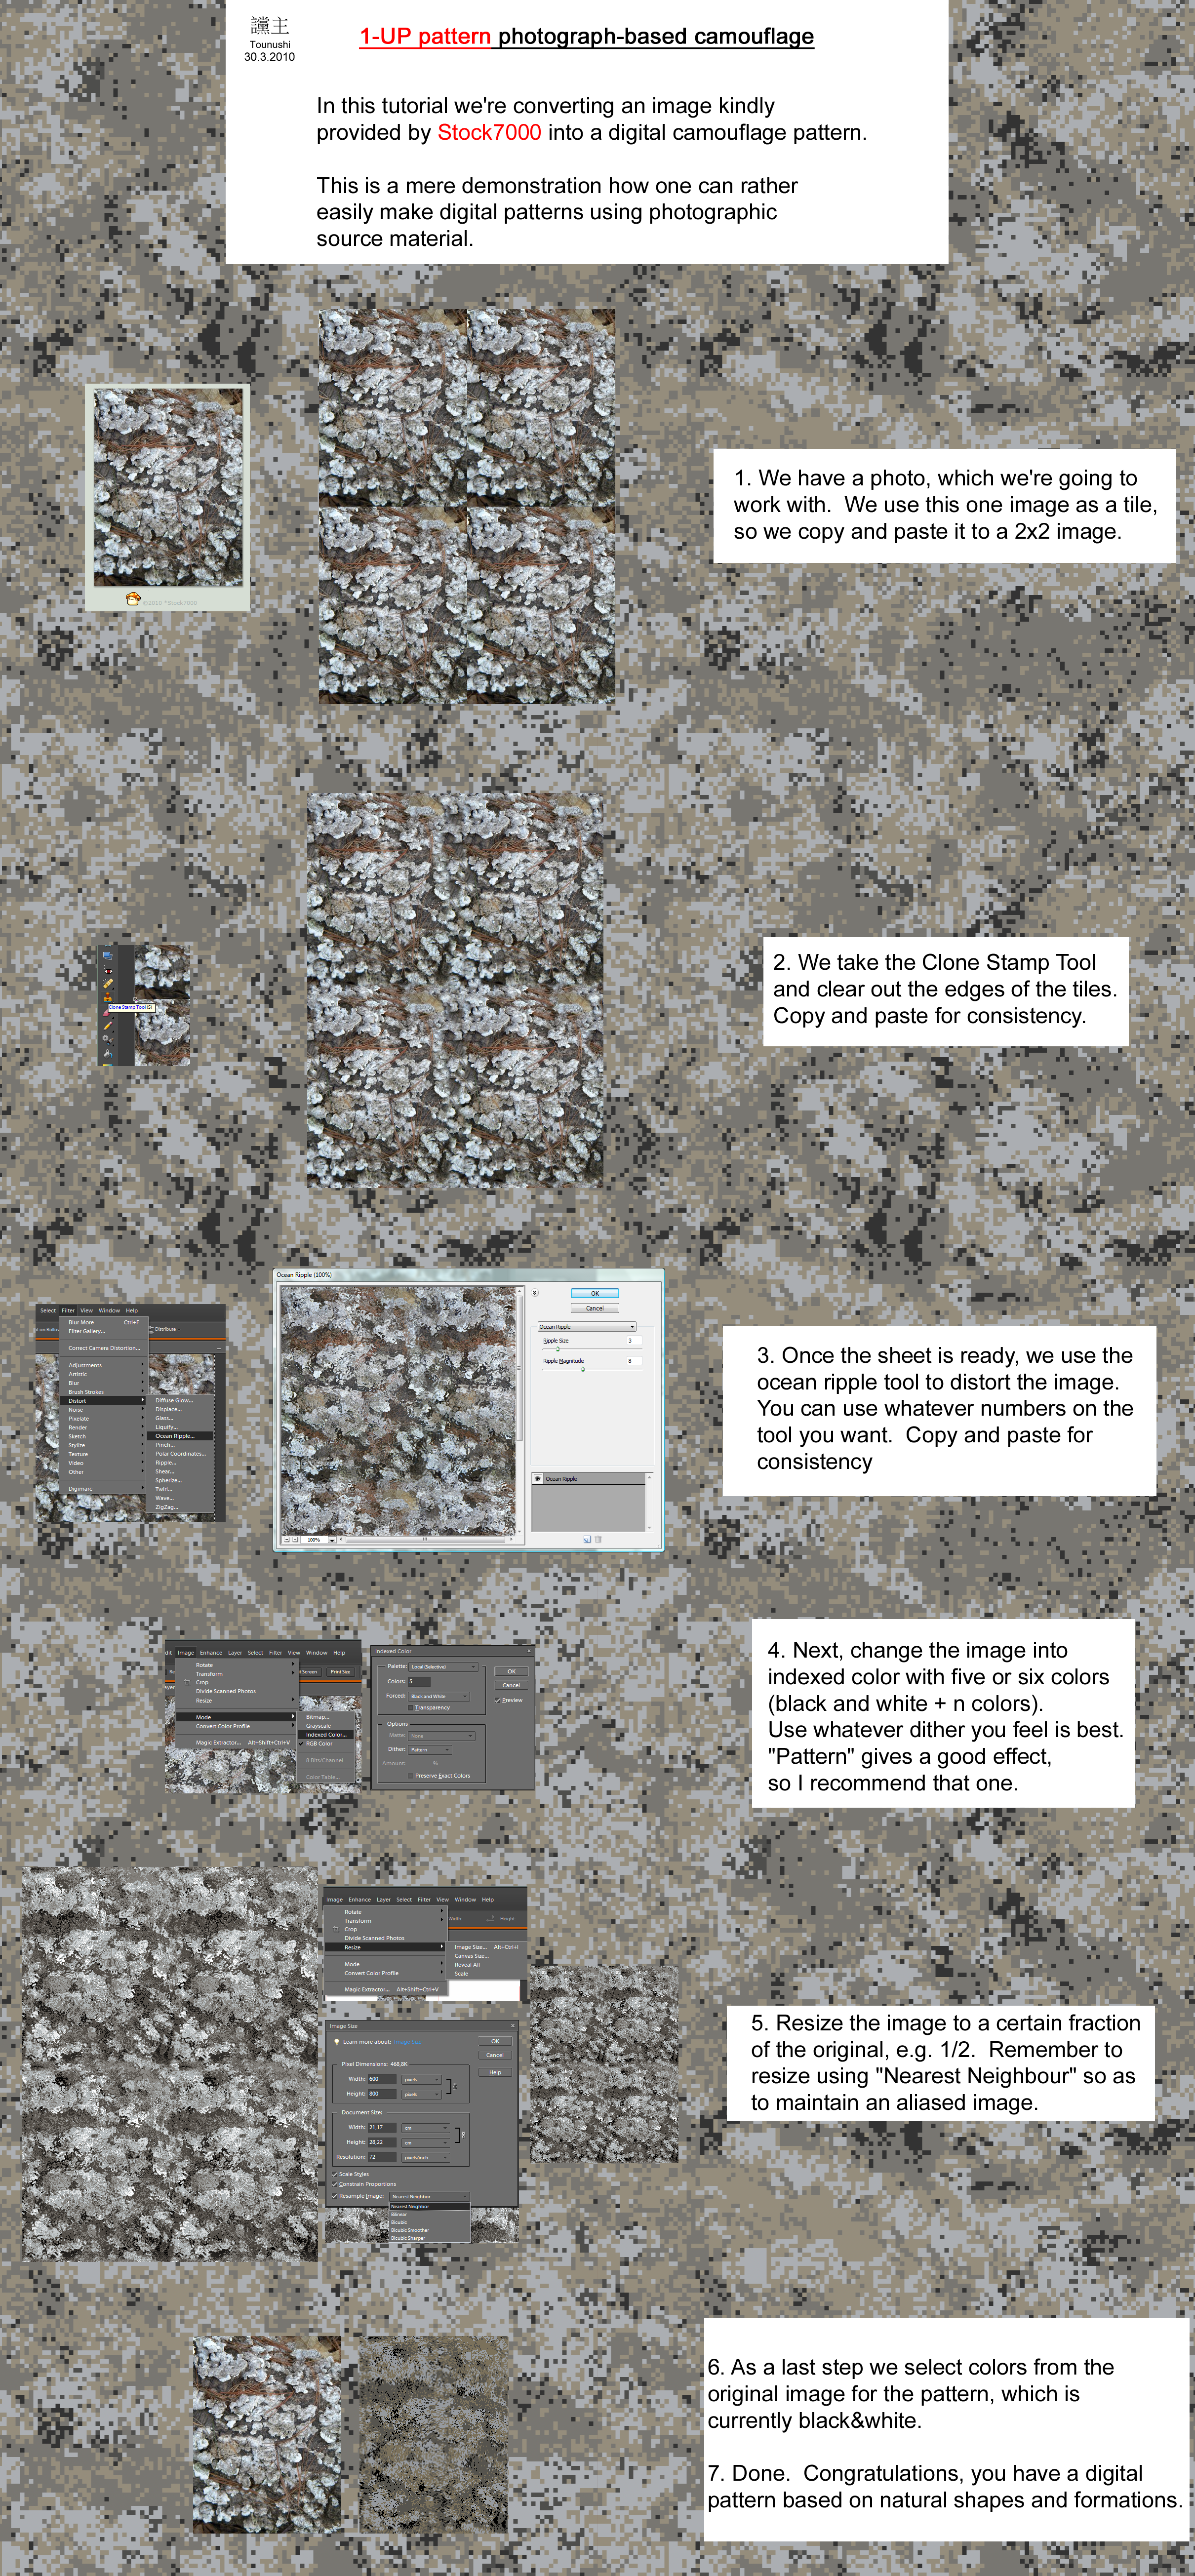
In this tutorial we're converting an image kindly provided by *Stock7000 into a digital camouflage pattern.This is a mere demonstration of how one can rather easily make digital patterns using photographic source material.
1. We have a photo, which we're going to work with. We use this one image as a tile, so we copy and paste it to a 2x2 image.
2. We take the Clone Stamp Tool and clear out the edges of the tiles. Copy and paste for consistency.
3. Once the sheet is ready, we use the ocean ripple tool to distort the image. You can use whatever numbers on the tool you want. Copy and paste for consistency
4. Next, change the image into indexed color with five or six colors (black and white + n colors). Use whatever dither you feel is best. "Pattern" gives a good effect, so I recommend that one.
5. Resize the image to a certain fraction of the original, e.g. 1/2. Remember to resize using "Nearest Neighbour" so as to maintain an aliased image.
6. As a last step we select colors from the original image for the pattern, which is currently black&white.
7. Done. Congratulations, you have a digital pattern based on natural shapes and formations.
Related content


Comments: 4


I'm sorry, but I don't understand the last step. Could you explain? :/
*is a newfag*
👍: 0 ⏩: 1
Nevermind. <.<
👍: 0 ⏩: 0
