HOME | DD
 vasilnatalie — Physics
by
vasilnatalie — Physics
by
#blender #boobs #physics
Published: 2018-03-20 17:52:09 +0000 UTC; Views: 1338; Favourites: 3; Downloads: 18
Redirect to original
Description
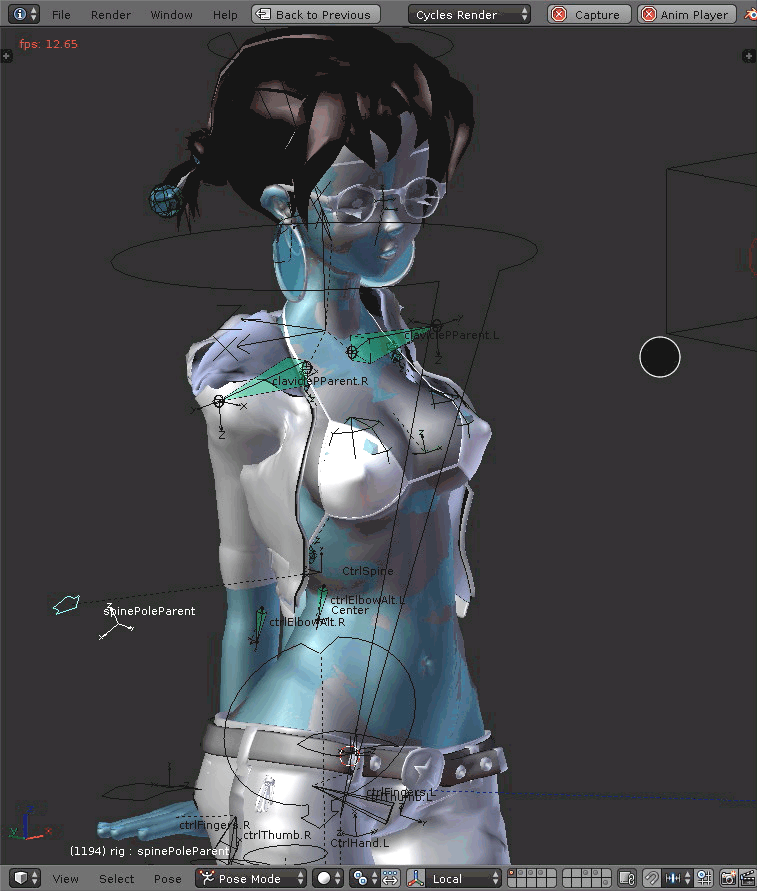
I'm getting better at this. Not all the way there yet though.Pigtails and boobs. Boob physics are jigglier than I'd like and I'm limiting them by reducing the influence on the bone constraints, which is bad because it means collision won't agree very well, but I don't know enough about tuning Blender springs yet.
I decided to build boob physics for the bikini top, since attachment points were fairly obvious-- shoulders, sides of body, cleavage, just where it's modelled.
If I do the bangs, that's the bare minimum physics completed. Those might be harder because they involve more pendulums. Might make a driver to deactivate/scale physics same as the driver I have to link to the MMD skeleton.
Edit: Oh, and the hoodie hood. That's not going to look good until it bounces.
Related content


Comments: 4

Hello, sorry for the inconvenience, I have been playing with Blender and creating characters for a while, but recently I wanted to do physics for their breasts, I tried to do it in several ways, but none has worked as I want. I would appreciate if you could give me some advice or guide me to a tutorial to achieve the physics that you did to your characters, they seem to be exactly what I am looking for
👍: 0 ⏩: 1

Sure, it's no problem. I might make a tutorial for you-- the things I've done haven't been informed by any particular tutorial, just my own experience, so I can't direct you to any tutorials.
In the meantime, what I find works best is to mesh deform with a dynamic bind from a non-rendering mesh with soft body physics and goal settings.
Try this as a start:
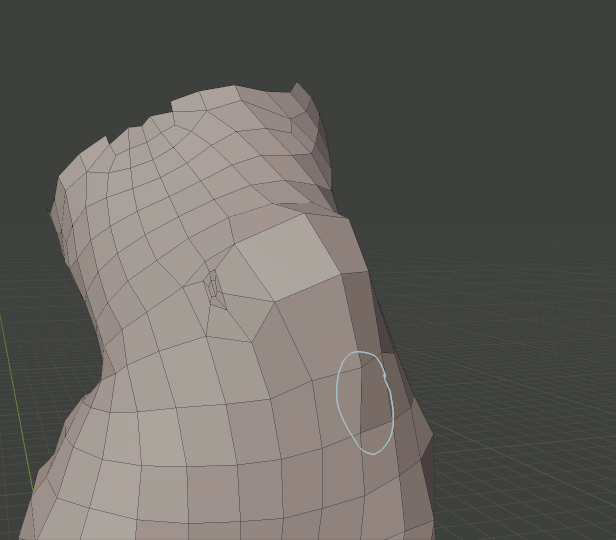
1) Make a cube. Disable "show in renders." Put it roughly over the breast, scale it roughly appropriately. Parent it bone relative to the breast bone. In edit mode, duplicate the cube and scale it up about its center slightly. Note: this isn't a solidified cube. It is two cubes, both of their normals pointing away from the center. Create a vertex group named "goal". Assign all faces of the bigger cube to goal, and four verts of the inner cube to goal.
2) Create a mesh deform modifier for your character, after/below the armature modifier. Target the cube you just made. Enable dynamic, then bind.
3) Give your cube soft body physics. In properties/physics/soft body/goal, specify "goal" as the goal vertex group. In goal/strengths, set default to 1.0, max to 1.0, and min to, say, 0.5. Enable stiffness in soft body/edges and set it to 1.0 or something.
4) Play the animation.
The rest of it is tuning. A cube isn't the ideal shape, it's just the simplest to get you started. The reason for the outer cube is to smooth out the edges of the mesh deform, and if you'd rather, you could use a vertex group for the mesh deform instead. Tuning your physics can be important, and where people tend to go wrong with this is to focus on the settings to the exclusion of the soft body mesh, while both are important-- both interact to create the physics. Soft body physics are push/pull forces exerted along *edges* and you can create additional edges that you wouldn't want for a rendering mesh to create those forces. As a simple demonstration, try creating a soft body UV sphere and a soft body icosphere and see how differently they behave.
Should be said, that's not necessarily what I did for this submission, which I made a long time ago. This sounds like rigid body physics, but I can't really remember. Still, the reason I've settled on the soft body physics I describe is because I like them better, so if you like this, you ought to like that.
👍: 0 ⏩: 1
Thank you for your response, I did a quick test on one of my characters and it works perfectly, just what I wanted, thank you very much!
👍: 0 ⏩: 1
Glad to hear it. Here's some pics and explanation that you might not need:
👍: 0 ⏩: 0