HOME | DD
 akugyouza — .Akugyouza Tutorial Project
by-nc-nd
akugyouza — .Akugyouza Tutorial Project
by-nc-nd
Published: 2008-02-04 09:54:19 +0000 UTC; Views: 169666; Favourites: 395; Downloads: 11038
Redirect to original
Description
Hello people (^^)Seems like the day has come...
Through my time wandering from deviantart.com to vexels.net, some people asked for advices and some asked when I would do a tutorial, well, I already gave the advices, tips and some techniques away, it's time for the tutorial.
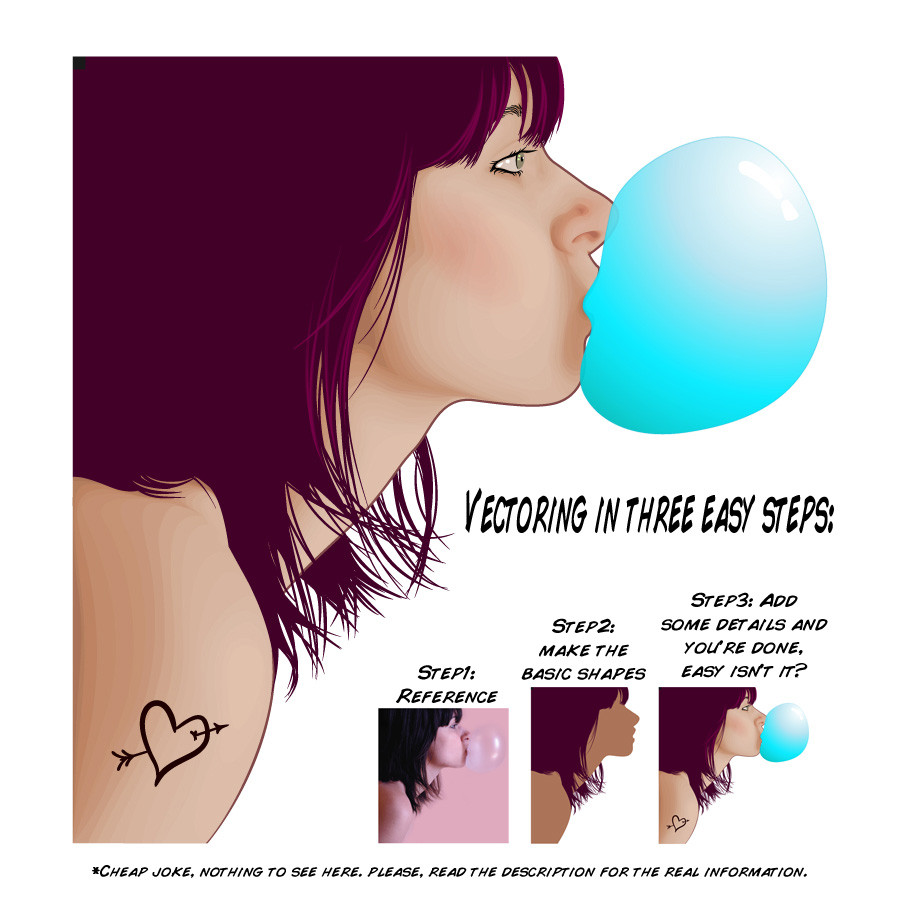
Full view for some laughs (if you have a silly humor like me!), keep reading to find the real deal...
Let me clear some things up before start:
* I'll not be telling you how to reproduce this exact same image, I'll just provide you some information and a file to understand the way I handle vectors, so you can apply on other works later if you wish.
* You must know how to navigate and use the the tools and features on your application of choice. There tutorials for this, you can find links to the tutorials section from DA and Vexels.net at nearly the end of this description.
Let's roll!
Click on download to check the SVG file or go to the links section on the bottom, to find more stuff.
.The information:
.The colors (or colours, whatever)
Choosing colors is difficult at first, but after you create your first custom swatche things will be much easier!
Starting with the darkest color you are going to use (in this case I'll explain the skin part, as a base you can apply to anything), start increasing the brightness by, let's say 5%, keep an eye on the other values as well (saturation and hue) to keep a consistence in the color sequence. Create the necessary number of colors you're going to use/need, something between 13~18 is a good choice (or less, depending on your style).
*Trick: Try to tweak the hue a little each time you increase the brightness, this way you'll give a little more life to the sequence (let me put a clear extreme example on this, start with a red and end with an orange tone, while keeping a smooth consistence, get it?)
*A shortcut for this process is to use the 'blend tool' (or similar tool in your vector application of choice) and create a blend between the darkest and brightest color with a defined number of steps, so you can create a custom swatche based on them.
*Another shortcut is to modify the colors in the standard swatche given by the application, sure, there will be some nice colors for you to play.
*When you feel comfortably with this or when some colors don't seem to blend pretty well, you can tweak the opacity of each one! This will provide a new level for you to work on, but remember it will be worth nothing if you don’t have a good base first (the colors!).
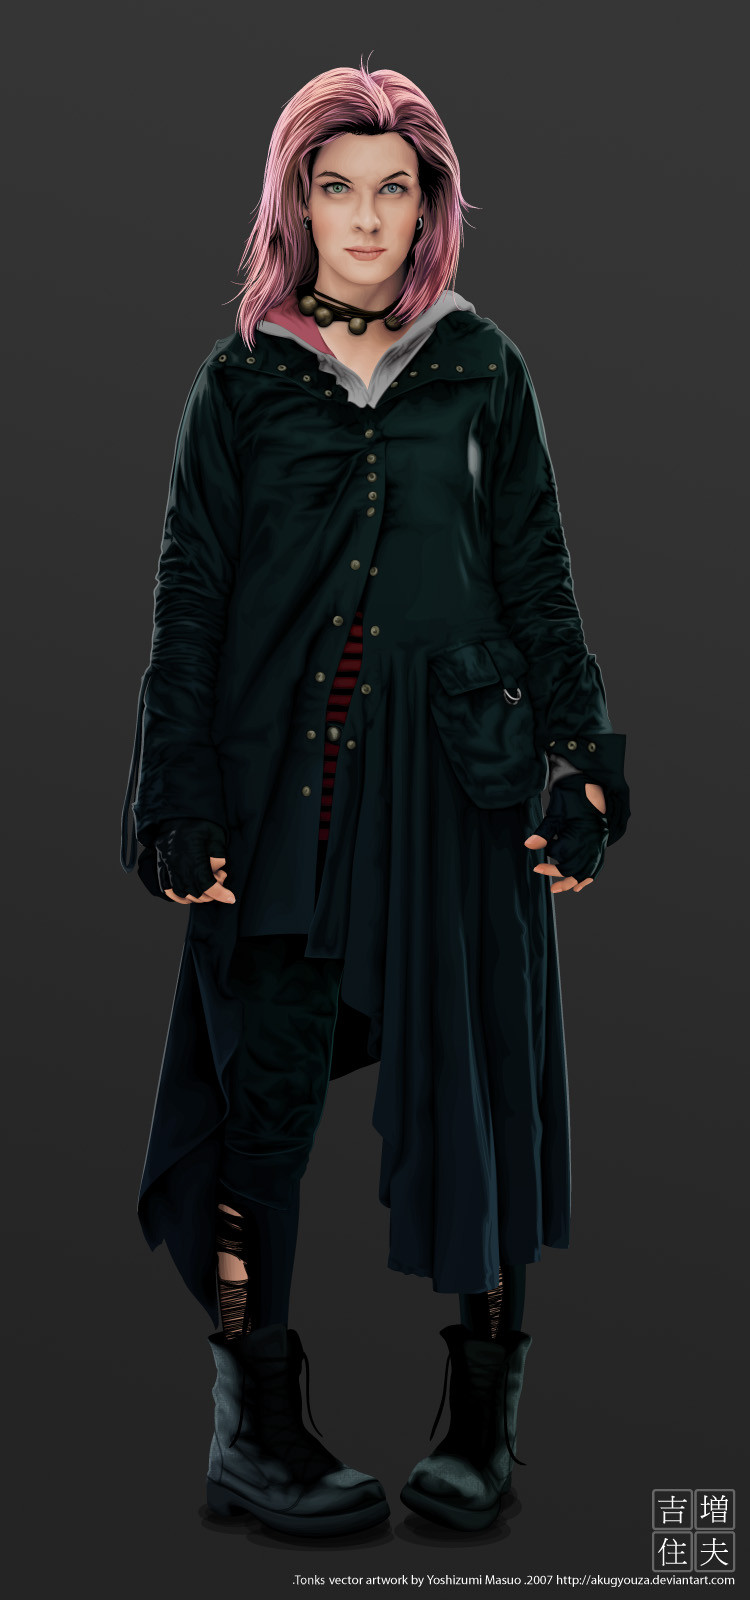
.The shapes
When drawing shapes, you just click and drag, sometimes you click too much and drag too... little? (is it right? my engrish suck, sorry)
A thing that helps to give a smooth look to the image is... believe it or not... smooth shapes!
No, serious. Try to use the minimum of anchor points in each shape, stress each handler as much as possible, using each variation of anchor point, this way you will create the desired shape faster and without many anchor points hanging around, becoming easy to edit later if needed.
*Trick: Try to keep a pattern in the distance of each shape, shapes too much close to each other will give a shaper look, too far will give a strange look, keeping a pattern and adapting when needed will give a smooth look. (the color selection will have a direct impact on this, so choose wisely!)
.The shapes - The art of subtracting.
You can always add more shapes, for example: darker colors over the bright ones to achieve the desired nose moles. Sure it's fantastic, it works, so what's the problem? No problem, but I'm explaining how "I" do these things, let's proceed, subtracting is a cool thing that you can do with every shape already placed in the canvas.
As an example, the nose moles, you can start 'excavating' your way trough to reach the darkest color, the same apply for the place where you're going to put the eyes (even the lips can be made this way.)
.The files:
If you did read all of this, you must be questioning where's the fun part... it starts now!
To not exclude any people from seeing this file, it's on SWF format, so if you can watch youtube videos and surf the web seeing great websites using flash, probably you'll be able to check those files.
Here you can check a .SWF file showing how each shape is placed in the canvas (how I do put everything together), rendering the final image that you can check on the other .SWF.
SWF - Vector dissected: [link]
SWF - Vector assembled: [link]
Open them in a new tab (or window), right click and select "zoom in", this will give you the ability to pan around and check details.
Here you can download an .AI and a .PSD version (since I couldn't let the vexel group locked out in the cold), both are the same, maybe some minor color difference (not sure about this), but the ability to resize and edit stays the same on each file. If you don't have a vector application installed in you computer, I recommend you to download the latest InkScape version to handle the SVG file

PSD: [link]
AI: [link]
They're hosted on rapidshare.de, click on the 'free' button, wait for the time check and then input the code and get the file. If someone know a better place to host those documents, please feel free to make a mirror.
Copy this description to a text file and you're set now to dissect this file! Be sure to check the tutorials section from DA [link] and Vexels.net [link] for in depth information on more specific things, since I'll be not covering any of them.
Happy dissecting.
The original picture, you can check here: [link]
I don't have the source of this, if someone know, please, tell me, meanwhile I can just say that this picture is property of its respective owner. (I'm really sorry for not been able to inform the source! This picture came to me in a very odd situation, someone at Vexels.net asked for help to vector this picture, I did a basic version of this and sent, but didn't receive any response, I didn't went 'WTF', but oh well...)
.....
After reading this, you'll see that there's is no big tricks or voodoo and that it's really nothing special, you'll just be asking why did you wasted time reading this... well, I don't know!
.....
*If you can't figure something out or got questions after reading this, post a comment there! I do accept tips too!
**You can change this file as you wish, just don't redistribute or publish it without giving credit >.<
***Actually, I was thinking if possible, that each one who modified this file, send me a link or copy to check out, thanks!
*****If you find it useful, please spread the word (^^)/
*The joke is a copy from Frank Cho (comic artist), check the real thing here: [link]
Related content


Comments: 42

inkscape doesn't work, i have downloaded it now... why the hell D: ?
👍: 0 ⏩: 0

the tutorial is not available 
")
👍: 0 ⏩: 0

")


i like how this looks but the tutorial isn't available anymore. could you upload it or make it available again?
👍: 0 ⏩: 0


This tutorial is helpful. Thank you for developing this.
👍: 0 ⏩: 0

Very nice!
The only problem is that you should use the word 'original' instead of the word 'reference'. A reference would imply simply looking at something for, for example, a reference on what a side view eye would look like. Not tracing the image with vector.
But very nice tutorial!

👍: 0 ⏩: 0


Hi! Your tutorial is featured in our journal!
[link]
👍: 0 ⏩: 0

Uhmmm I have the latest Inkscape and it will not open the AI file.
👍: 0 ⏩: 1

You're not supposed to use the AI file with InkScape, click on "Download" at the top left to get the SVG file (it is the same thing, just different format).
👍: 0 ⏩: 1
Got it thanks! Hmm now to figure out how you did the Hair...
 (Smile)")
👍: 0 ⏩: 0


Hahahaha, I always tought that vector art is very difficult, but I Was Wrong!!!
it takes only three easy steps!!!
hahaha
oh, and by the way, your art is excellent
👍: 0 ⏩: 1
Just need some patience to get things right (^^)
👍: 0 ⏩: 0


👍: 0 ⏩: 1
I'll try to pull out another source file, but don't know when
THank you for the comment (^^)/
👍: 0 ⏩: 1


honestly, i started from the lightest colour and then go darker. it's easier for me to reduse the shape then to add it
believe me you're the one

👍: 0 ⏩: 1
Well, I'll steal... I mean save this piece of information... for later use, you know...
👍: 0 ⏩: 0


Looks really useful! a bit too much to read at the moment, but I'll give it a look later!
Thanks for the help, in advance
👍: 0 ⏩: 1


if i could give you 1 zillion favs on this one... i would
👍: 0 ⏩: 1
No need for this, just hope it's useful (^^)
👍: 0 ⏩: 1
it is useful... very2 thank you
👍: 0 ⏩: 0

The joke is a copy from Frank Cho (comic artist), check the real thing here: [link]
Thank you (^^)/
👍: 0 ⏩: 1
Have you read the disclaimer?
The guy is awesome (^^)
👍: 0 ⏩: 1


hahaha...
three easy steps!
very cool and helpful tutorial by the way!

👍: 0 ⏩: 1
Thank you
The joke is a copy from Frank Cho (comic artist), check the real thing here: [link]
👍: 0 ⏩: 0

awesome work! i think it'll be very usefull for those who are learning vector art! well done!

👍: 0 ⏩: 1