HOME | DD
 Aleccha — I can tell... - Step by step

Published: 2011-01-15 19:40:49 +0000 UTC; Views: 12334; Favourites: 176; Downloads: 3
Redirect to original
Description
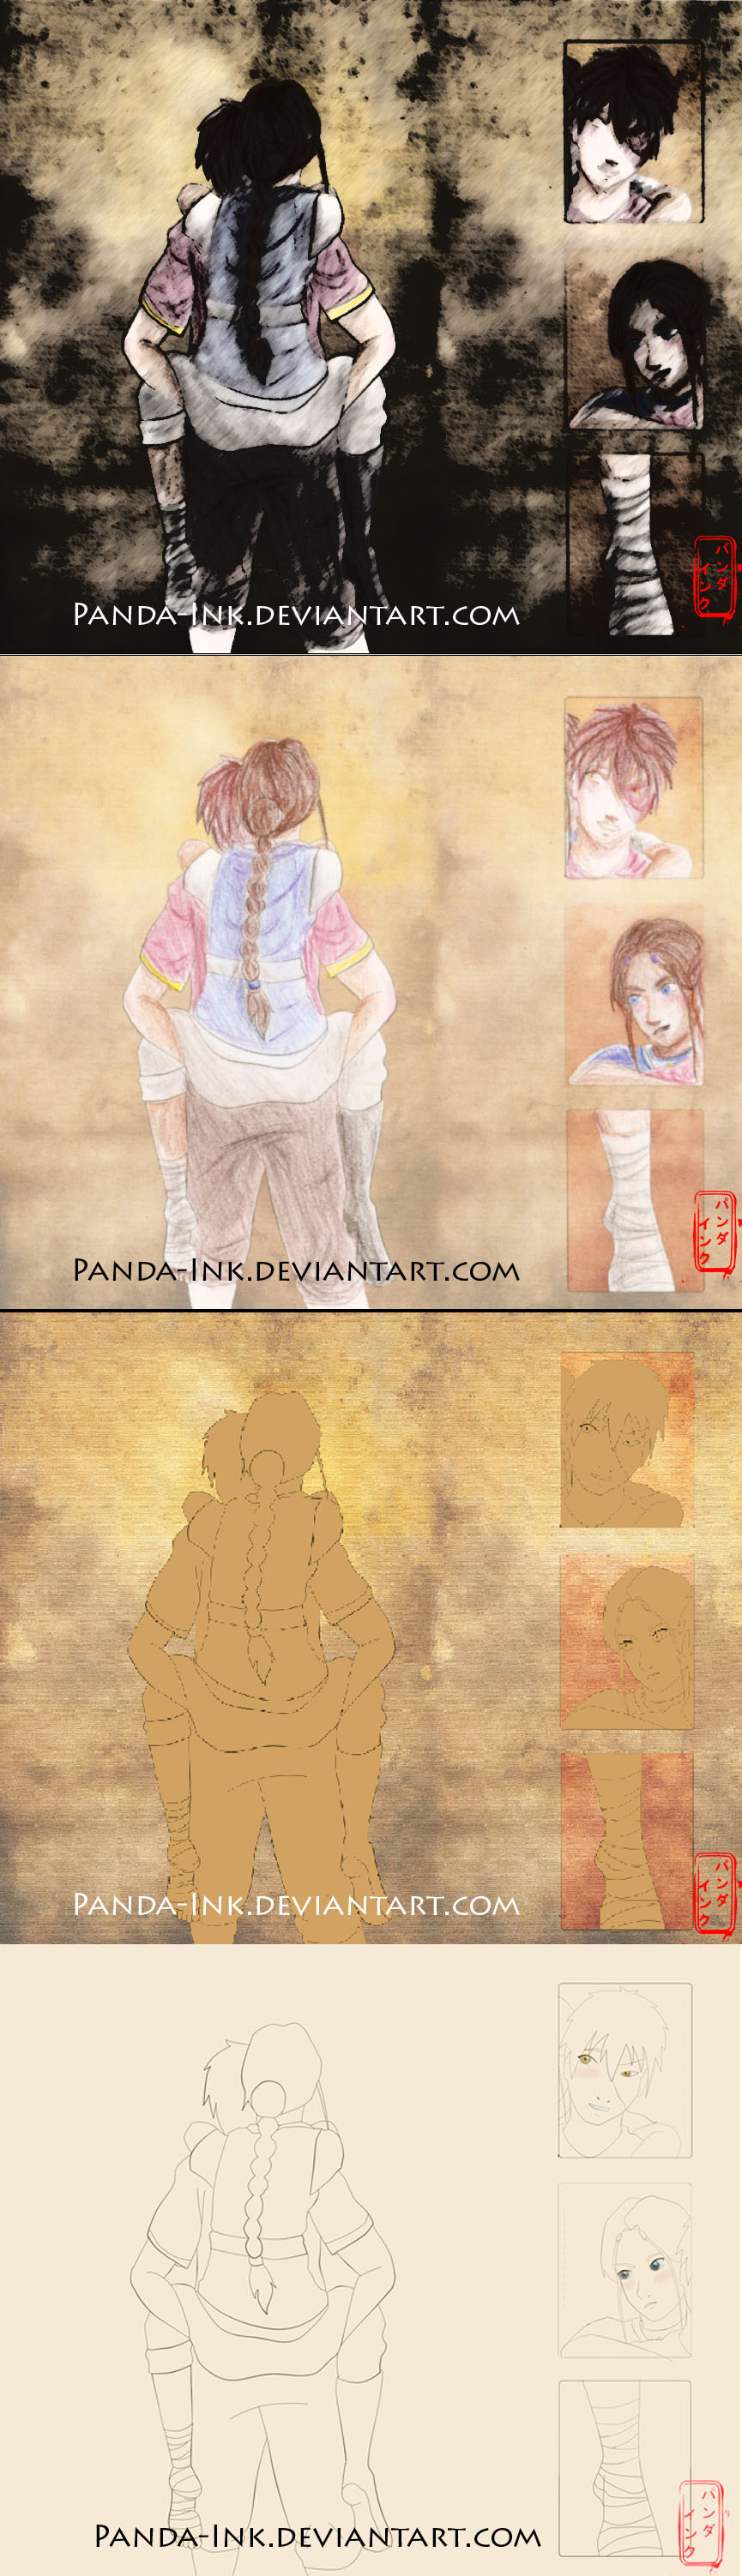
A sort of step by step of my latest work, "I can tell you're right" ---> :thumb192916537:Because several people asked which technique I used for colouring, as well as "Shorter you was cute" :thumb192304330:
 (Smile)")
Keep in mind that I work with a tablet and Photoshop CS4 + Paint Tool SAI when needed. I use layers a lot, as well as layer masks. They're great and really helpful, if you don't know what they are I recommend you check out the way they work! *____*
So yeah, it's not much, but it collects all the phases which eventually brought me to the final product! Let's go into further details:
1) Very rought sketch - this step is essential, because it allows you to translate the idea you have in mind to "paper", and I'm referring to the position, the setting etc. As you can see, I didn't pay attention to anatomy and details AT ALL; it's just the general concept. (Photoshop)
2) Basic shapes of the body - once the initial sketch is decided, it's time I started adding more details, focusing mostly on anatomy. The final product is rough once again, but not as much as the latest step! We'll define everything later. (Photoshop)
3) Anatomy - this is when you finally spend much time with defining muscles, articulations (beware of knees and elbows!) and tridimensionality (see Toph's right foot?). I also start to add more details to hair and faces. (Photoshop)
4) Get dressed! - add a blank layer above the latest one (whose opacity is lower) and simply draw clothes over it! It's the best thing to do if you want to modify the bodies (and the anatomy in general) a second time. This way the lines of the clothes won't interphere with the ones of the "mannequins". (Photoshop)
5) Lineart - once your basic sketch is done and you're satisfied with everything, it's time to add a new layer and nicely trace the lineart! Make them as clean as possible and, if you like, add some darker spots to give more volume. (SAI)
6) Base colours - this step, obviously, depends on you and your creativity ^^ I create a new layer for each colour I use, so that I don't get confused when it's time to add shades and lights. (Photoshop)
7) Cell-shading - for this step, I usually work on a different layer set on "multiply" or "linear burn": the colours are usually the same as the basic ones, but I often vary their levels of brightness, contrast and saturation so that the final product will be more vibrant and not monotonous. (SAI)
8) Global light and shading - Burn Tool, Vivid light (picking white colour from your palette!), Overlay... blending modes are your friends! This step is useful to give more deepness and volume. (Photoshop)
9) Adjustement + balloons - once I've added light and shades, I save final product in .png format and then open it again. Then I play a bit with levels, light and contrast to make everything look more defined and lively. Balloons are made with SAI... and I believe everyone knows how to make them! :'D (Photoshop)
10) Background - well, not a real background here... it's just a green stain which I eventually blurred to make it look softer and more "grass-like". (Photoshop)
...Finished!
Note: each of the sketches from the first to the fifth panel are done on five different layers. As you can see, I modified their faces and some parts of their bodies a lot, but this is part of the game

Hope you can find it useful, or maybe a bit... I don't know... inspiring?
Soon in scraps.
Related content


Comments: 28


This is a great outline - I'm usually drawing everything by hand and then just scanning it onto the computer. Fortunately, I'm in the process of getting a tablet - I can't wait to finally get started and see what I can come up with this...
👍: 0 ⏩: 1

Have fun with your new tablet!

👍: 0 ⏩: 0

>_> Without looking at the other steps, just from your rough sketch I could immediately tell who the characters were. Wow!
👍: 0 ⏩: 1
No, I just add more layers over the sketch, hiding those (the rough ones) I don't need anymore
👍: 0 ⏩: 1

Oh, I see. Yes, that's what I meant but I guess I wasn't as clear as I meant to be. Thanks!
👍: 0 ⏩: 0


Ale ma la fase di Lineart la fai col pen tool o a mano col pennello da 1 px?
Comunque stupendo as usual XD
👍: 0 ⏩: 1
Per le lineart uso lo strumento Pennello di Paint Tool SAI [link] E' perfetto per questo tipo di cose, perchè il tratto (quello a mano) viene molto fluido e pulito *____* E' lo stesso che uso per il cell-shading, in Photoshop non viene fuori lo stesso effetto. Fosse per me abolirei il pennello da 1px per quanto è inutile 
Il Pen Tool lo uso quando faccio disegni su Kim Possible [link] per attenermi il più fedele possibile allo stile originale, ma è una fatica immane! X(
SAI non avrà tanti effetti quanti ne ha Photoshop, ma ha alcune funzioni che non sono per niente male!

👍: 0 ⏩: 1
Si mi piacerebbe, ho buttato un occhio sul sito ufficiale navigando tramite il link che hai postato ma... io uso un MAC e quel software gira solo su Windows ç.ç Grazie comunque, per il momento faccio a mano col pennello da 2px di PS, viene impreciso e tremolante ma sempre meglio del Pen Tool che mi snerva XD
Rinnovo i complimenti per questo lavorone e per gli altri comunque :zizi:
👍: 0 ⏩: 0

Ma lo sai che quando ho favorito il tuo ultimo disegno volevo chiederti una cosa sulla colorazione?
Ahahah, quando ho visto questa deviation mi son data della sensitiva visto che ho ricevuto una risposta senza chiedere domande!
Comunque le uniche volte che ho provato a fare del cell-shading con photoshop non sono mai stata soddisfatta, prima di tutto per i colori impostati sul "moltiplica" che mi davono davvero l'idea di creare tonalità un pò troppo bruciate (usando lo stesso colore sulla base) e poi per i pennelli piatti che non sembravano crearmi ombre nette, ma leggermente sfocate/pixelate.
Con i tuoi consigli mi vien davvero voglia di fare un tentativo con sai.. speriamo bene!
👍: 0 ⏩: 1
Ahah, davvero? Allora ho proprio avuto il tempismo giusto! ")
SAI è veramente buono per questo tipo di lavori, le lineart e i contorni in generali vengono fuori che è una meraviglia! Ci vuole la mano ferma, ma i risultati si vedono. In Photoshop i pennelli che vanno da 1px a 4px non valgono una cicca per quanto sono sottili! Però le ombre del cell-shading le modifico in Photoshop perchè sono più pratica, questo sì. Mi piace molto cambiare i valori di saturazione, luminosità e soprattutto contrasto... rendono il disegno più bello e "vitale"! E da qualche tempo mi sono accorta del bell'effetto che viene fuori se combini il cell-shading ai gradients (più scuri da una parte e più chiari dall'altra)... insomma, mi sono data allo sperimentalismo! 
Prova anche tu, non te ne pentirai (lol, che frase ad effetto! XDD)!!

👍: 0 ⏩: 1
Ahahahahahahah!
Ok ok vedrò se riuscirò a combinare qualcosa di buono

👍: 0 ⏩: 0


Ur very welcome. I really thought the art was funny.
👍: 0 ⏩: 0

whoa...
That's very useful information! I must try that too.
( Actually that's what how I basically do. but it's not as defined as this. )
👍: 0 ⏩: 1
Glad you liked it!
Haha, I know, I'm a perfectionist! If I'm not enough accurate I don't feel right XD
👍: 0 ⏩: 1
I want to be a perfectionist too... but I just...don't have enough patience. lolz
👍: 0 ⏩: 0

This is great! I really love your shading, btw.
👍: 0 ⏩: 1
Thank you! It's pretty easy... and fast!
👍: 0 ⏩: 0

Thanks to you for appreciating it!
👍: 0 ⏩: 0