HOME | DD
 aureamachina — Drawing Tutorial [Part II: Skin]

Published: 2014-08-24 03:46:43 +0000 UTC; Views: 3062; Favourites: 53; Downloads: 19
Redirect to original
Description
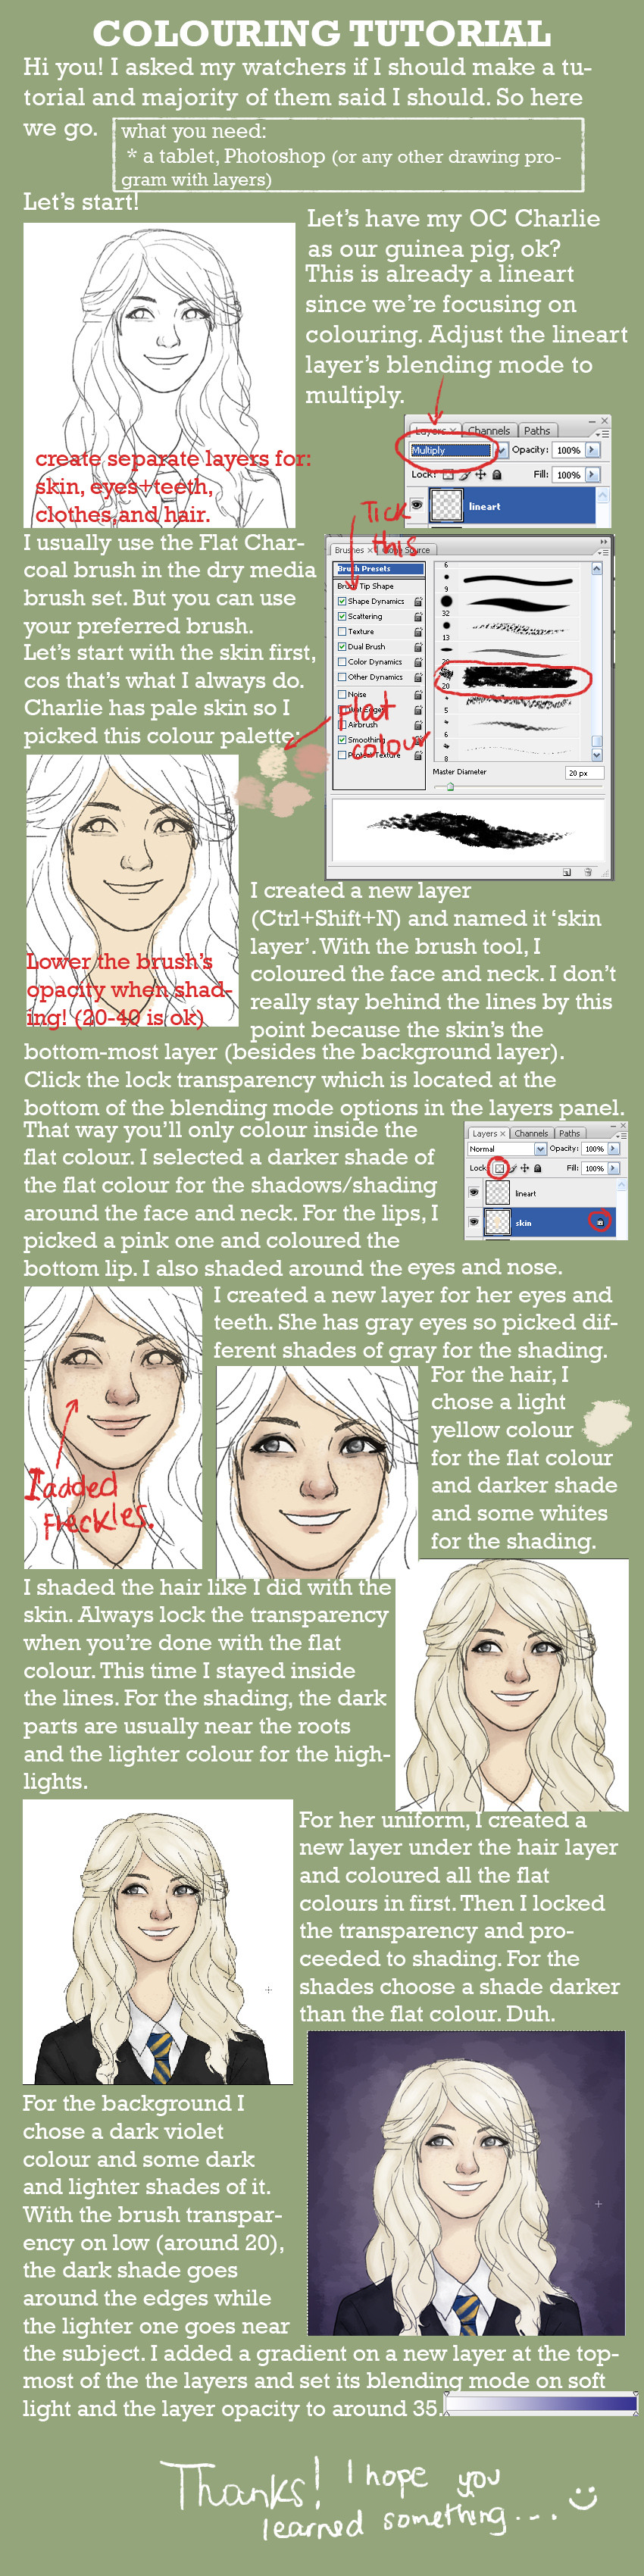
Skin. Oh dear lord, please bless me cause skin is a pain in the ass-dies-
________________________________________________
SKIN
1 to 3-4 layers depending on other details you would like to add
Well, I really only use two brushes when I draw. The airbrush 38.media.tumblr.com/e26e073660… and my main painting tool 38.media.tumblr.com/b836a48d2c…
First, I put down the flats which is the most simplest part. After choosing the light source, I use a big fluffy airbrush on a low density (opacity in PS) (both around 30-40%) and basically mark the shades with a shade darker than the base color of the skin. I usually have 3 darker colors after the base color. As you get darker, your brush gets smaller. If you think the main painting tool is too rough for your style, then use the airbrush or a water color brush to smooth out the colors or blend them.
Then for lips or blush, I put those ON TOP of the skin layer > clipping mask (should be clipping mask also in SAI) > and then go nuts. If you want to change the lip color after you painted them the way I explained it in the tutorial I usually do > hue/saturation > change hue > increase or decrease saturation to your liking.
________________________________________________
part i , part iii , part iv