HOME | DD
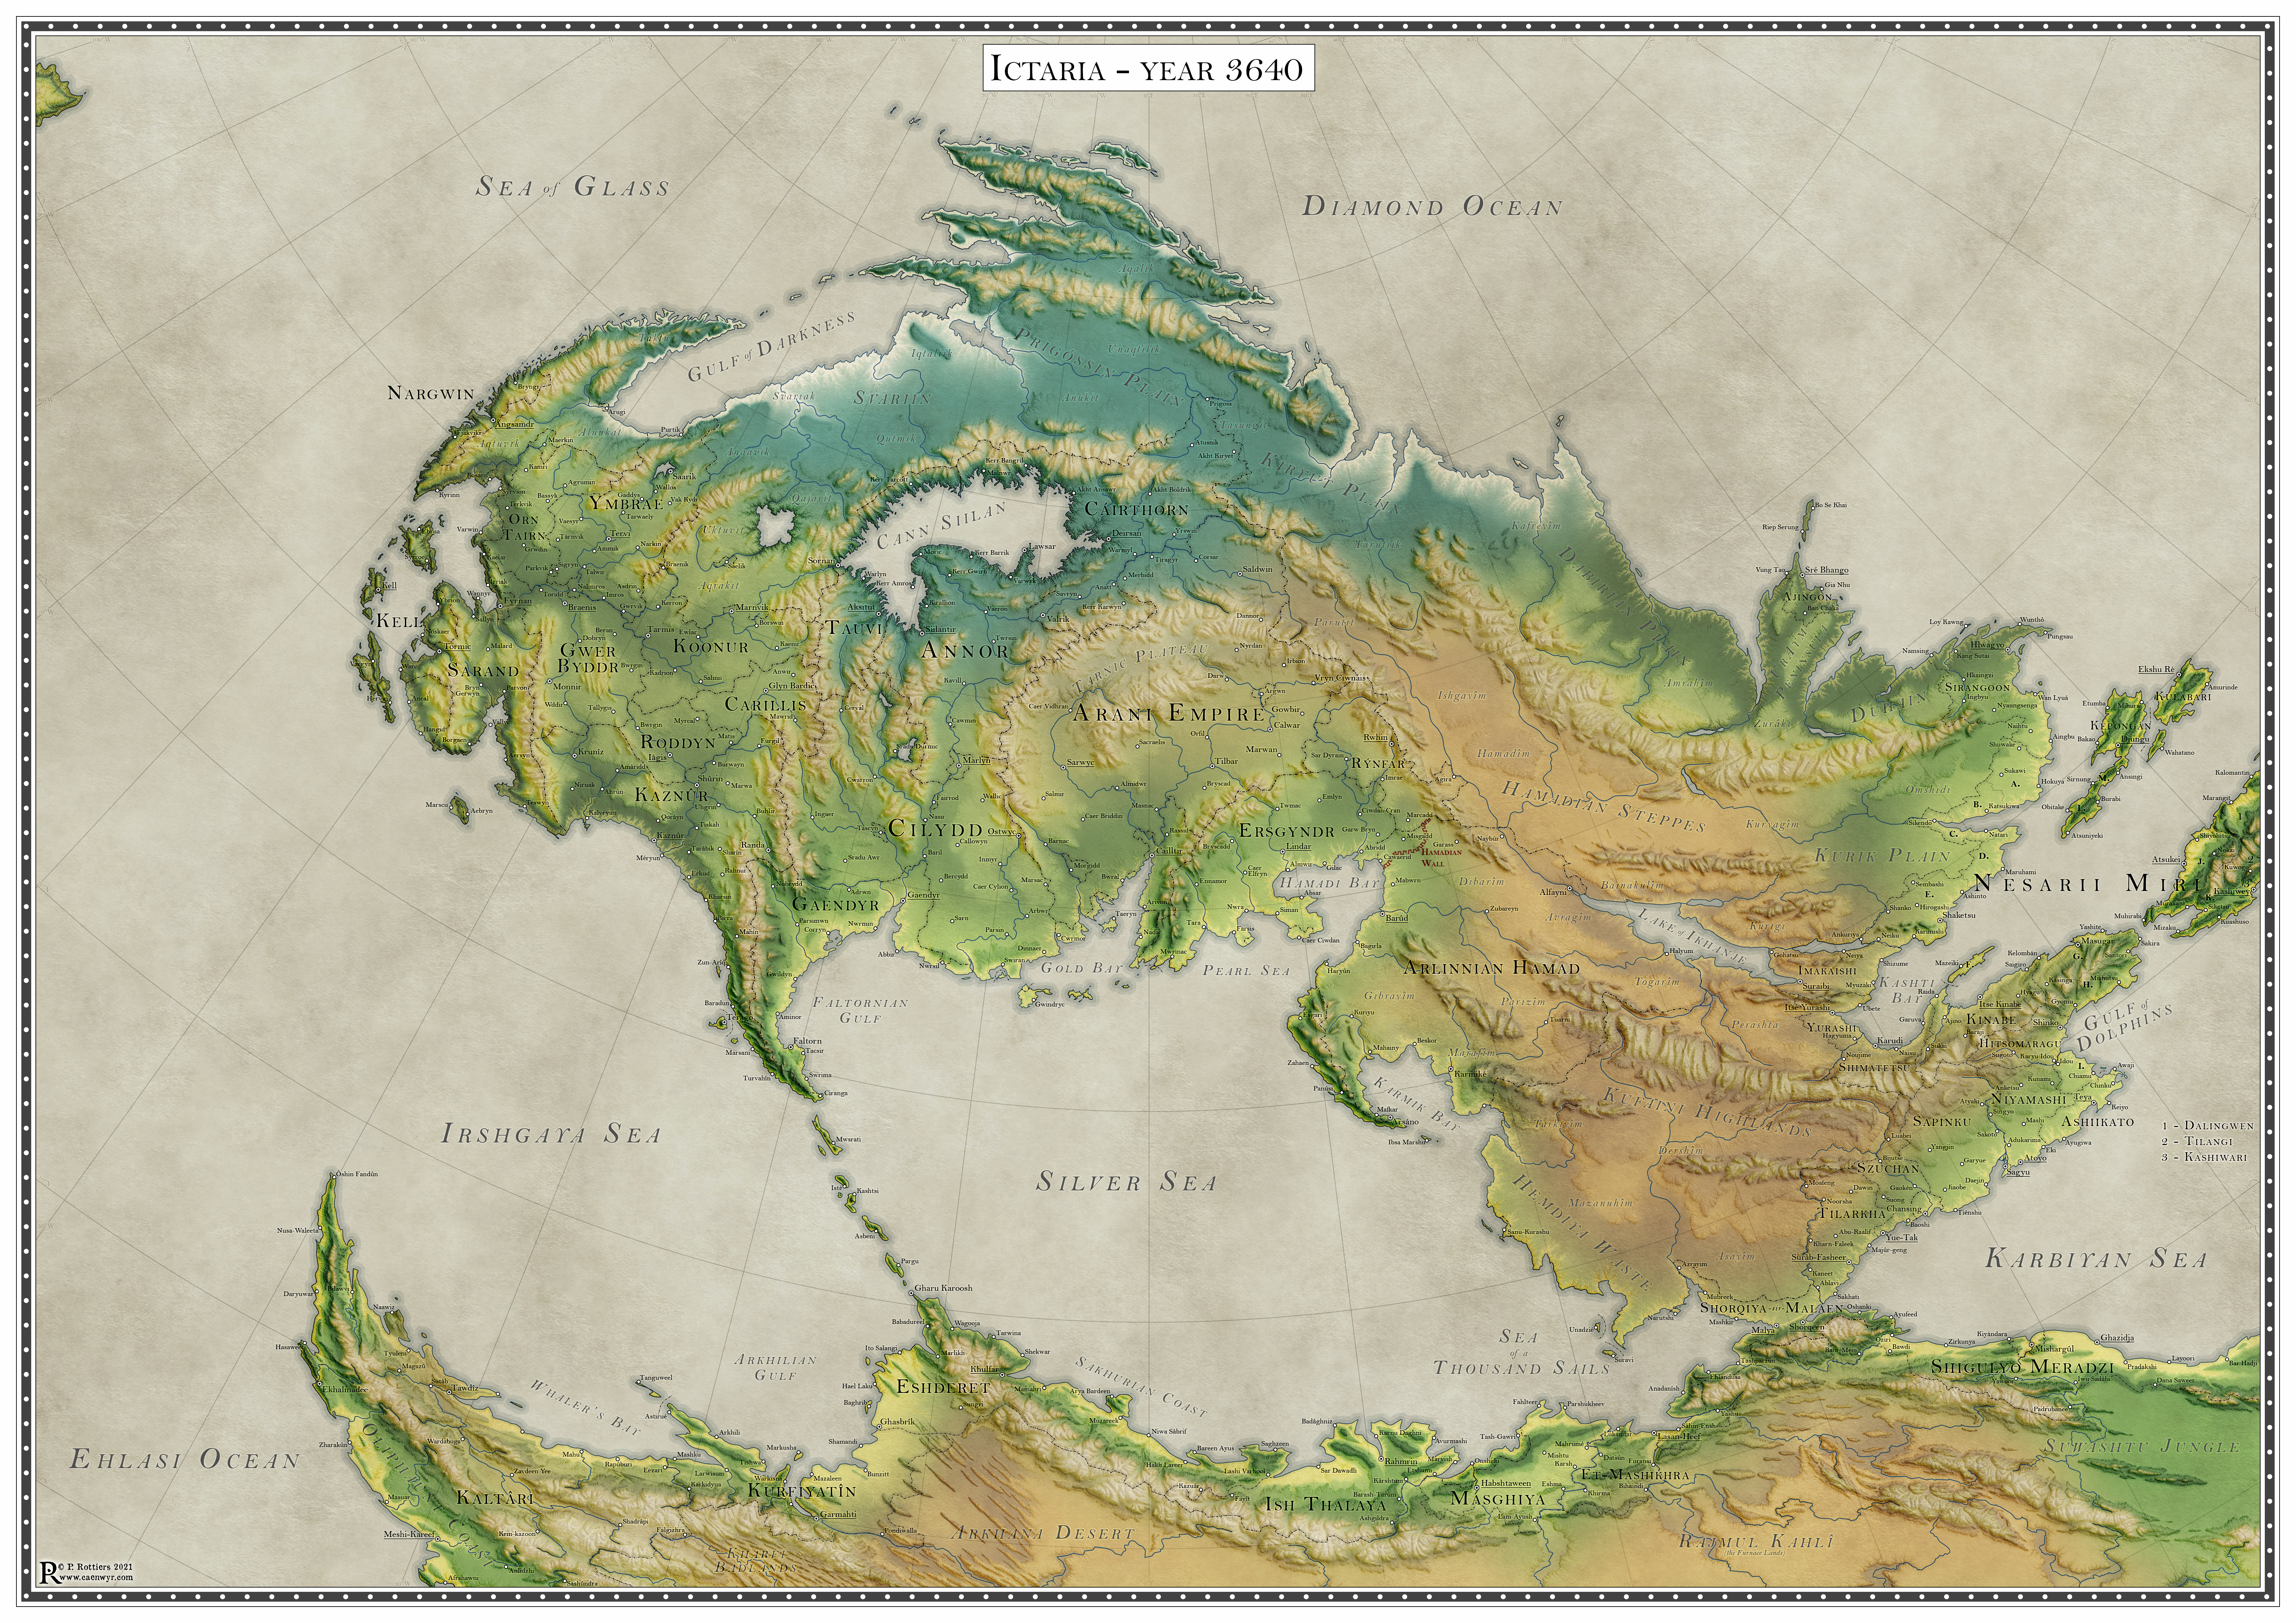
 Caenwyr — The continent of Ictaria - topography
#cartography #map #topography #worldmap #dnddungeonsanddragons
Published: 2021-05-05 20:01:02 +0000 UTC; Views: 7957; Favourites: 118; Downloads: 86
Redirect to original
Description
This is the third map in a series on the continent of Ictaria, this one focusing on the topography, with hints of the different climates. The north is tinged blue (hinting at the arctic conditions), the east and extreme south are coloured tan (showing the distribution of the deserts and dry savannas). The southeast and the fringes of the Silver Sea are dark green (suggesting warm and wet climes) and the west is mostly lighter green (the temperate climates).The other maps in this series are:
- the political map
- the linguistic map
Credit where credit's due: the basic concept of the map was inpired by Hendrik Wuckelt's wonderful historical maps . I did add a shaded terrain overlay and of course my map is of an entirely fictitious place, but I'm sure you'll spot some similarities. After all, imitation is the sincerest form of flattery!
Related content


Comments: 9

👍: 0 ⏩: 1

Thanks Qazdr! Happy to hear that!
👍: 0 ⏩: 0

👍: 0 ⏩: 1
Woah, I hope you're not hurt! Glad to hear you like my work, Hardwing 😉
👍: 0 ⏩: 0

👍: 0 ⏩: 1
Thanks man! The process is quite complex, but I'll be happy to give a quick overview of the steps:
1) open a blank canvas in photoshop
2) fill with black.
3) create new layer, draw your coastlines with the lasso tool, fill with super dark grey
4) create new layer, draw the first contour line with the lasso tool, fill with a slightly brighter shade of grey.
5) rinse and repeat with ever lighter shades of grey until you arrive at the tops of your mountains.
---->you now have a stepped terrain. It's not a DEM (Digital Elevation Model) yet, for that the steps need to be eroded away
6) open the open source tool Wilbur. In it, open your stepped file.
7) Fiddle with the erosion settings until you get a result that pleases you. Really, it's more of a art than a science. I hate Wilbur in a loving way. It does a wonderful thing but boy so I make mistakes. And it's so heavy!!
----> you now have DEM file
8) Open Photoshop. Open your DEM.
9) create a new layer, fill with 50% grey
10) Use the Lighting Effects filter to bump shade the grey layer, using the DEM as your basis
----> you now have a grey shaded version of your DEM
11) toggle that layer off for a minute
12) select the DEM file, add a gradient map effect
13) double click on the gradient, play with the colours until you get something that looks nice.
14) toggle the grey layer on again. Set to overlay
----> voilà, you have a background that looks like mine.
15) Now you export this as a bmp file. This will be the backdrop for the rest of the process
16) open the bmp in a separate photoshop window. Save its as a psb already just to be sure
17) start drawing borders with the shape tool.
18) create a tiny circular icon with the oval tool
19) copy that a million times an drag to wherever you want cities
20) add the names of all the countries, then the cities (in that order, or you're in trouble finding a spot for the country names)
21) adda frame, and a map title
DONE!
I'm not even kidding, I even skipped a few steps because I'm a lazy writer on mobile
👍: 5 ⏩: 1
👍: 0 ⏩: 0

👍: 0 ⏩: 1