HOME | DD
 Chellosia — Radiate Process
Published: 2016-08-31 02:12:00 +0000 UTC; Views: 939; Favourites: 17; Downloads: 4
Redirect to original
Description
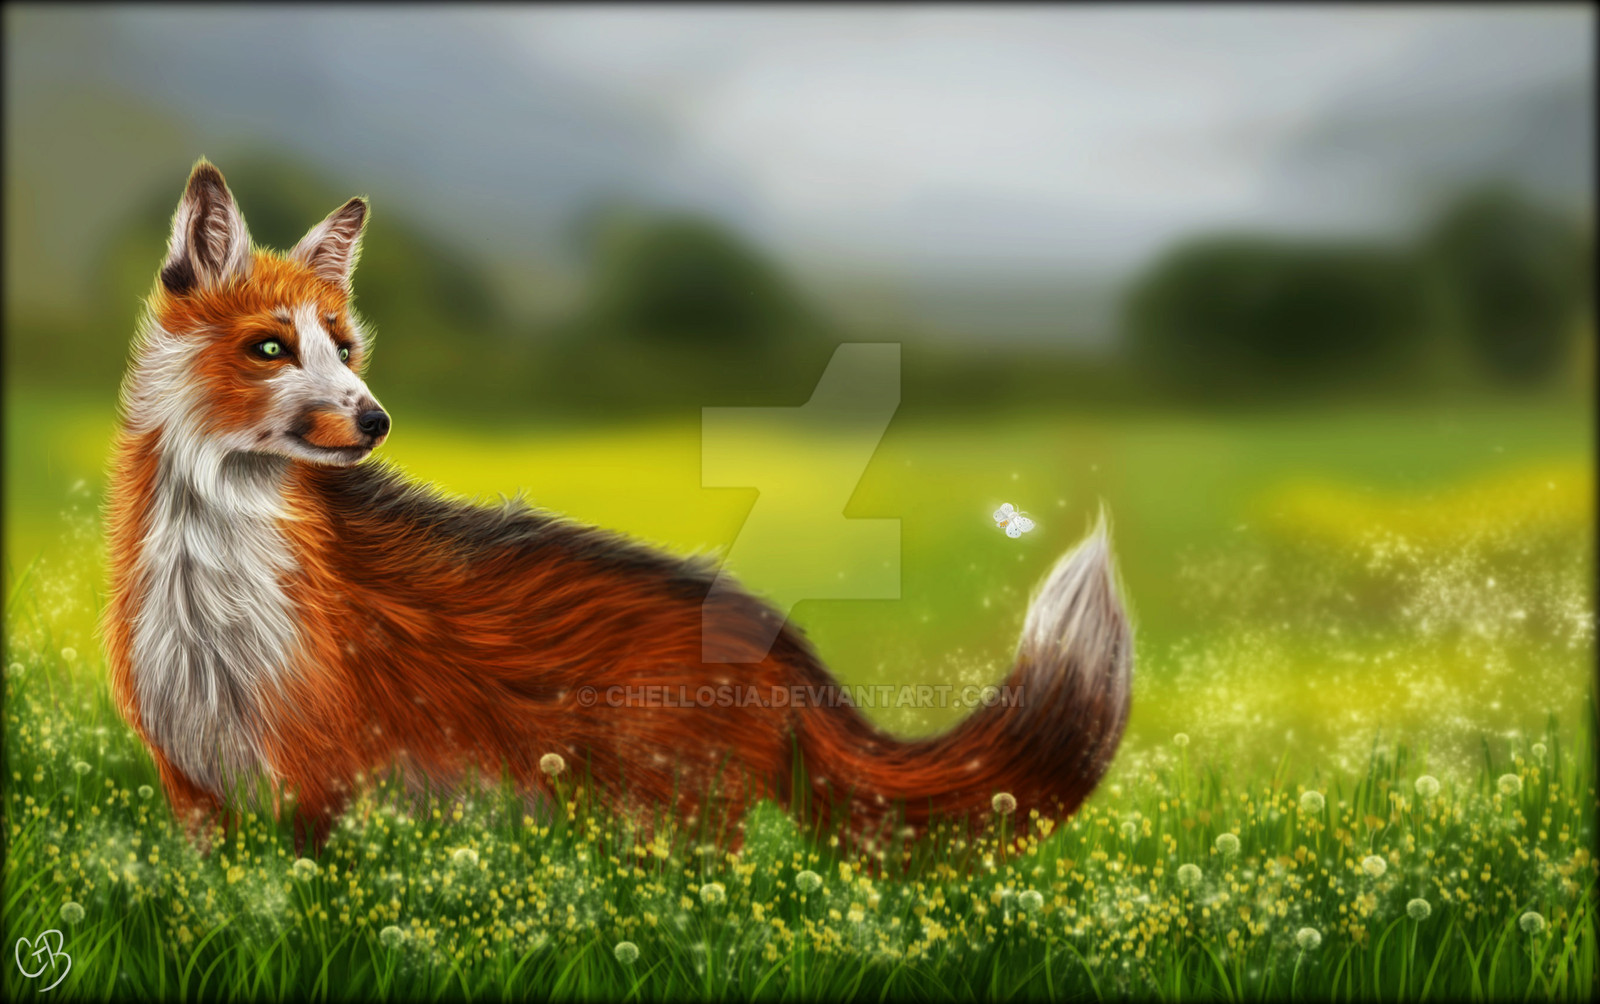
Finished image: fav.me/dadpbrrAnother one I didn't save the best progress pics for ^^' Oops.
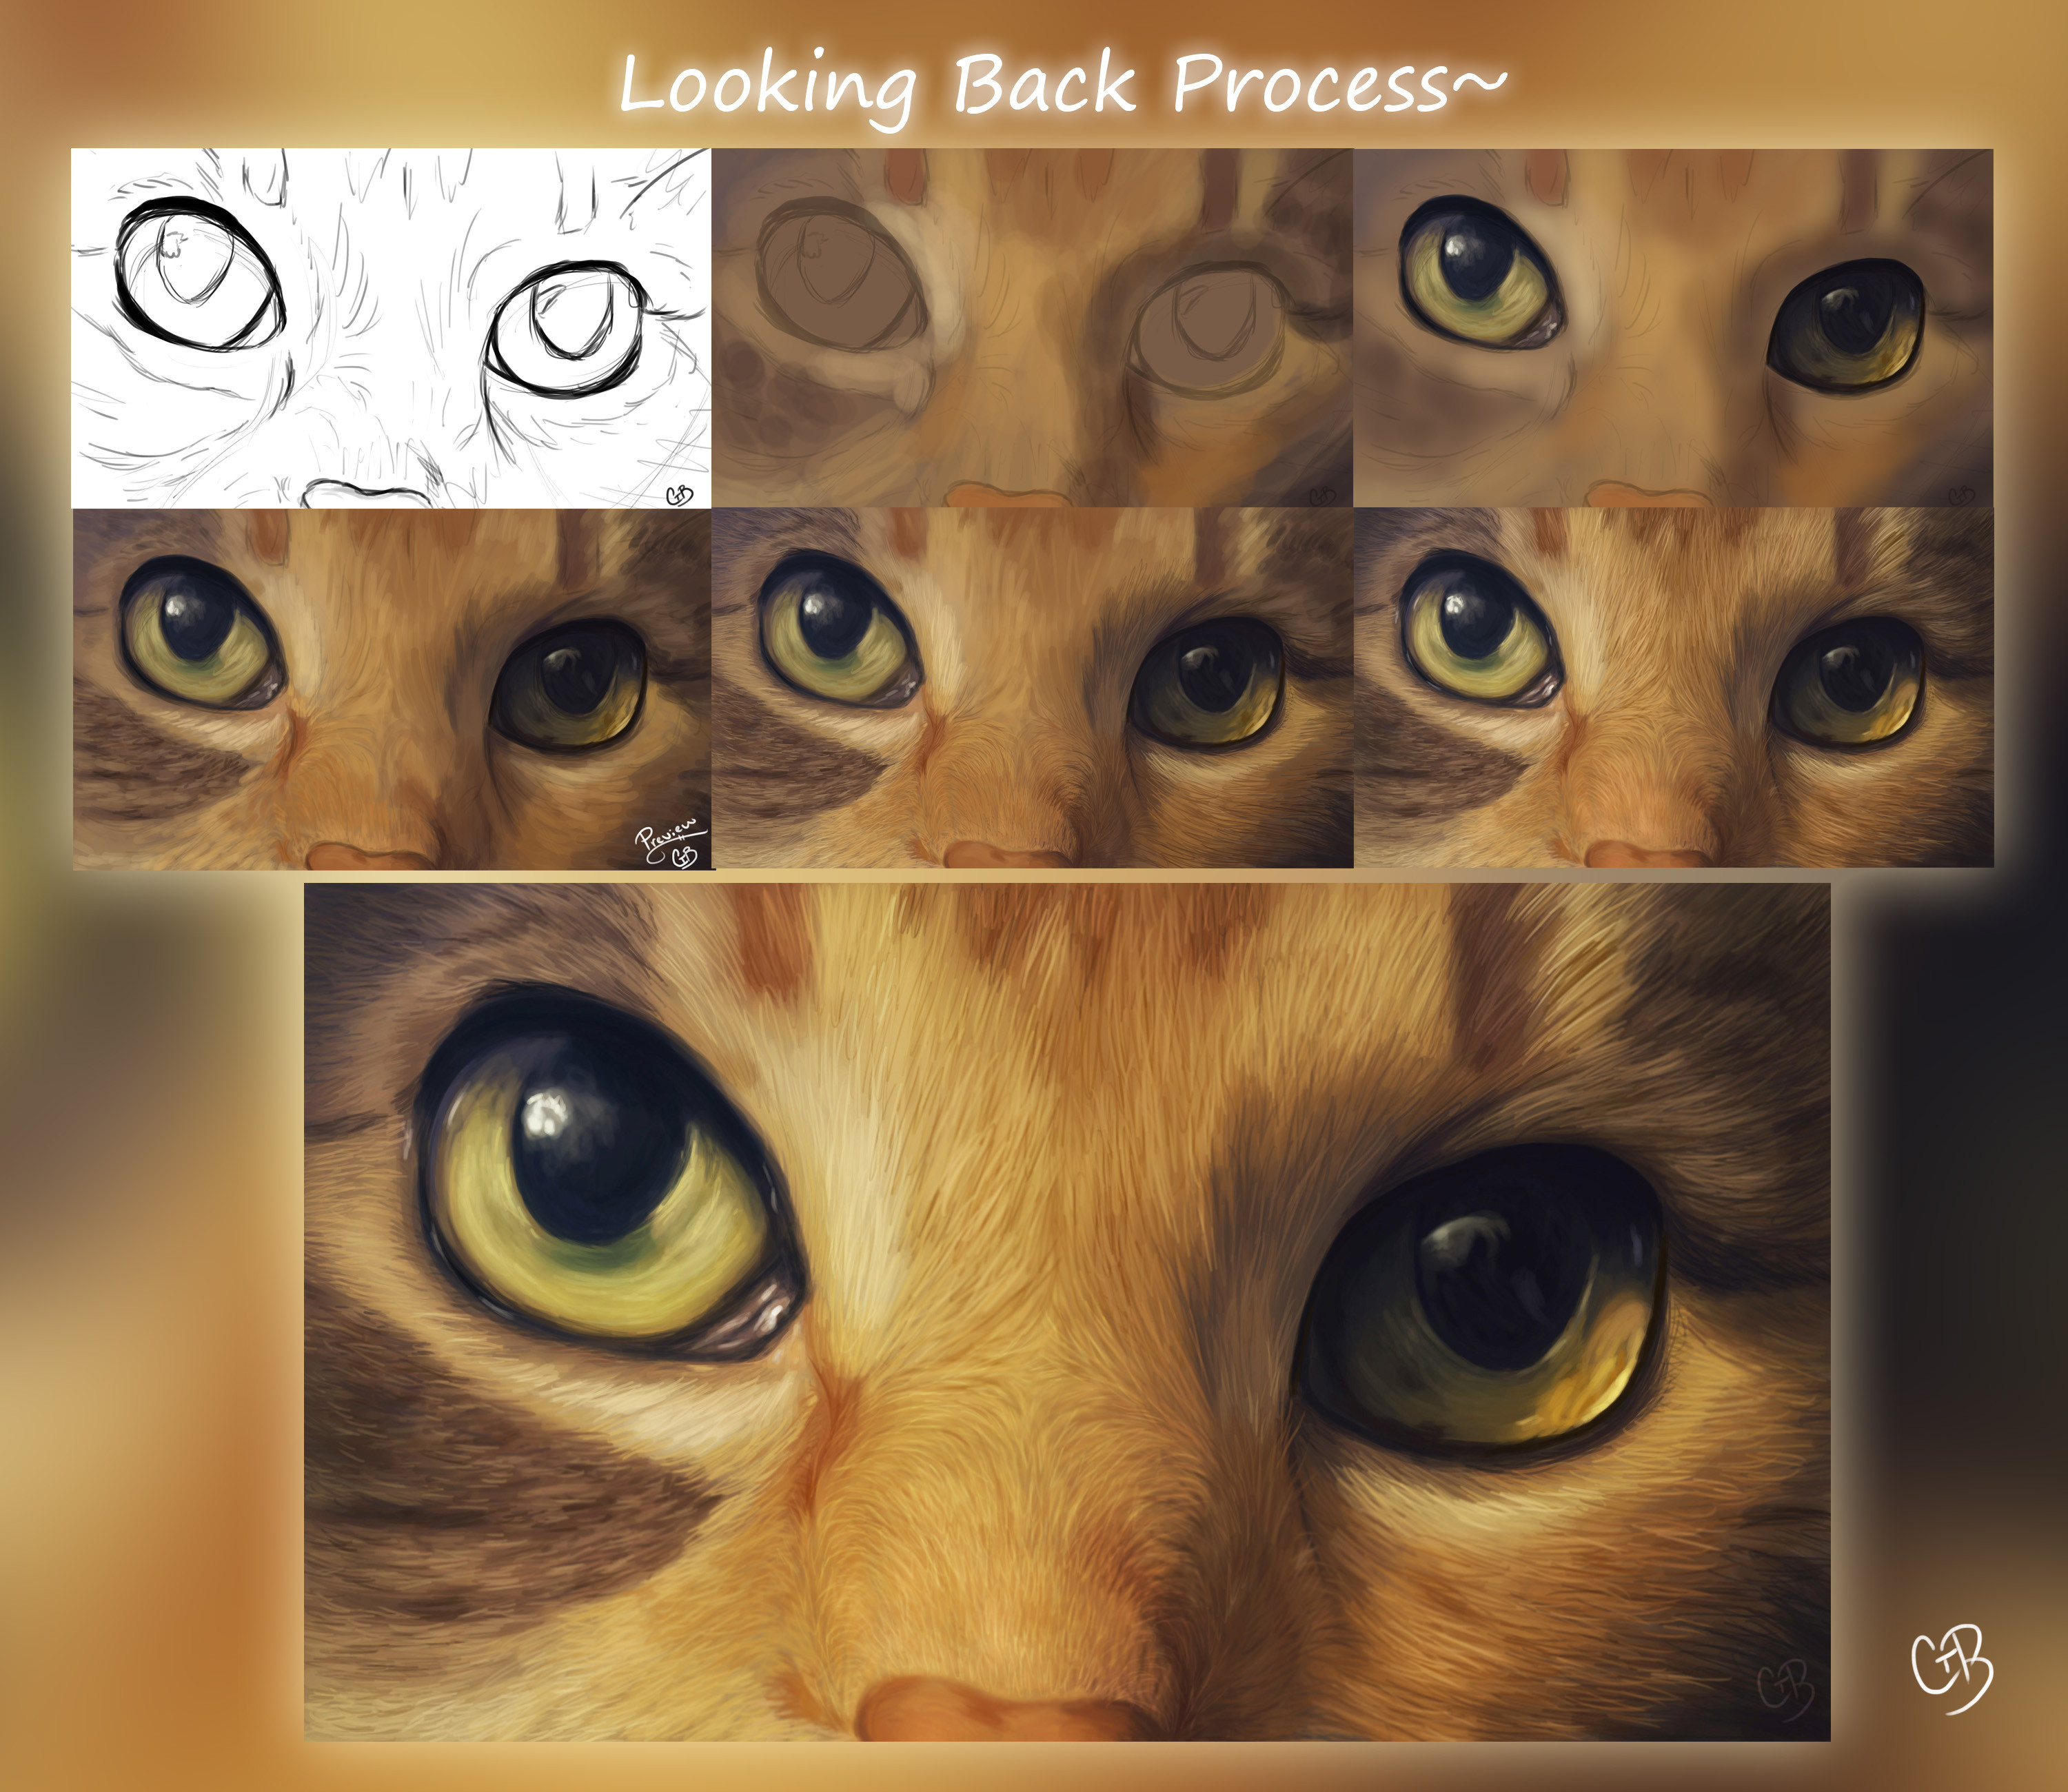
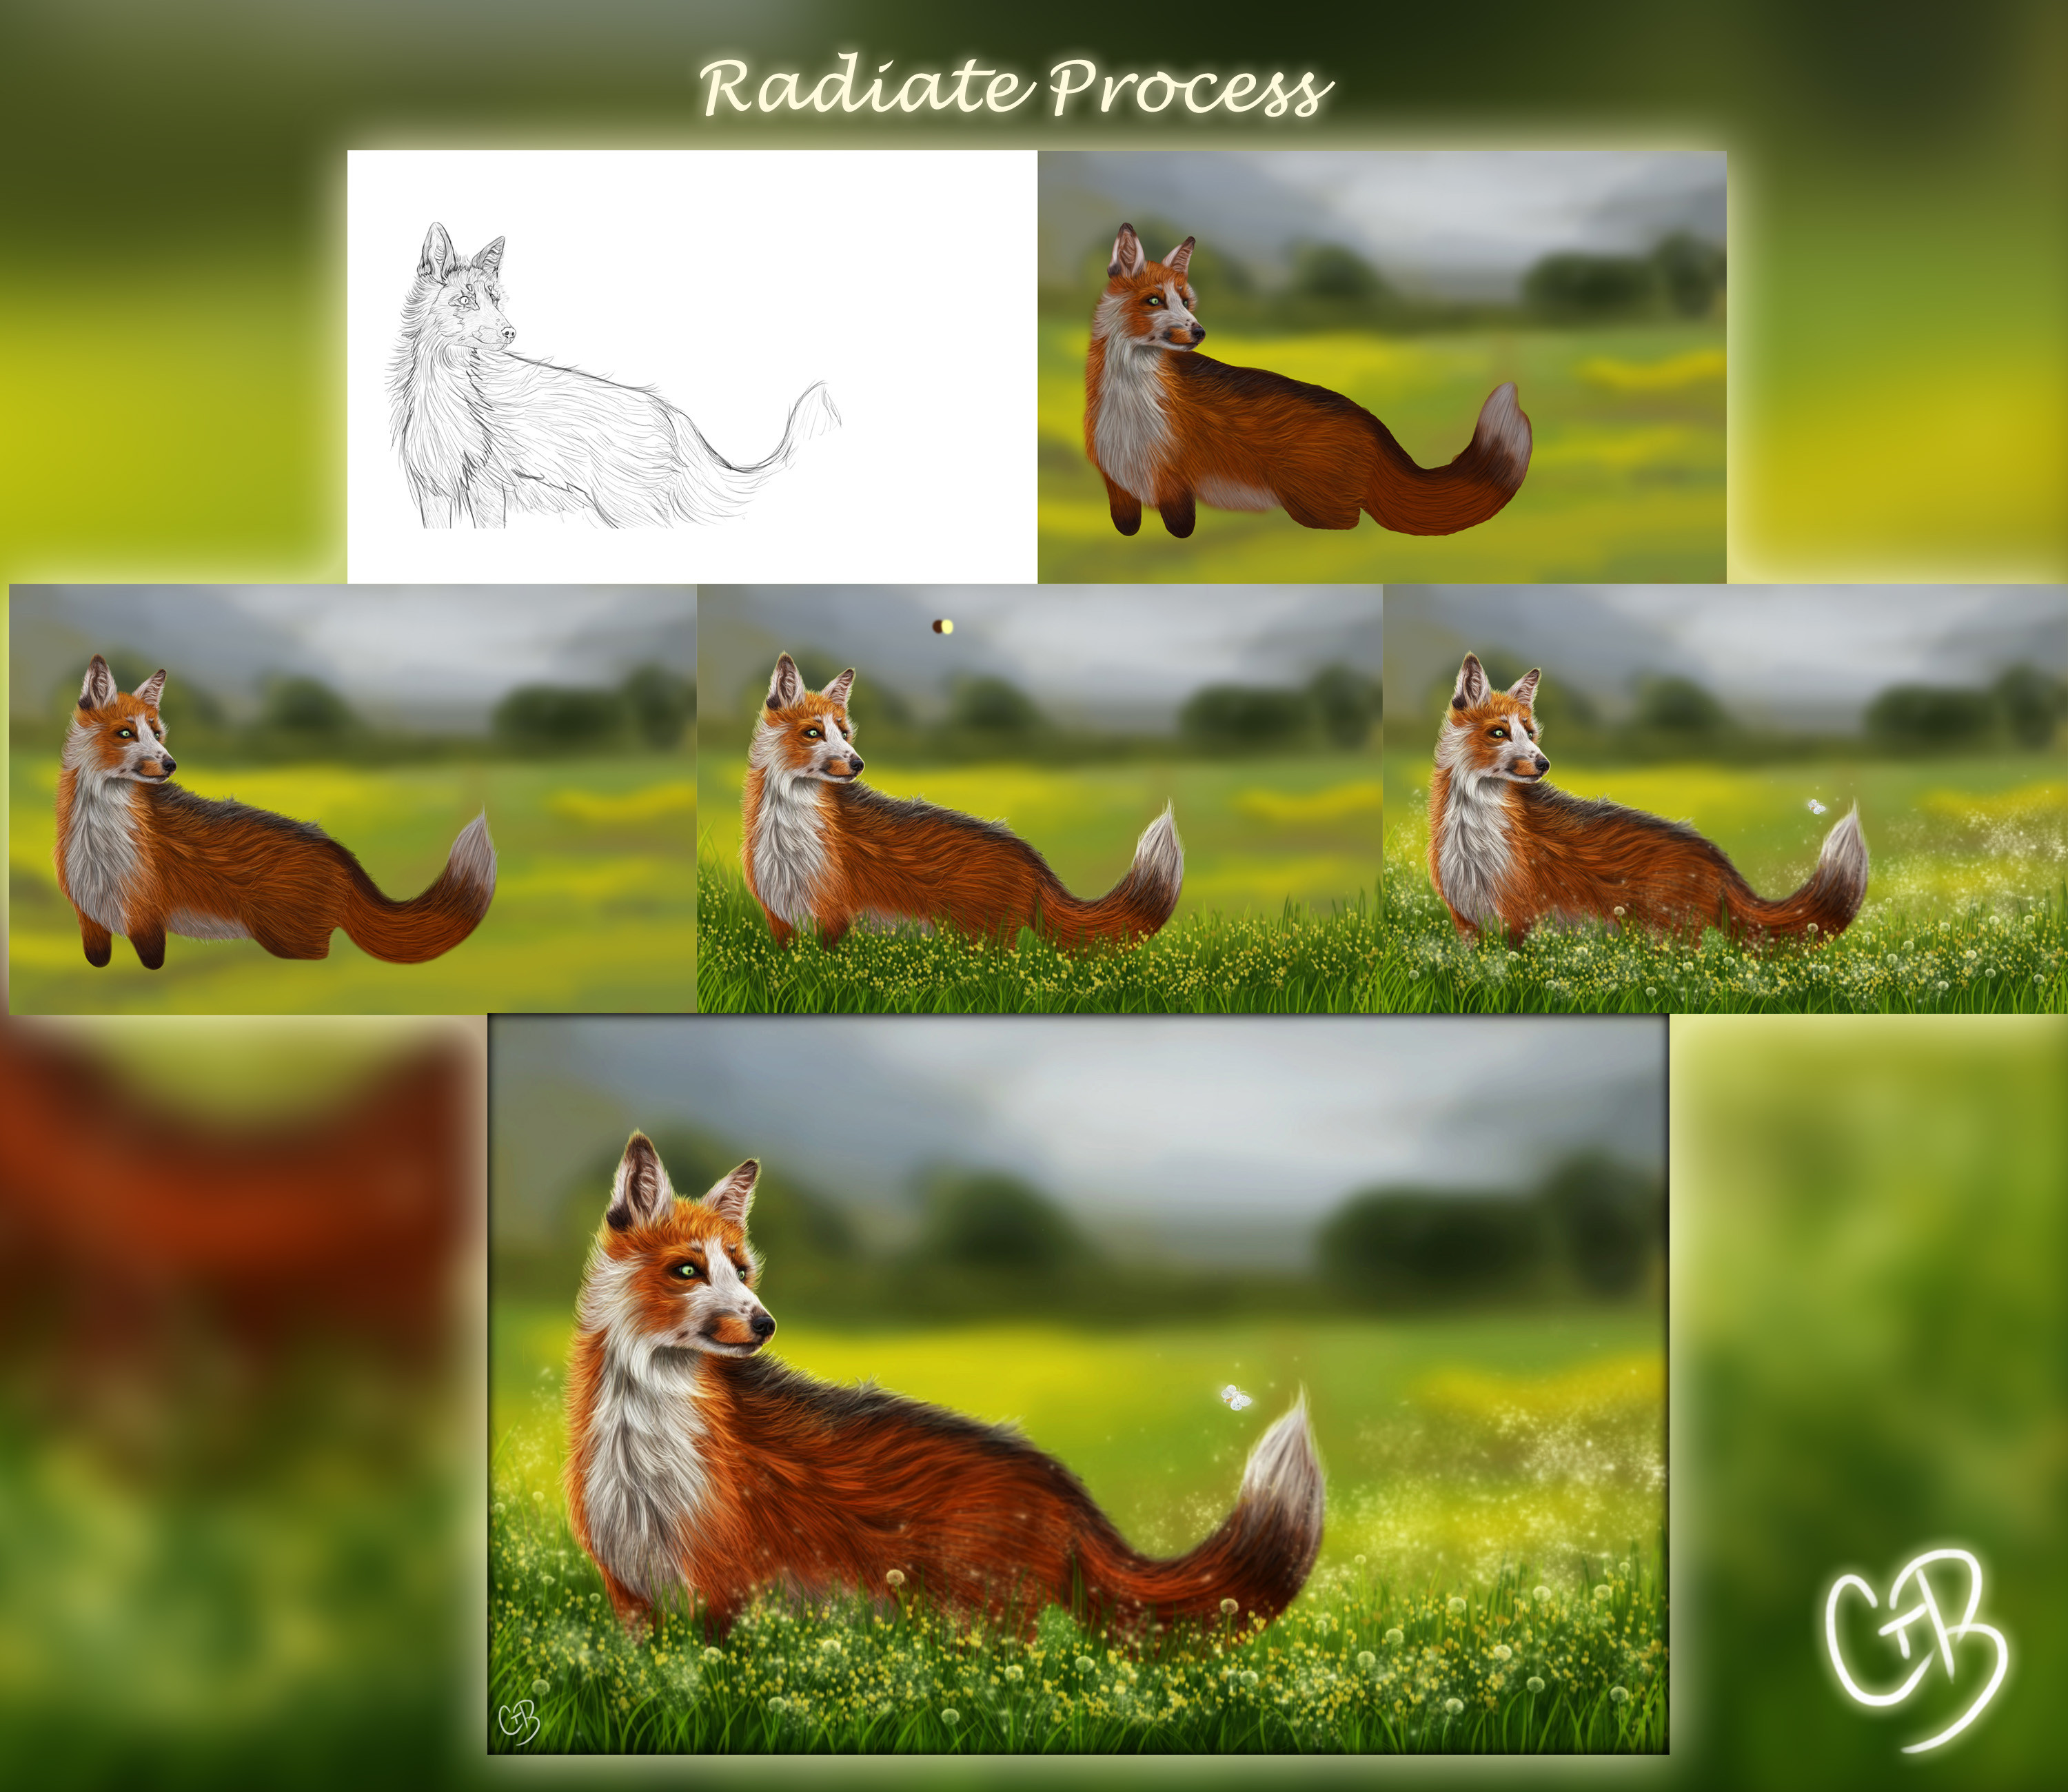
First Picture: Rough sketch. Very basic, usually I include a background but for this painting I sort of flew by the seat of my pants. Included is the fur direction and markings.
Second Picture: Big jump. General idea of colour, background. For the fox I started with blocking in the colours, then I blurred them together a bit, and started adding the fur texture. You can see the difference between the front of the fox and it's tail. I find it easier to do the dark fur texture first, then the medium tones and then the highlights. Dark-light. For the background I also just blocked in colours and then used gaussian blur.
Third Picture: Focusing on fur texture. Here I have started defining the flow of the fur- notice the chest area. I've also begun adding the looser hairs that outline the fox. I've begun adding brighter highlights, which bring the fox a bit more life. Again, there is a noticeable difference between the tail area and the rest of the fox.
Fourth picture: The fox is mostly done here. A lot of small hairs and little highlights, tweaks were done to make the fox a little more realistic. More importantly, the foreground has been added so he's not peg-legged. I decided to go for foreground depicting long grass with yellow flowers which ties into the background. I find the process for grass a little hard to explain so unless anyone requests me to delve into further detail I will skip that XD The flowers I made with a basic speckle brush and a few I added with just a round brush.
Fifth Picture: The image was still quite dull to me. Incomplete. I decided to add some dandelions releasing seeds (a rather dramatic amount lol). I also added a small white moth which explains what our dear mr. fox is so captivated by.
Final image: The finished product, after some colour tweaks, blurring and effects
 (Smile)")
I know this wasn't my best process, but I hope you found it somewhat helpful ^-^
Credits for final image:
7wallpapers.net/wp-content/upl…
www.deviantart.com/art/Dandeli…
www.moorhen.me.uk/imgofday/201…