HOME | DD
 digitalninja — DMC Nero: Process

Published: 2009-11-15 02:19:12 +0000 UTC; Views: 4929; Favourites: 67; Downloads: 364
Redirect to original
Description
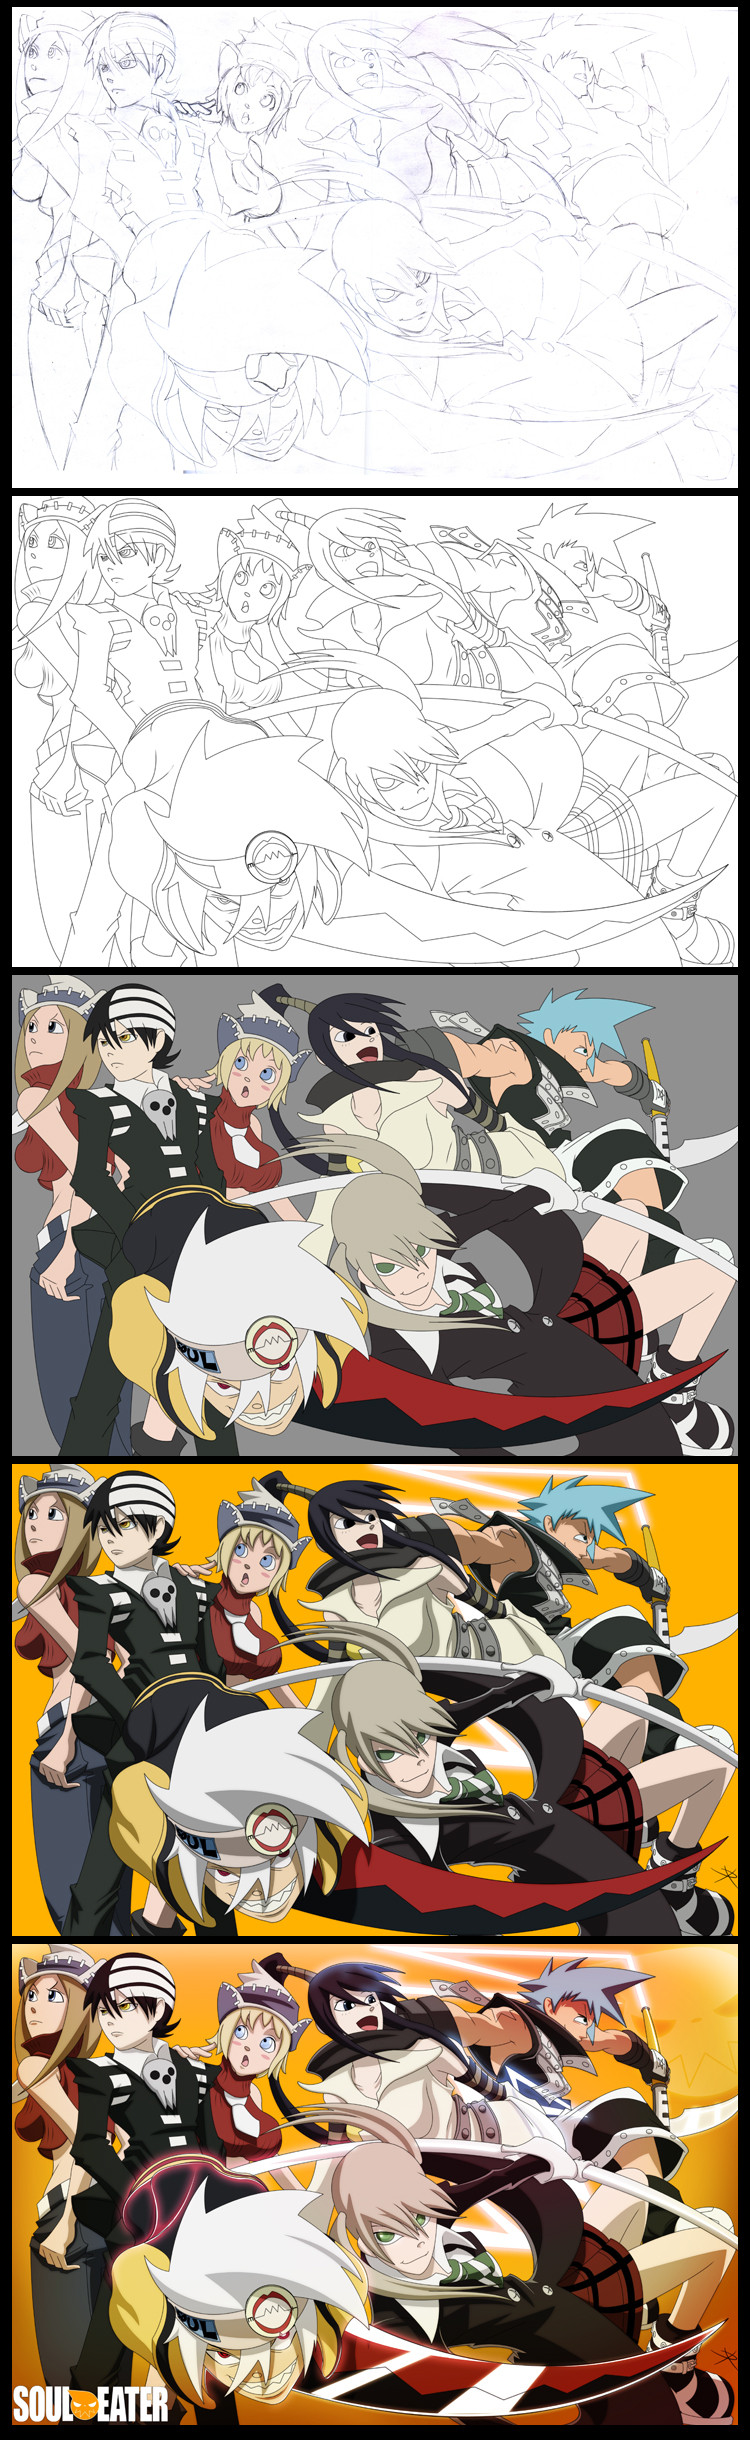
**WARNING LARGE FILE**This is a step by step process tutorial of one of my fanart works of Nero from the videogame series Devil May Cry 4
You can see the full finished version here: [link]
Process:
1. Pencils using mechanical pencils on 11x17 copy paper.
2. Scanned into photoshop and digitally inked with wacom tablet and basic photoshop brush and pen tool.
3. Base colors (Flats). Did a little extra detail on the eyes.
4. First quick shading pass for light source reference. I am using a lower red light beneath Nero, and also using his glowing Arm for a secondary source of light..
5. Details and texture pass. Sometimes while I am penciling I will get a little anxious to bring the image into photoshop and I will skip the little details like metallic carvings and ornate articles of clothing. But not to worry, photoshop can accelerate my process.
6. FX and color balance pass, added the glow back into his arm while giving him a little extra aura FX to give the viewer the sense of power NERO controls.
Hope this helps some people out there, if you have any question feel free to ask!
-DN
Related content


Comments: 8

I would like to learn how to make the blue glow in his glove
👍: 0 ⏩: 1

At some point I hope to come out with a photoshop FX tutorial series, I will be sure to add something similar to this effect in my tutorials
 (Smile)")
👍: 0 ⏩: 0


")


")
