HOME | DD
 dopepope — zShin wip 1
#3d #artprints #colossal #combat #concept #daikaiju #evil #gamera #gfest #giant #godzilla #kaiju #legendary #monster #reveal #shin #shingoji #showa #toho #zbrush #dopepope #shingodzilla #godzillaresurgence
Published: 2016-07-25 16:23:45 +0000 UTC; Views: 2115; Favourites: 49; Downloads: 31
Redirect to original
Description
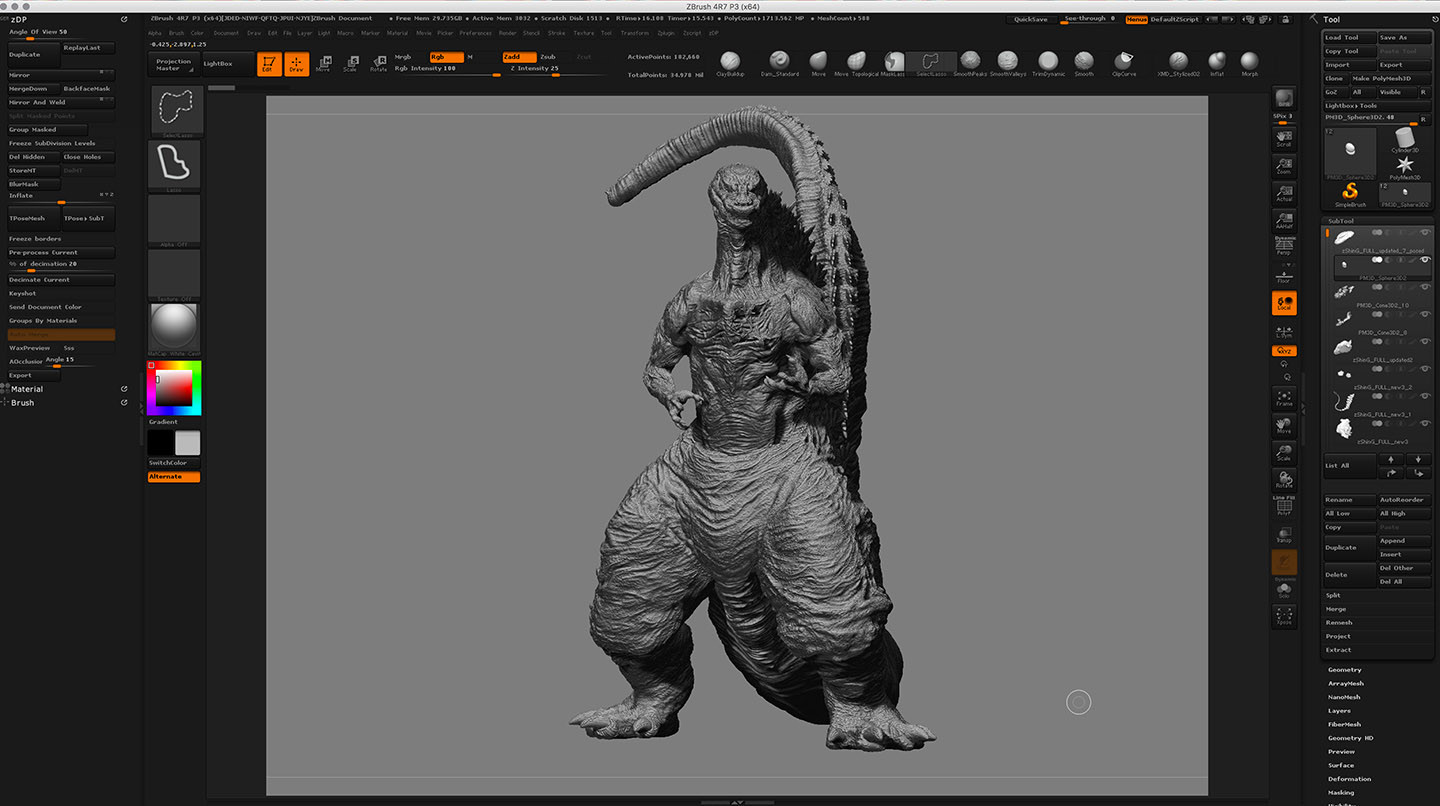
Just a work in progress of SHIN GODZILLA. © TOHO. zBrush.3D MODEL HERE.
Related content


Comments: 7


This is amazing, I was wondering, what is your work progress? Do you start with Zspheres?
How long did this take you? How long have you been working in Zbrush?
Haha, sorry I am very curious, love your work, WIPS and end results. Always gives some inspiration to aspiring 3D artists like myself. Do you rig them for them final images like this one? dopepope.deviantart.com/art/zB…
I was always curious!
Thanks for providing such awesome Kaiju artwork man. Hope to get lots of insight!
👍: 0 ⏩: 1

Thank so much! Here's some answers to your questions.
I do not start with zSpheres. I just start with a sphere primitive, and then dynamesh it into shape. then I work almost entirely in dynamesh, which allows me to keep making changes on the fly, with no commitments to divisions. I start really low, like 32, or 64, and make the primary forms. Then, once I'm happy with them, I spilt them into their own subtools, if they weren't already, and then increase the resolution on each subtool, to finesse the forms into more detailed and accurate forms. Then, once everything looks good at that stage, I'll increase even more, and start adding all the tertiary details that I need to sculpt. It's not quite the final texture process, but it's almost there. Once that's all done, and I have everything in place, looking as good as I want it, I then go down my entire list of subtools with zRemesher, and remesh each piece. I make a duplicate, turn off symmetry, remesh it, then divide resolution of the new piece, then project detail from the dynameshed piece, then repeat those steps until the remeshed piece has all the details on a subtool with much better topology flow. Then, I add final texture sculpting on the new remeshed subtools, making it crisp and cleaner.
This particular model took very long time to sculpt the details. I wanted to get it as detailed as the actual images I was seeing online. It's nowhere near that, but still looks pretty good. About 3 nights of 6-8 hours.
I've been using zBrush since 2013.
None of my models are actually rigged for animation. I pose them in transpose master.
👍: 0 ⏩: 1
That looks pretty nice, I used Zbrush a long time ago and Dynamesh seems like a familiar term. But what is it? Is it something that just allows you to mold the primitive into shape?
Definitely seems like an interesting work flow nonetheless. What tutorials or tools would you recommend for learning Zbrush online? Did you use any or was this all learnt from experience in Zbrush?
Oh and lastly, as I am interested in this specifically. How do you make each part into their own subtool? Isan't zRemsher compile everything together?  (Smile)")
👍: 0 ⏩: 1
Dynamesh instantly reorganizes your subtool mesh back to a default resolution, that you set, when you use it, so you don't need worry about topology being uneven while you're in your sculpting flow. So, when you push and pull clay, and the topology gets all wonky, you use dynamesh and it's back to uniformity. And you can use it as much as needed. It makes sculpting extremely seamless in the beginning stages when you're still trying things out. It changed the game for me.
You can make things their own subtool a few ways. you can APPEND or INSERT tools into your scene and they'll be their own subtool, or if you have a subtool in there that you want broken into more subtools, you can mask off areas, and then click SPLIT MASKED PARTS in the SPLIT menu. It'll split them into new subtools, and all you need to do is then CLOSE HOLES, and you have multiple subtools. If the original subtool has polygroups, you can duplicate that entire subtool, then isolate a polygroup on that duplicate and then delete hidden, then go back to the original subtool, isolate the OTHER poly group, delete hidden again, and you've got 2 subtools.
👍: 0 ⏩: 1
Ah that is helpful. Thanks again!
👍: 0 ⏩: 0