HOME | DD
 feavre — How to Paint Realistic Eyes Tutorial

Published: 2013-07-02 01:28:16 +0000 UTC; Views: 257815; Favourites: 6745; Downloads: 4668
Redirect to original
Description
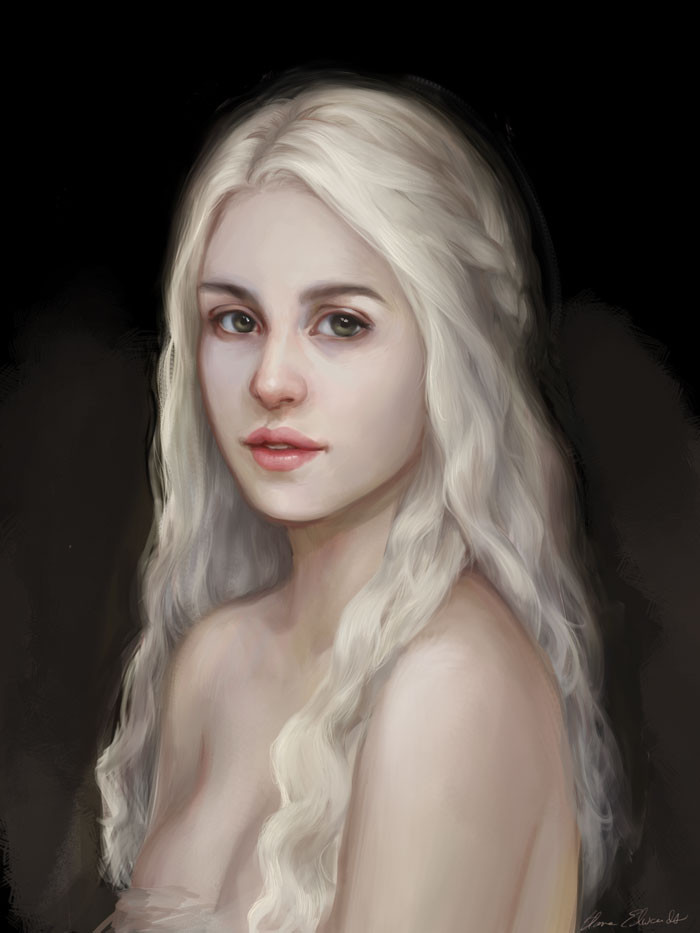
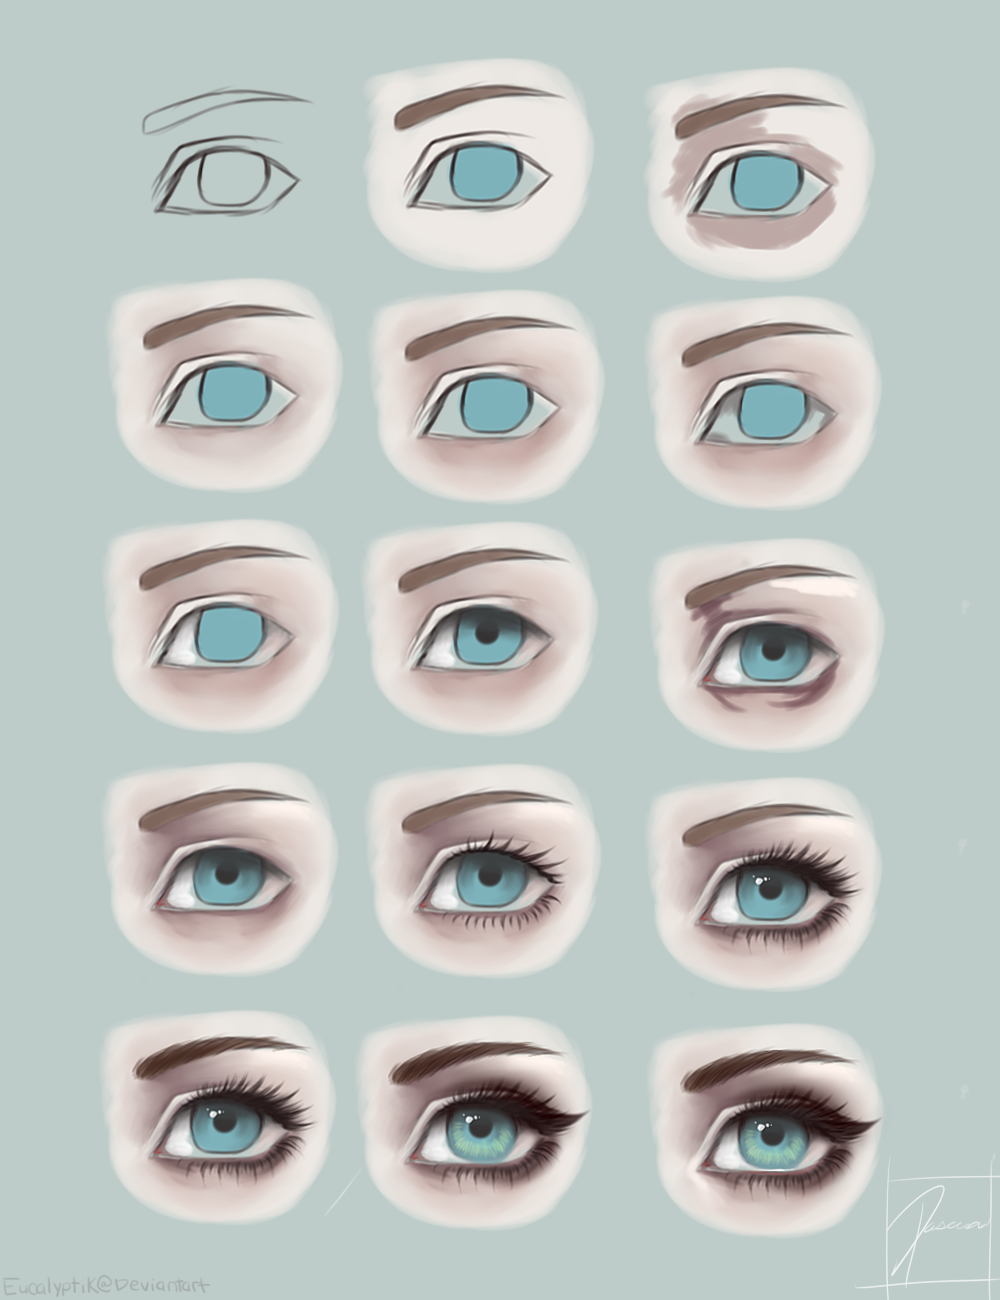
I've had a lot of requests for a tutorial/steps for how I paint. This picture wasn't done with a reference, so a referenced eye would be even more photorealistic. You may also look at other eyes on my portraits to see different color variations.For more WIPs and resources : art blog feavre.tumblr.com
Full paint tutorial: fav.me/d6bux63
I used photoshop CS5, and this tutorial is for digital artists, and assumes you have a basic knowledge of these programs.
Step 1: Sketch the eye. I've drawn enough eyes to be very familiar with the shape and proportions. If you aren't, find a reference and work with that.
Step 2: Color blocking, begin to define the brow bone. I'm doing a blue eye, and colors vary widely depending on what color iris--a green eye for example will also have brown and gold. Play around, generally you can use this tutorial for any color.
Step 3: Shading. The top of the iris will always be the darkest because of shadow from the eyelid. This is also applied to the whites of the eyes. Also color the tear duct.
Step 4: I keep darkening the iris and below the lash line. The limbal ring is usually a desaturated, dark color. Darkening it (that's the ring around the iris) makes the eyes more dramatic. And I also define the crease, the skin under the eye, and the waterline.
Step 5: For the most dramatic eyes, with lots of depth, make the pupil and area above it black, as well as the lash line. The whites of the eyes are also high in contrast from the shadow. This makes them look rounder and "glowy."
Step 6: I usually do entire portraits on one layer (best for blending) but I recommend putting the reflection on a new layer. For photorealism, more layers can help. Below I have another box with alternative reflection. They can be any shape, depending on light source. They are nearest to the light, and the lightest part of the iris is opposite that. See the light blue on the right with the reflection on the left.
Step 7: Adding some details in tear duct and waterline. White makes it look wet/shiny. Also use a natural brush to make the base for the eyebrows. Keep in mind that the edge of the iris should be blurry--it's not a hard line. This will contrast with the hard edged reflection. There is also some brown near the edges of the iris. No iris is completely one color. There will be flecks of color blended in. I also added individual hairs on the eyebrow. Using a speckled brush with spacing, dabble in some skin texture. I put this on another layer set to overlay.
Step 8: Put your pen pressure on opacity and size jitter. Then brush in some eyelashes. They will curve outward from the eye, and curve from under and out from the eyelid. I put this on a new layer, set to multiply. Do the same on the bottom, though these will be much smaller. Lashes can be brown or black, dramatic or short. You may stop at this step, but I chose to add makeup.
Step 9: You may make another layer if you wish. A speckled brush comes in handy for shimmer. The color depends on what "eyeshadow" you want, but it will usually be a soft shade that is darker near the crease and eyelid. The brow bone should be defined with a lighter color, and the hollow near the inside of the eye is also darker. I also add lines on the lash line and bottom shading for a more dramatic effect.
Step 10: Tiny details. If you zoom you can see the tiny lines under the eye and specks that make the skin's texture. I also darken the eyebrows to match makeup.
I hope this is helpful to you! If you use it, let me know or link to it in the description.
More tutorials:
Related content


Comments: 102

👍: 0 ⏩: 0

👍: 0 ⏩: 0


its nice just not helpful for someone like me with just using deviant art muro to draw >.>
👍: 0 ⏩: 1

You should consider getting a better art program! Medibang is a good start as its free and much better than muro. :>
👍: 1 ⏩: 0


Thank you very much
Merciiiiiiiiiiiiiiiiiiiiiiiiiiiiiiiiiiiiiiiiiiiiiiiiiiiiiiiiiiiiiiiiiiiiiiiiiiiiiii
👍: 0 ⏩: 0


I mastered eyes and thanks to this I will now be able yo master eye brows thank you XD
👍: 0 ⏩: 0

Now THAT is absolutely perfect!!! THAAANK YOOOUU!!
Just to mention it: for a realistic eye (and only because you have already added soooo much detail) I feel that something (detail) is missing in the sclera of the eye. Maybe a touch of suggested veins?
👍: 0 ⏩: 0

On one layer?! :/ Witchcraft!
I have around fifty of those for one single portrait.
👍: 0 ⏩: 0

This one sure helps me a lot! Thanks for this tutorial!
")
👍: 0 ⏩: 0

")


What brush tool? I am trying to find a thinner one but I'm always stuck with a fat one. For the sketch, I mean.
👍: 0 ⏩: 0

Wow, I have a long ways to go if I want to draw/paint eyes like this... x) Thanks so much for the tutorial! I will probably use this in the near future~~
👍: 0 ⏩: 0


whoa! Amazing! I try myself to draw realistic! I hope this can help me! Thanks you!
👍: 0 ⏩: 0


I tried it! I'm actually glad on how it turned out. Thanks for the tutorial! [link]
👍: 0 ⏩: 0

I followed your tutorial and I really liked your technique. It will certainly be of use in the future! Thanks a lot for this awesome tutorial. If by any mean you feel like checking out the reasult, here the link to my deviation : elvann.deviantart.com/art/Feav…  (Smile)")
👍: 0 ⏩: 0

woooooooooooooooooooooooooooooooooooooooooooooooooooooooooooooooooo!!!!!!!!!!!!!!!!!!!!! <3 amazing!
👍: 0 ⏩: 0

and now i want an easy way to do that som one now how i make my eyes black like a demon?
👍: 0 ⏩: 0


I am new in digital painting... r u using just PC mouse or graphical tablet? I cant even touch the right place with mouse :-D
👍: 0 ⏩: 1


Oh yahh, everything seems soo easy on tutorials)) Anyway, thanks for doing these))
👍: 0 ⏩: 0


wow....incredible. Just curious, do you know how to paint with regular oils or watercolors? I never learned with conventional media but really want to do stuff like this.
👍: 0 ⏩: 0


Used here your tutorial to draw this hikarirose13.deviantart.com/ar… THANK YOU SO MUCH!
👍: 0 ⏩: 0


Probably not. The technique remains the same, but you can't achieve that same realism in the same way. I'd say it would work better with acrylics, oils, or pencil colors, media that are more opaque.
👍: 0 ⏩: 1

Love this tutorial. Tip for the eyelashes; fade out: 17px for lower lashes 19-39 px for upper. Keeps the length right so you don't have to worry that you're over doing it.
👍: 0 ⏩: 0

Thanks for this tutorial! I have real trouble drawing eyes, and I think this will definitely come in handy
👍: 0 ⏩: 1
| Next =>