HOME | DD
 FocalFlare — Small Shading Tutorial (DESC. FOR ALT TEXT)
by-nc-sa

#tutorialpaintdotnet #behindthescenes #tutorial #paintdotnet
Published: 2023-12-30 05:44:36 +0000 UTC; Views: 3995; Favourites: 6; Downloads: 0
Redirect to original
Description
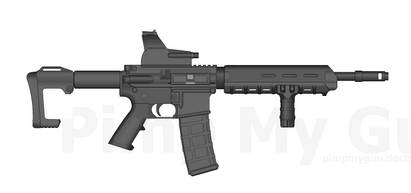
DISCLAIMER: This is nowhere near firearm-related even if my Elanor 5.56 is in the image, so please don't come to this image expecting a new firearm design from me to be posted on my DeviantArt. I already made several multimedia existence posts--as well as post about my future designs being posted on my Artfol profile --directly after seeing the obvious bias of the favorites I've gotten between those and all of my other media. So if you want to see more future designs, then please consider looking at my Artfol so that all of my other media I've posted more of doesn't get drowned out by this favorite bias!Accurate document here: docs.google.com/document/d/1dA…
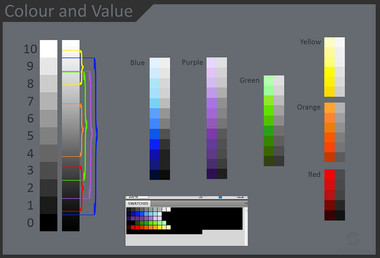
I don't really do tutorials since I'm not a good teacher and sometimes whatever I present may be inaccurate, but here's a small little tutorial for how I do my shading whenever I make flat pixel art. This is based on IzzyLuv-BG 's shading style so credit goes to him. Hopefully you guys find it helpful, and feel free to ask anything regarding this tutorial!
ℹ This tutorial is mostly meant for paintdotnet users but you should be able to follow along with any other image editing software you have or use.
ALT TEXT FOR ACCESSIBILITY (you may also want to zoom this image in to see anything on it):
// Middle
How to shade in LUV scale like Focal Flare
A suppressor being made in 5 steps. The 6th step isn't included for actually making the suppressor in this example.
A diagram of a rectangle showing a small flat area representing fillets (smooth circular bevels) and a shaded area representing chamfers (hard bevels). Lines and text show where each chamfer and fillet is at. Directly under it is my Focal Flare emblem.Whenever I apply any kind of shading to an area, I do it selectively, meaning that certain areas will be shaded and others won't.
For example, bevels. Fillets and chamfers will still have some kind of indication like above where one end is wide and the other end is narrow. Because this scale usually makes use of only flat shades (so that means no gradients whatsoever), chamfers will be shaded followed by a darker line for indication while fillets will remain as one tone of a color. This does not mean that wherever there's a flat area will 100% not have any kind of bevel there if you were to 3D-model said shape.
// Left
Screenshot of PDN's "Hue / Saturation" adjustment edited to only show the Lightness parameter for steps 4 and 5.paintdotnet's hue/sat adjustment uses HSL (Hue, Saturation, Lightness), which acts differently from HSV (Hue, Saturation, Value). However you are free to try both!
OF Elanor 5.56
- CC FocalFlare (Original design)
- (c) IzzyLuv-BG (Project LUV rendition and other variants)
Based on IzzyLuv-BG 's shading method.
// Right
Screenshot of Kris Vandermotten's 3rd-party drop shadow object effect edited to exclude the "Keep original image" parameter for step 6.I recommend using Kris Vandermotten's drop shadow object effect (like IzzyLuv-BG uses (except he actually does the shadows by hand and not with a 3rd-party effect)) as it doesn't apply any anti-aliasing when setting the shadow offset even if the blur radius to 0, unlike the stock drop shadow effect which does whenever you set the angle to anything but 0d, 90d, (-)180d, or -90d.


