HOME | DD
 GriswaldTerrastone — Angled Gem, Odd Windows 2
Published: 2011-06-22 21:18:15 +0000 UTC; Views: 2404; Favourites: 46; Downloads: 108
Redirect to original
Description
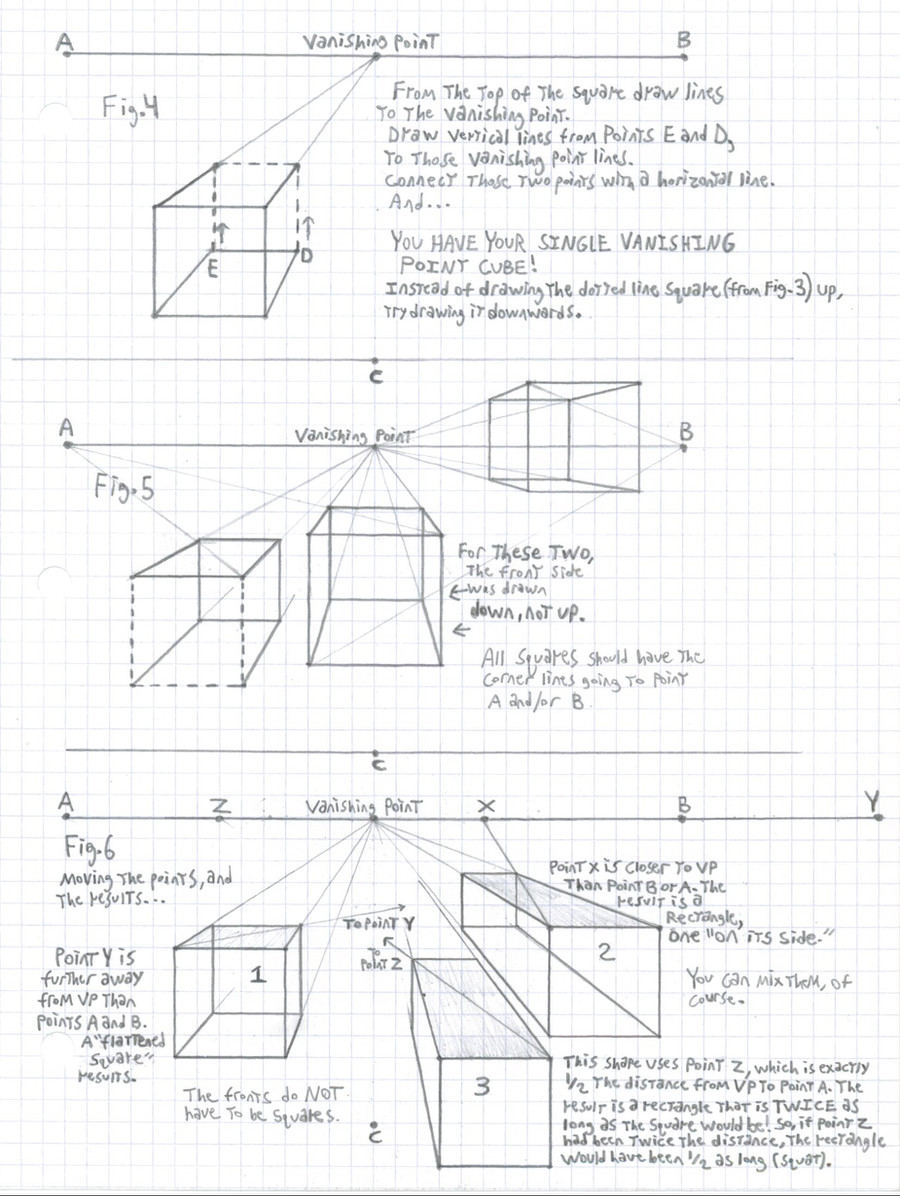
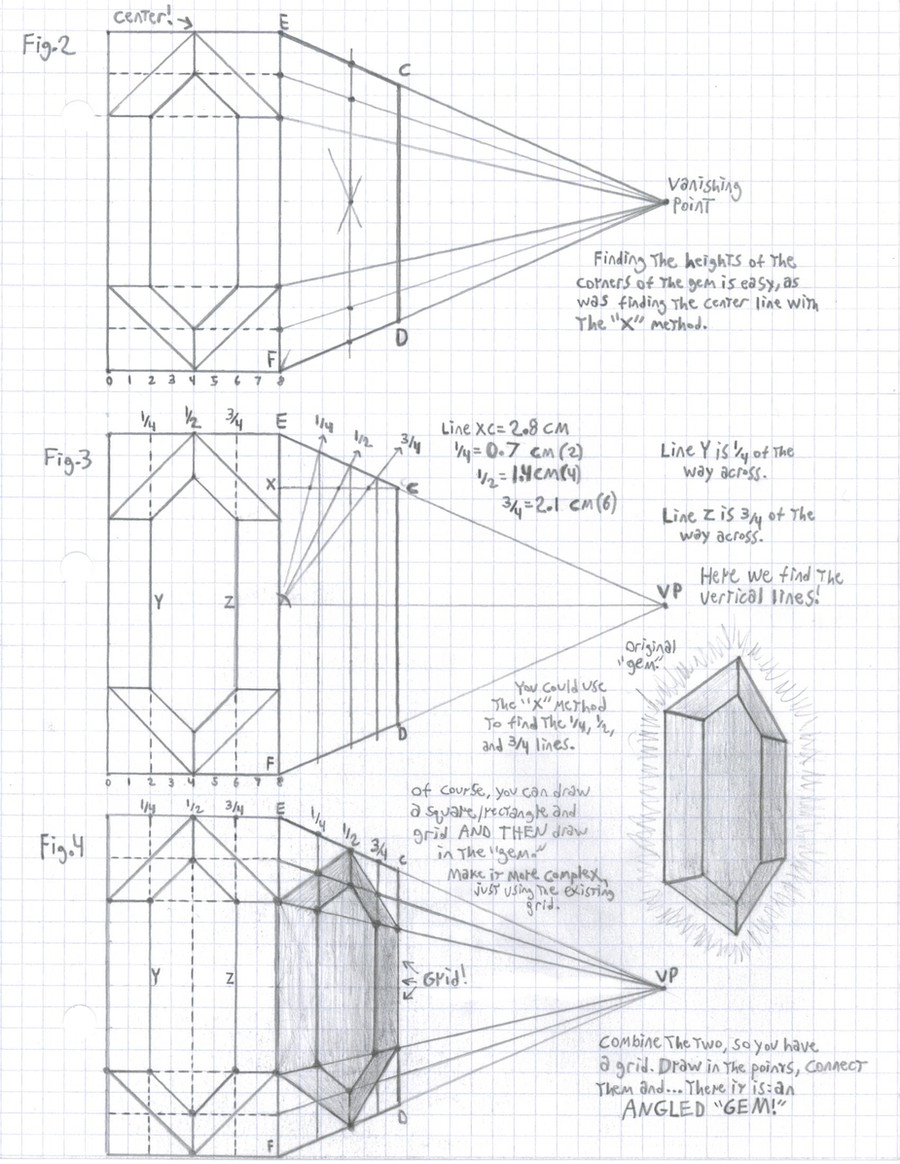
Part 2 of drawing a "gem" at an angle.It's really based on the idea of dividing the rectangle into a grid, and then drawing in the "gem."
Finding the heights of the gem's corners and such is easy: all you have to do is draw horizontal lines through them in the reference rectangle; where they end on the right side here you draw in points and connect them to the vanishing point, as shown in Fig. 2. You have half of your grid.
Now for the vertical lines...
At the bottom of the reference-rectangle are numbers.
Since the rectangle is 8 spaces wide, "4" would be the middle. See how the top and bottom points of the gem are there, and how they touch the top and bottom of the rectangle?
So for the angled rectangle, you can find the center line with the "X" trick," as shown in Fig. 2. By drawing a vertical line through the center of that shape, you now know where to place the points of the gem!
But what about the rest?
For Fig. 3, I left out all but the vertical line from Fig. 2. Since the left and right edges of the gem are actually on the left and right sides of the rectangle, and we know how high and low they are from Fig. 2, and we also know where the top and bottom points of the gem go, we can actually already draw the outside of the gem using Fig. 2- to get a hexagon.
The only problem at this point are those two vertical lines on the inside of the gem- once we have them, the rest is easy.
Again, notice those numbers under the rectangle- since one of those vertical lines is above 2 and the other is above 6, that means one is 1/4 of the way over and the over 3/4.
If you had wanted to, and since you already divided the angled rectangle in two in Fig. 2, you could use the "X" trick to divide those two halves each in two, giving you quarters- thus giving you the 1/4 and 3/4 lines. In this case, it would work.
But I used the more complex method from the 2VP section, just in case your gem isn't so simple. Check that part out for more details on how this is done, it's a good idea (all of this tutorial is in that folder in my gallery; there's even an index).
But, either way, we now have the vertical lines.
SO- In Fig. 4, they are combined, Figs. 2 and 3. You now have your grid! All you have to do for the angled rectangle is draw the lines in the grid as they are in the regular reference rectangle, and there you'll have it- an ANGLED GEM! And it's the same as the one you're looking straight at, too!
Oh, all right- this isn't really a "gem," since it is flat, but this would be a nifty window, and now you can draw one that's fancy at an angle, too- and this would be the basis for drawing a gem, if you want one.
Good luck!